
In this article
You bought the rescue PFD with the harness belt, and it felt like the responsible call. Then one afternoon you clip into it for real, in current that didn’t look like much from shore, and you find out the release isn’t going to pop the way it did on the living room floor. Ask anyone who teaches swiftwater rescue and they’ll tell you the same thing: the gear in a river rescue kit is the easy part, and the belt is the piece most likely to turn on you.
The good news is that the kit itself isn’t a mystery. It’s a known count, it fits in a PFD pocket, and this is what goes in it, why each number is what it is, and how much of it you actually need right now.
What the 4-3-2-1-1 River Rescue Kit Actually Is
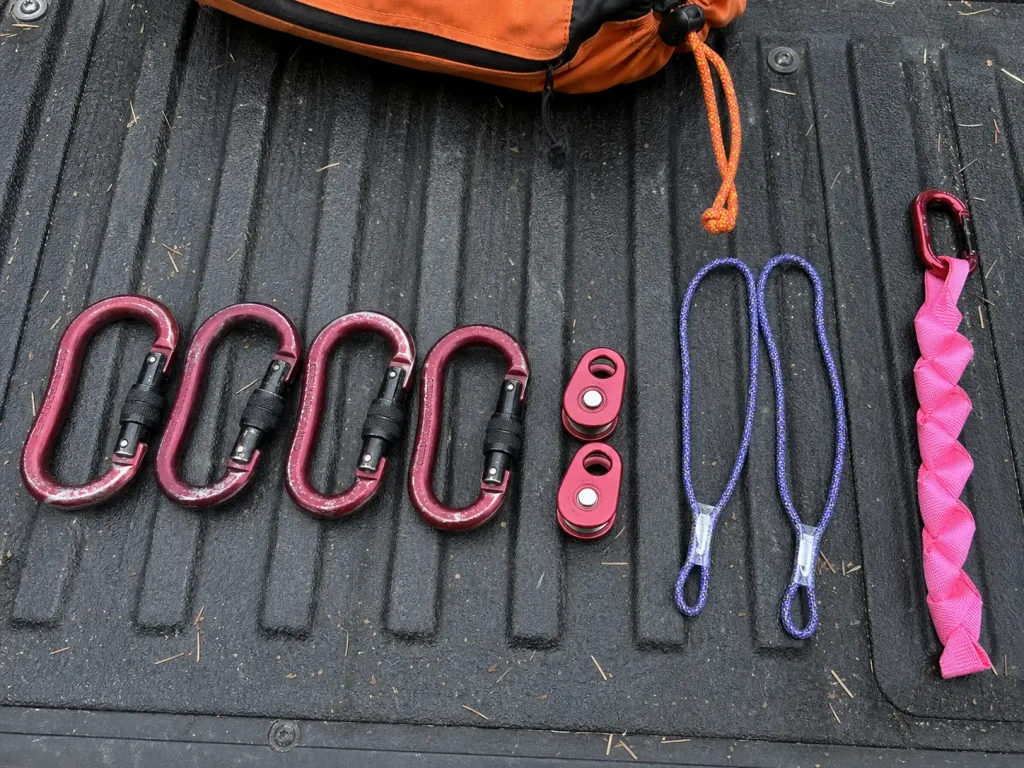
Open a guide’s PFD pocket and what falls out looks random. A handful of carabiners, some small aluminum wheels, a couple of coiled loops, a folded strap. It isn’t random. Every one of those numbers is reverse-engineered from a single thing you might have to build on the bank with cold hands.
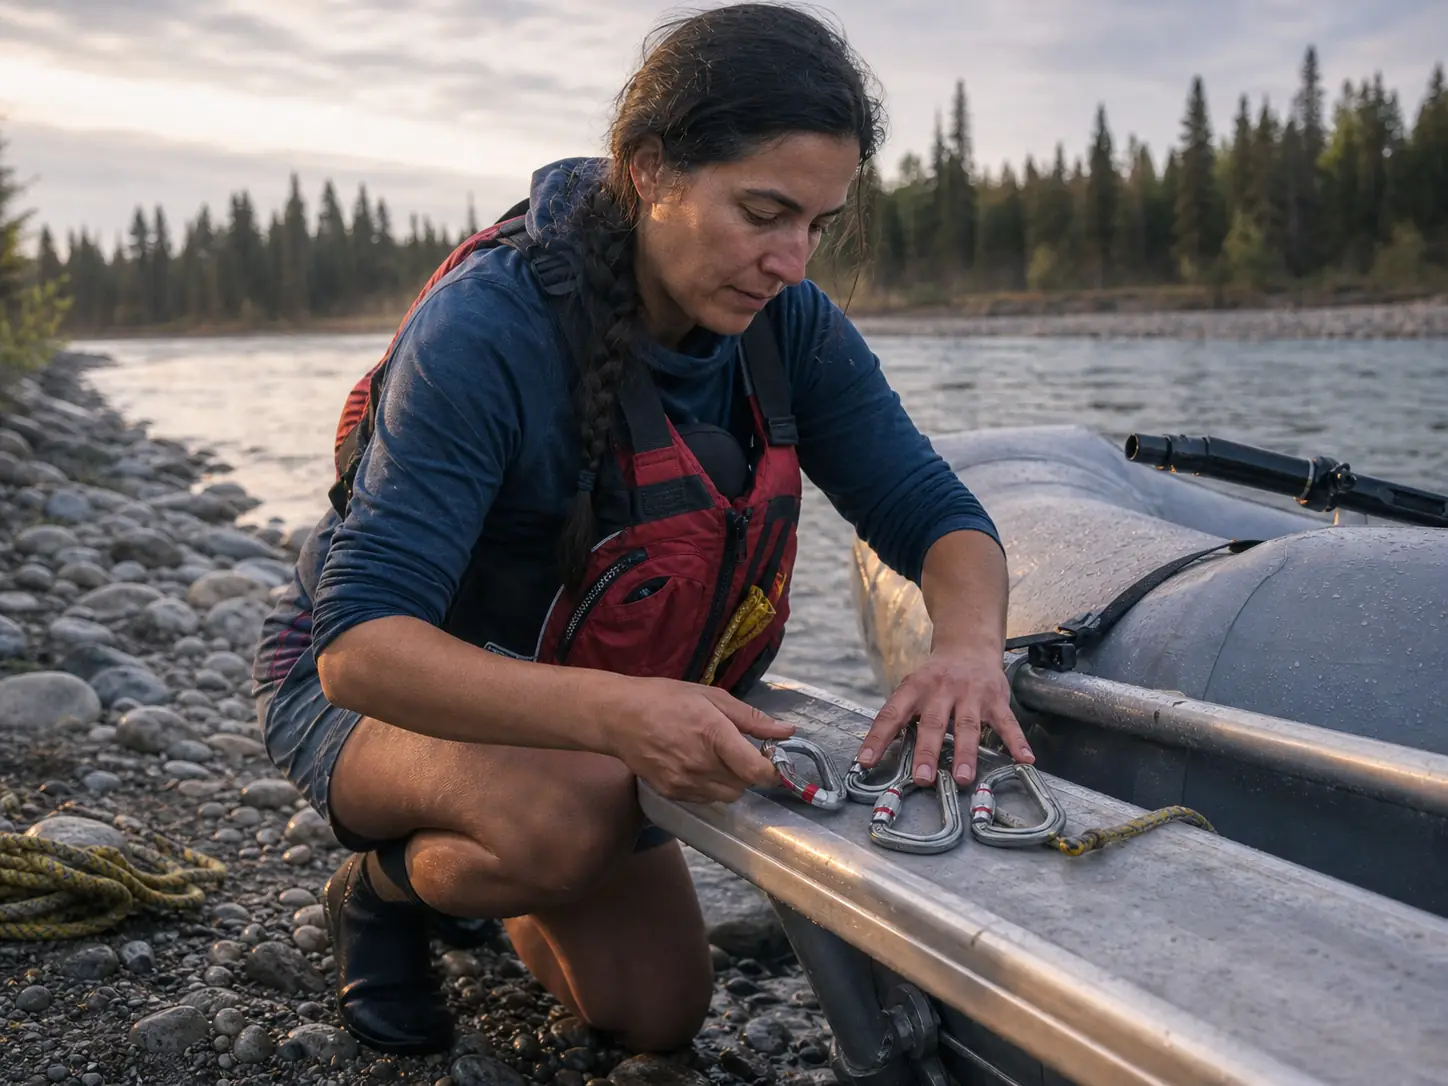
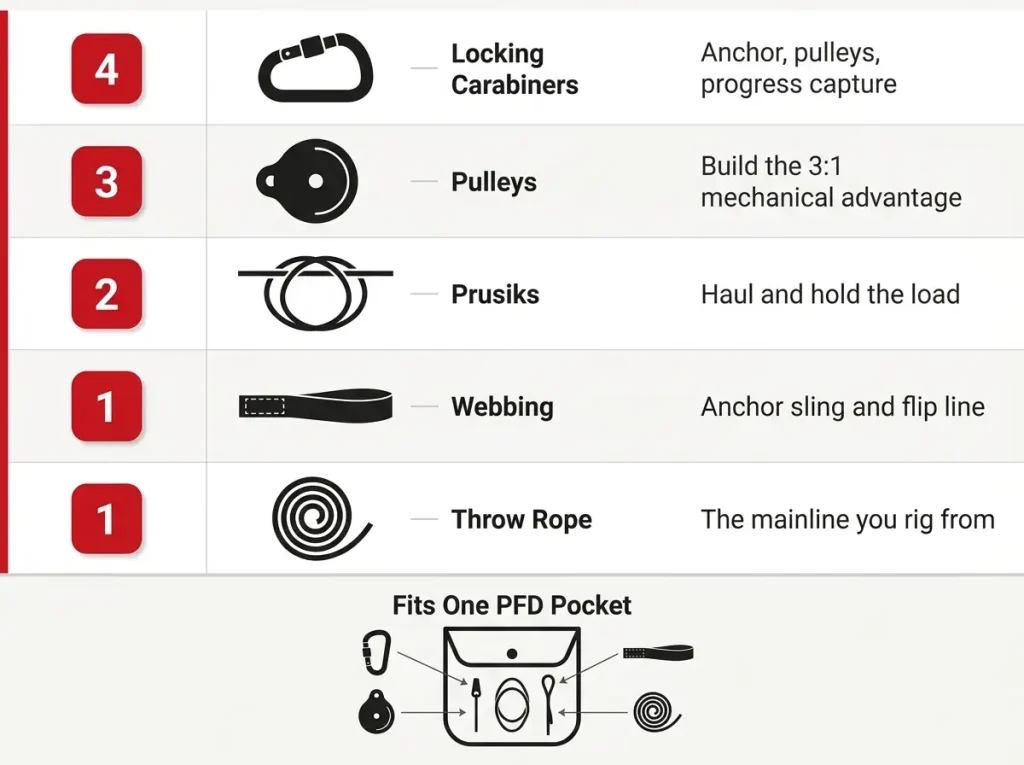
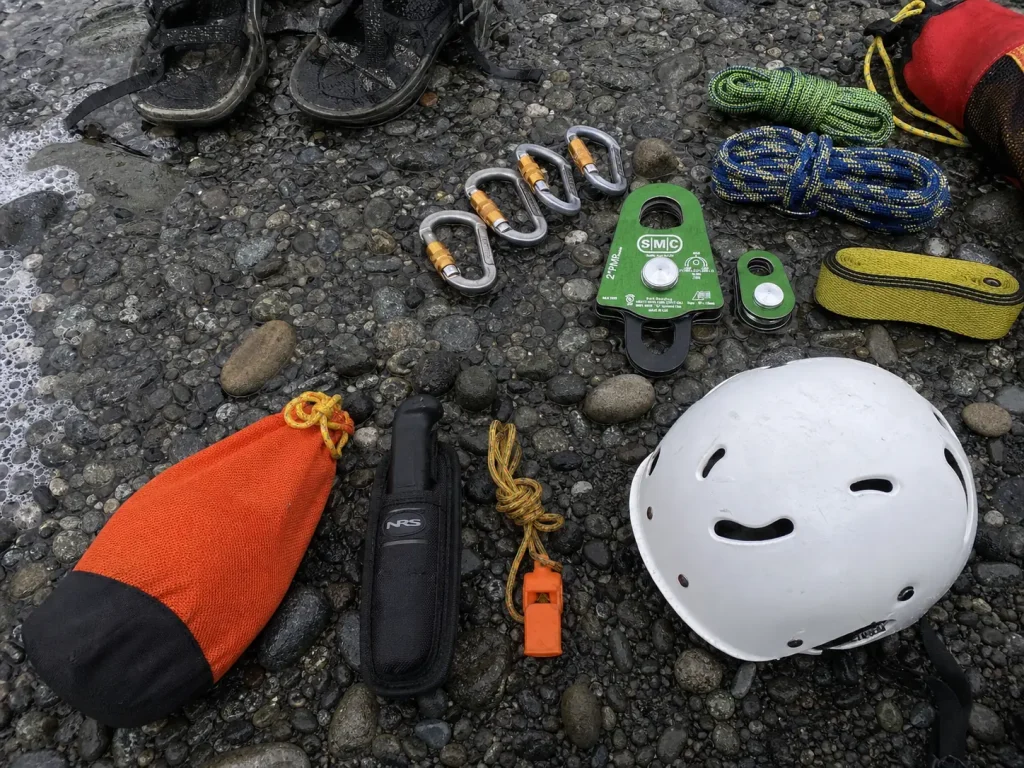
The count is 4 locking carabiners, 3 pulleys, 2 prusiks, 1 length of webbing, 1 throw rope. Different instructors write it as 4:3:2:1:1 or shorten it to 4-3-2-1, and there’s some disagreement about who first put it that way, which matters a lot less than the fact that it stuck. Treat it as the standard system rather than anybody’s invention.
Why the Numbers Are What They Are
Here’s the part almost nobody explains: this isn’t a shopping list, it’s a parts inventory for a 3:1 mechanical advantage system. Two pulleys and two prusiks build the haul. Four carabiners cover the anchor, both pulleys, and the progress capture.
The webbing becomes your anchor sling. The rope is the mainline. Count the clip points on a rigged Z-drag and you land on exactly these numbers.
That’s why it’s a floor and not a wish list. Cut one carabiner and you’re improvising at the worst possible moment. Add a second full set and you’re carrying weight you’ll never deploy from a PFD pocket. The count exists because it’s the smallest thing that still works.
What Personal Rescue Equipment Means and What It Doesn’t
Boaters call this the PRE kit, for personal rescue equipment. It’s the gear that rides on you, not the gear that rides on the boat. Your longer throw bag, your spare webbing, your mooring line and pin kit are all real and all necessary, but they live rigged to the frame. If you want to see where this fits in the bigger picture, the full gear checklist by river class puts the rescue kit next to everything else that should be in the boat.
Standardize on one locking style across the whole kit instead of mixing a screwgate carabiner with an auto-locking carabiner. Under stress you don’t want to be relearning which gate needs which motion, and you will not look down to check.
The Rescue Belt Is the Most Hazardous Piece You’ll Own
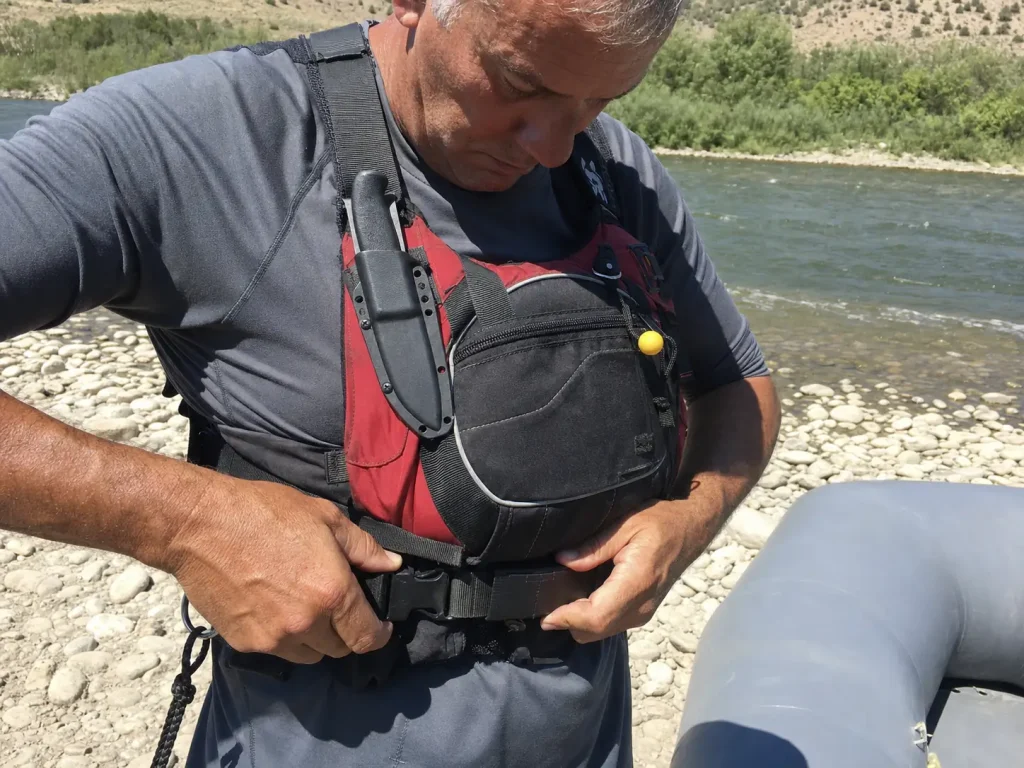
Most gear roundups save this for a caveat at the bottom. It belongs at the top, because it’s the one item in this whole conversation where owning it without training makes you less safe rather than more.
A rescue PFD is a Type V PFD under US Coast Guard PFD type classification, which is the label to look for and also the tell: Type V means special-use, approved only when worn for the activity it was built for. Its quick-release belt is reliable in skilled hands, and it is not foolproof.
That’s not a blogger’s opinion. That’s the language NRS itself uses, via longtime safety writer Charlie Walbridge, in its own guidance about who should and shouldn’t be wearing one. Under load, even in current that looks mild from the bank, forces build faster than people expect, and a release that was rigged slightly wrong can jam exactly when it has to work.
What Actually Goes Wrong Under Load
The belt is designed to let you tether yourself to a rope, swim to a swimmer, and then disconnect. Every part of that sequence is fine until the disconnect. If the webbing has been routed through the buckle incorrectly, if a strap tail has worked its way under the release tab, or if the load is pulling at an angle you didn’t anticipate, the pull that was smooth in your kitchen becomes a pull you can’t complete one-handed while being dragged.
None of that is exotic. It’s the ordinary failure mode, and it’s why instructors make students pull the release blind, over and over, until the hand goes there without a thought.
That is what “trained” means here. Not that you’ve read about it. That you’ve done it enough that your hand finds the tab while your eyes are somewhere else.
The Rule: Class Before Clip-In
So the honest read is this: without the class, that harness is a strap you paid extra for and will never use correctly. That is not an argument against buying a rescue PFD. It’s an argument about sequence. Take the course, then use the belt, and in the meantime wear the vest for what it is, which is a good PFD with a feature you haven’t earned yet.
If you’re still deciding which vest to buy, choosing a rescue PFD when you’re not a guide walks through whether you need the harness at all. And if you want to understand the technique the belt exists for, how a live-bait rescue is actually run covers what the class drills into you.
The 4: Locking Carabiners
Four sounds arbitrary until you count clip points on a rigged haul system and come up exactly four short. Anchor, two pulleys, progress capture. That’s the whole argument for the number.
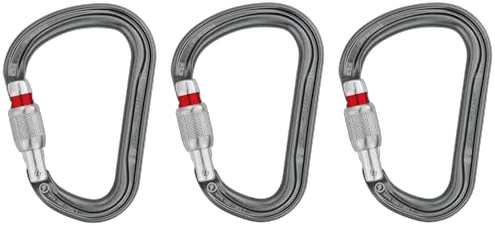
All four are locking carabiners. Not three locking and one wiregate you had in a drawer. A non-locking carabiner can open against a rope or a strap under load, and that’s the entrapment hazard the rule exists to prevent. It’s the same clean line principle that governs everything else on the boat: nothing in the system should have a hook, a gap, or a gate that can catch what passes through it.
Strength is the spec people worry about and the one that matters least. Rescue carabiners built to NFPA 1983 come in at 22 kilonewtons for technical use or 40kN for general use, and 22kN works out to roughly 4,945 pounds closed-gate.
Nothing a swimmer or a pinned raft generates comes close. The rating is never the weak link in a river rescue. Technique is.
What does matter is shape. At least one of your four should be a pear-shaped carabiner so a prusik loop can’t pinch flat against the gate, which makes it a workable substitute for a missing prusik-minding pulley. An aluminum carabiner for a kit you carry all day, a steel carabiner only where abrasion and permanence outweigh weight, which for most private boaters is nowhere. These same four do double duty in the wrap kit you’d build to unpin a raft, so the pin kit that shares most of this hardware isn’t a second purchase, it’s the same metal in a different bag.
The 3: Pulleys and the 3:1 They Build
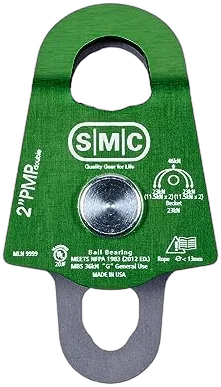
Two pulleys and two prusiks give you a 3:1 mechanical advantage system, better known as the Z-drag, or the z-rig, for the shape the rope traces through it. Three feet of rope hauled moves the boat one foot, which is the trade: you’re buying force with distance, not conjuring it out of nowhere.
What a Prusik-Minding Pulley Actually Prevents
A PMP has wide, flat side plates that extend past the sheave. When the haul prusik slides up and contacts the pulley, those plates push the knot open instead of letting it get dragged into the wheel. On a generic climbing pulley the prusik knot pinches flat against the sheave, welds itself in place, and now your progress capture has become a very expensive knot.
Aluminum, a sheave big enough not to crush the rope, and bearings you can rinse are the rest of the list. If you want the rigging itself rather than the parts, rigging the Z-drag step by step is the next thing to read.
Why the Third One Isn’t a Spare
The third pulley is the one people cut to save money, and it’s the one that does the most for the people pulling. Rigged as a directional change, it lets you redirect the haul line so the team is pulling off to the side rather than standing in line with the system. If something lets go, hardware travels along the fall line, and the fall line is where nobody should be standing.
Rig the third pulley as a directional change before you start hauling, not after. Once the system is loaded, moving the haul team means unloading everything, and nobody wants to give back the two feet they just earned.
The 2: Prusiks and the Pinch Test
Prusik sizing is the one spec in this kit that people eyeball, and it’s the one that quietly decides whether the whole system works.
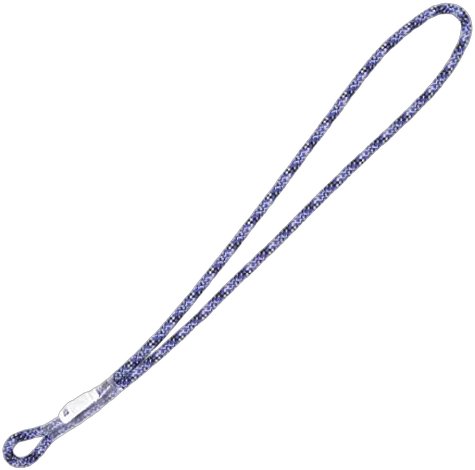
The rule is a ratio, not a number: prusik cord should run roughly 60 to 80 percent of your mainline diameter, or about two-thirds. Both directions fail, and they fail differently. Too thin and the prusik bites so hard under load that it welds itself to the rope and won’t slide when you need to reset the system. Too thick and it never grips at all, which you discover when the load comes on and the whole thing slips back to where it started.
Sewn loops solve this by arriving pre-sized. If you tie your own, the join is a double fisherman’s knot, and it has to be dressed properly and looked at every season, which is one more thing to remember at the worst possible time.
Two is the number because a 3:1 uses both at once, doing different jobs. One is the haul prusik that grabs the mainline and drags it toward the anchor. The other is the progress capture that holds what you’ve gained while the haul prusik resets. Lose either and you’re pulling against gravity every single stroke.
The pinch test: lay the cord against the actual rope you carry and press it flat with your fingers. If it squashes flat and slides, it’s oversized for that rope. It should stay round under a light pinch. Do this in the garage with your own rope, not in the store with theirs.
The 1: Webbing and Your Flip Line
Webbing is the least interesting thing in the kit and the piece that does the most different jobs. Anchor sling, flip line, improvised harness, tie-down, tow strap in a pinch.
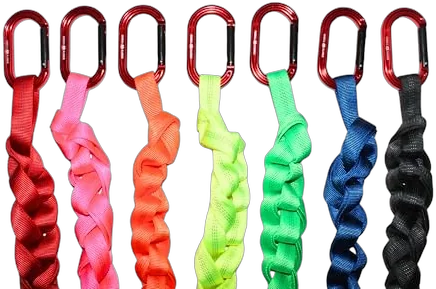
Eight to twelve feet is the working range, and one commonly cited spec is four meters of 25mm tubular webbing. Buy short and you’ll be improvising knots around a tree trunk that turned out to be thicker than you planned for. Buy long and you carry a little extra bulk, which has never hurt anybody.
The water knot is what joins it into a loop, and it needs long tails and a look every so often, because webbing knots creep under repeated loading. This is also the one slot where buying by the foot and cutting your own costs almost nothing and works exactly as well, so if you’re stretching a budget, stretch it here rather than on the pulley.
The 1: Throw Rope
Most boaters own one throw bag and quietly assume it covers both jobs. It doesn’t. The bag rigged to the frame and the rope in your PFD pocket are two different specs solving two different problems.
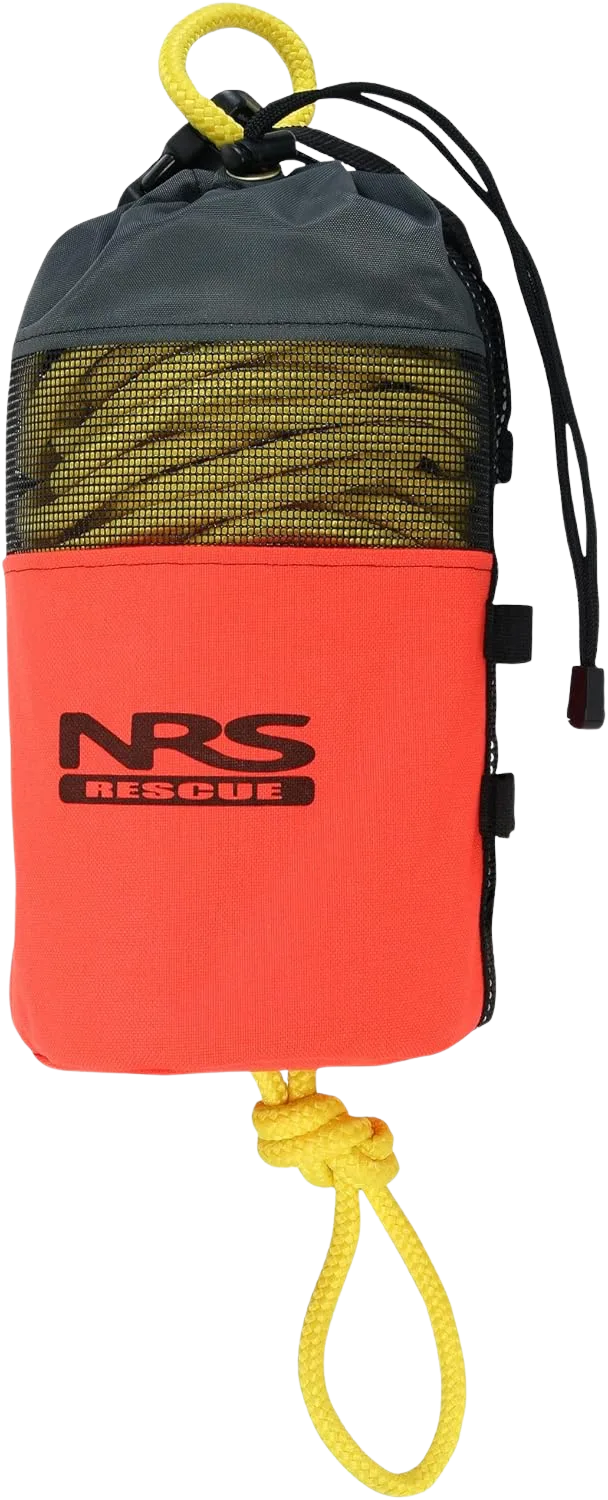
Floating rope is non-negotiable for this slot. Most rescue lines are nylon kernmantle rope, and you’ll see spectra core options that buy strength and low stretch at the cost of grip and money. For a throw bag, neither of those trades helps you. Everything else is a trade too.
A personal PRE rope is commonly spec’d shorter, around 18 meters or 59 feet, because it has to live in a pocket and still be throwable. A group or boat bag runs closer to 50 to 70 feet, plus whatever mooring line you carry separately. Thinner rope packs smaller and is meaningfully harder to hold with cold hands, which is the condition you’ll be using it in.
One more thing to file away for later in this article: rope has an expiration date whether you throw it or not. And owning the bag is not the same as being able to put it where you want it, so actually throwing it accurately under pressure is worth practicing on a boring flatwater afternoon.
The Knife, the Whistle, and the PFD Are Their Own Decisions
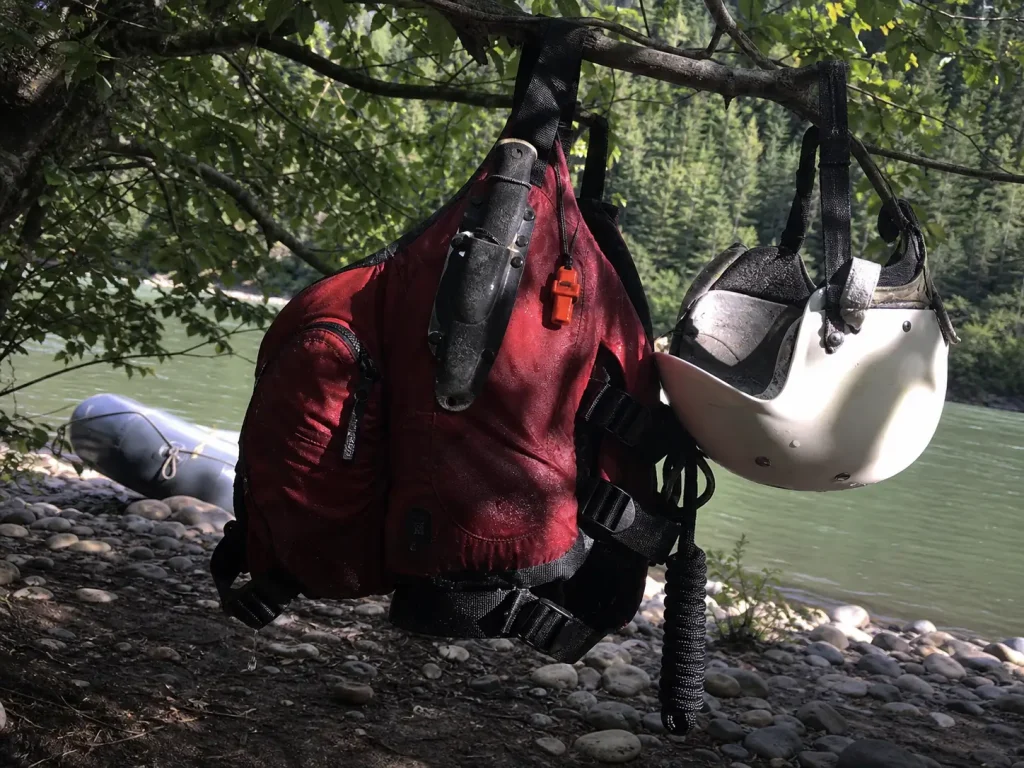
Nearly every article on this topic ends with three thin paragraphs: one on knives, one on whistles, one on PFDs. All three are too shallow to act on, and they’re shallow because each of those is genuinely a separate buying decision with its own failure mode. We’re not going to pretend four hundred words covers four gear categories.
The River Knife
A rescue knife is a cutting tool for rope and webbing, and that framing decides everything about which one you buy. A blunt-tip knife or a serrated blade, because you may be cutting near a person in moving water. Mounted high on the vest where your off hand can find it without looking. And a sheath that retains the blade through a swim but releases with one hand when you pull it on purpose.
That last part is where knives actually fail, and it’s not the part anybody markets. Why river-knife sheaths fail before the blade does is the version of this conversation with room to breathe. What a knife is not is a prying tool for a pinned boat, and using it that way is how people end up with a broken tip and no cutting tool.
The other quiet failure is corrosion. A blade that lives clipped to a wet vest all season, rinsed with river water and never dried, seizes at the pivot or in the sheath, and you find that out the one time you reach for it. Same rinse-and-dry habit as everything else in this article, applied to the one item you carry every single day on the water.
The Whistle and the Helmet
Whistles get treated as a throwaway item, which is odd for something that’s your only signal over the noise of a rapid. The instinct is to buy the loudest one on the shelf, and that’s usually the wrong call for reasons that come down to how sound behaves over water and what your lungs can do while swimming. Why the loudest whistle isn’t the best one unpacks that.
The helmet sits above all of this and is the piece people most often mismatch to their water, buying a thin park-and-play shell for creeking or a full-cut whitewater helmet for a mellow float. Matching a helmet to the class you actually run is the anchor of everything in this cluster, and it’s worth reading before you spend money on hardware you can’t yet use.
Here’s the honest summary: the rescue kit in this article is the assembly manual for the technical gear. The knife, whistle, helmet and PFD are four separate decisions, and each one deserves the full treatment rather than a paragraph.
Where Each Piece Rides: On You vs. On the Boat
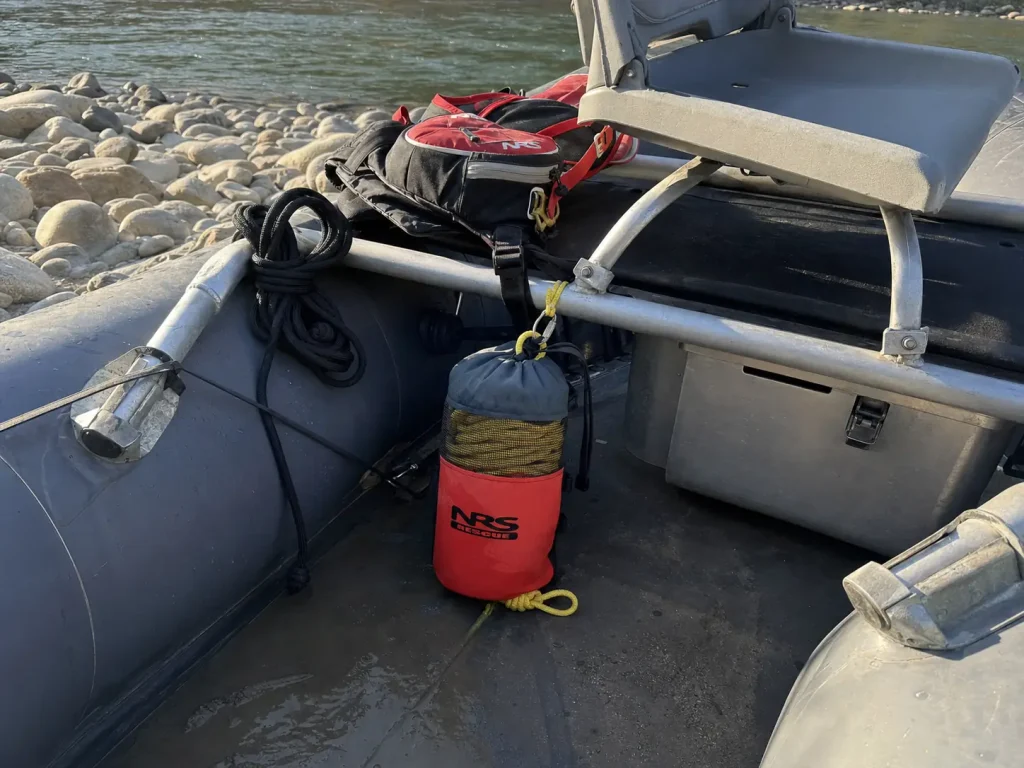
The kit you can reach is the only kit you have. There’s a version of this that fits in a PFD pocket and a version that lives in a dry box, and mixing up which is which is how people end up watching a rescue from twenty feet away with all the right hardware strapped down under a cooler.
What Fits in a PFD Pocket
The 4-3-2-1-1 set is sized for this. Four carabiners clipped together in a bundle, three small pulleys, two flat prusik loops, folded webbing, and a compact rope. Add the knife on the vest and the whistle on a shoulder strap and that’s your on-person load.
It should be boring to carry. If it isn’t, you’ve oversized something.
What Stays With the Boat
The longer throw bag, spare webbing, a dedicated pin kit, mooring line, and a repair kit all belong rigged where you can grab them in seconds without unpacking anything. On permitted runs there’s often a hard requirement list too, and it’s worth reading the equipment list the National Park Service requires on permitted river trips before launch day rather than at the ramp with a ranger watching.
One number makes the whole personal-versus-boat thing concrete. A three-guide team’s shared kit works out to 12 carabiners, 9 pulleys, 6 prusiks, 3 flip lines and 3 throw bags.
That isn’t a bigger communal pile. That’s three individual sets, because everybody capable of assisting in a rescue carries their own. Budget per person, not per boat.
Your Realistic Starting Kit vs. the Full Rescue Rack
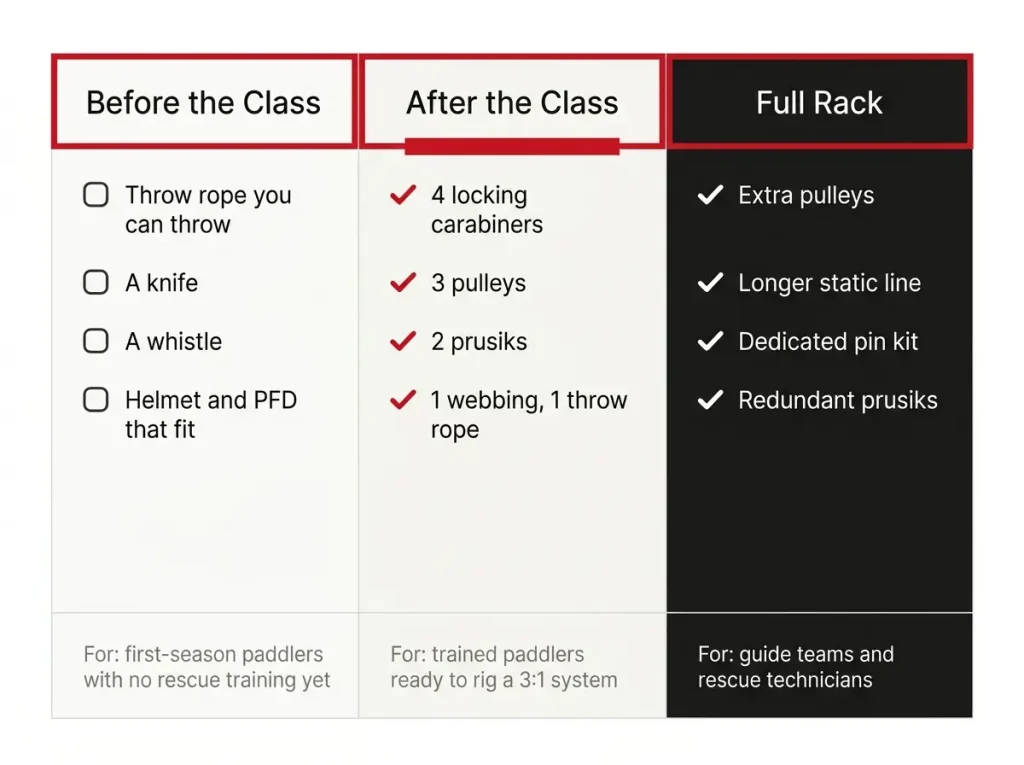
Every article on this topic is written either for a fire-department swiftwater technician or for someone who already has a certification card in their wallet. Almost nobody writes the honest version for the weekend paddler with a raft, four trips a season, and no class yet. So here it is, in tiers, and the first tier is smaller than you’d expect.
Before You’ve Taken the Class
A throw rope you can actually throw. A knife. A whistle. A helmet and PFD that fit.
That’s the whole list, and it’s a defensible whole list.
This sounds like an undersell and it isn’t. Rescue hardware you can’t rig under pressure does not make you safer; it makes your PFD heavier. The rope-and-whistle layer, by contrast, is usable on day one and covers the overwhelming majority of what actually happens on a private trip: somebody swims, you get a line to them, you regroup. How much beyond that you need scales with the water, and how risk actually scales with river class is the honest frame for that decision.
After the Class
Now the full 4-3-2-1-1 set earns its place on your person, because you can build the system while wet, cold and rushed. This is the tier where the hardware spend makes sense, and note the order: the class comes first, then the metal. Doing it the other way around is the single most common pattern on the water and the most expensive.
When the Full Rack Makes Sense
Extra pulleys, a longer static line, a dedicated pin kit, redundant prusiks. This is guide-team and rescue-technician territory, and buying into it early is exactly the over-purchase we tell people to skip. The hardware tier is the expensive jump in this whole progression, and it’s the one you should make after training rather than before, because the class tells you which of these you’d genuinely reach for.
As NOLS puts it, the best kit is the one you actually know how to use. A full rack you’ve never rigged is worth less on the bank than a cheap rope you’ve thrown two hundred times.
The Class That Turns Gear Into Skill
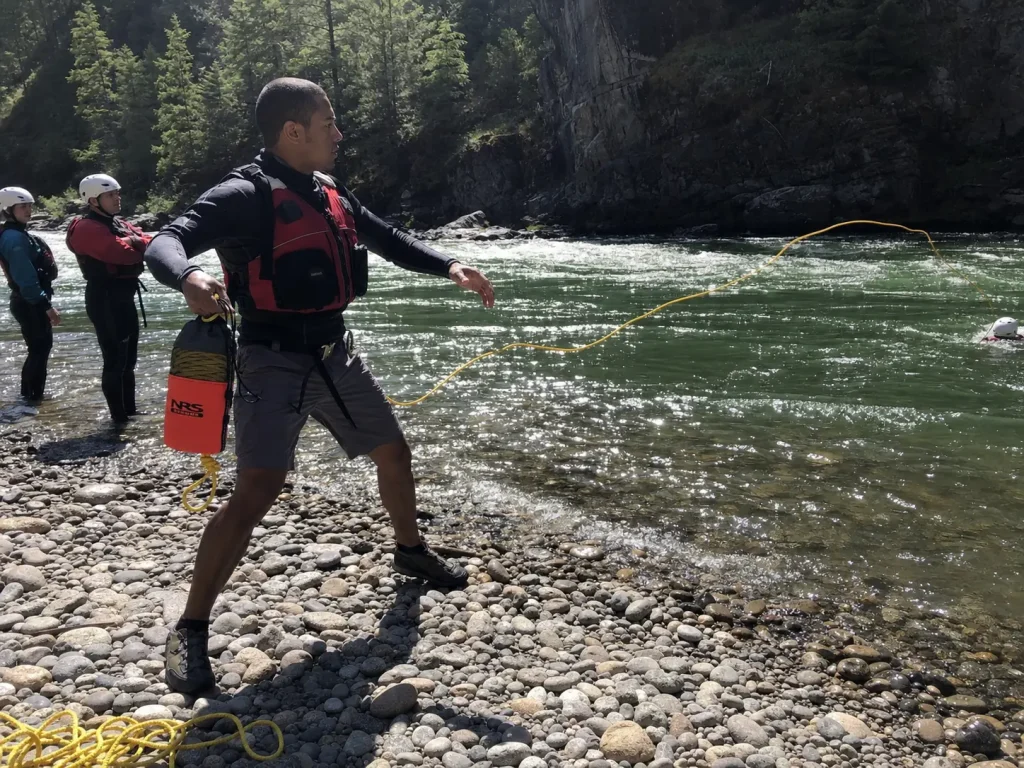
This isn’t a lecture, it’s a scheduling conversation. Two days. That’s the entire ask, and it changes what every item above is worth to you.
What Two Days Actually Covers
An ACA-certified swiftwater rescue course runs as a two-day program covering hazard recognition, self-rescue, throw bag and rescue-vest use, and pin and entrapment scenarios, with a certificate of attendance at the end. Two days is a weekend. It’s less time than most people spend researching a raft purchase.
Why Reading About It Doesn’t Transfer
What the class does that no article can is put you in the water. You rig the 3:1 wet, on an awkward anchor, with your hands cold and somebody counting on you to hurry. You pull the rescue-belt release while being dragged, until it stops being a decision and becomes a reflex.
Skills built that way still fade. Instructors are blunt about this: swiftwater rescue training decays faster than gear does, and a refresher every few seasons is the difference between having taken a class and being able to do the thing. Your carabiners will outlive your certification by decades.
Inspecting and Retiring the Kit Each Season
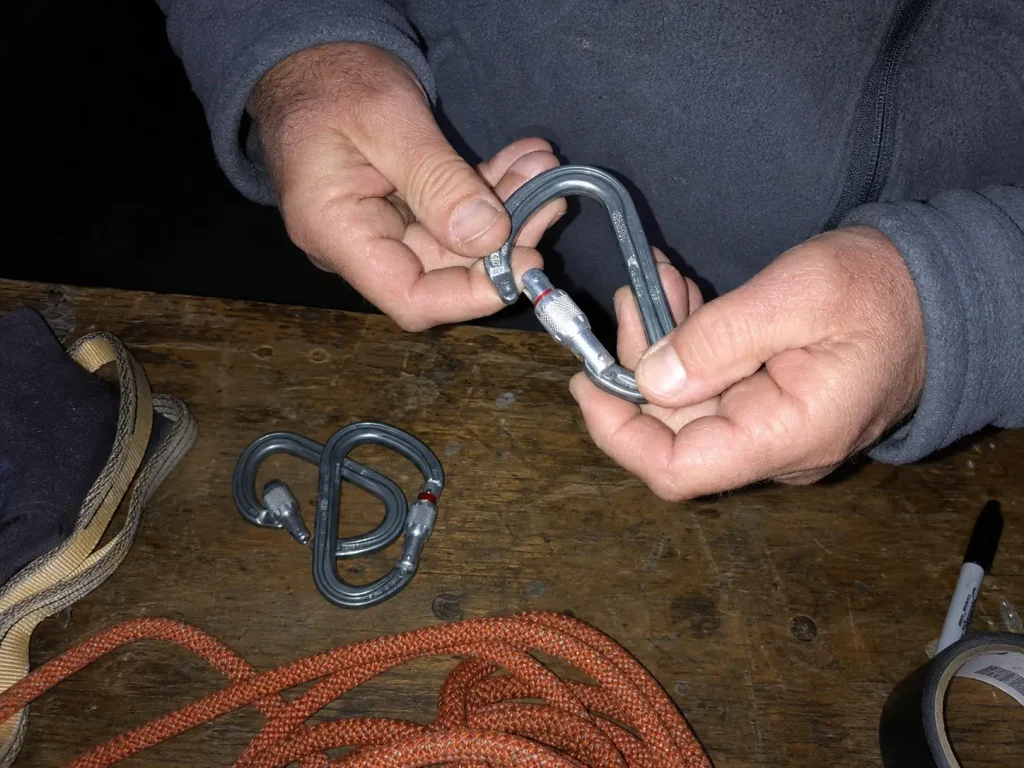
Almost everyone treats the rescue kit as a one-time purchase and then never opens the pocket again. Meanwhile the rope has been quietly aging in the sun for four seasons. This is the preseason ritual nobody writes about, and it takes about twenty minutes at a garage table in March. It’s the same logic behind treating gear maintenance as a season-long rhythm, applied to the hardware you’d only ever need on your worst day.
Metal: What Buffs Out and What Doesn’t
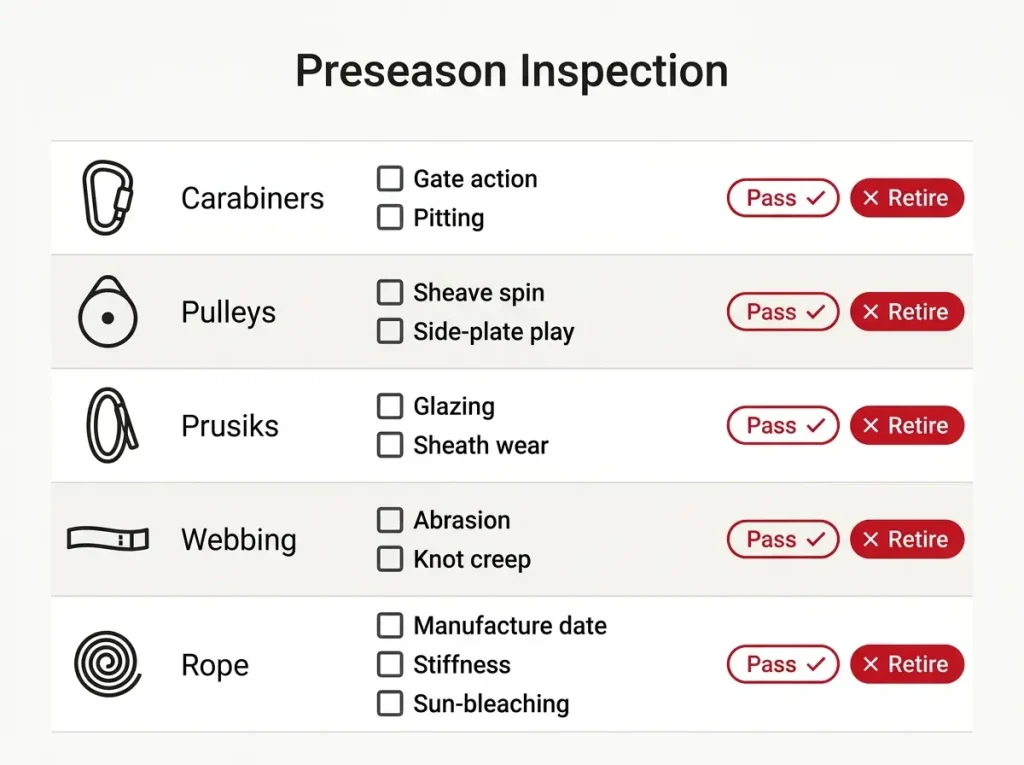
Start with the split that surprises people. Hardware like carabiners and pulleys is rated for an effectively unlimited service life if it’s undamaged and maintained. Your carabiners can genuinely outlive your raft.
The retirement triggers are specific. Surface rust after a season of cold dunkings can often be buffed off and treated with a preservative, and that carabiner keeps working. Corrosion or pitting you can feel under a fingernail is different, and that piece is done tonight.
There’s no “one more season” version of that call. Check gate action too: a gate that sticks, drags, or doesn’t snap fully closed gets cleaned and lubricated, and if it still sticks, it’s finished. On pulleys, spin each sheave and feel for grit, and check the side plates for play where they pivot.
Rope and Cord: The Date Matters More Than the Look
Rope is the opposite story. Ropes are typically retired 7 to 10 years from the date of manufacture regardless of use, so the throw rope in your PFD pocket has a shelf life even if it has never once been thrown. Check the date, not just the look, because a rope can look fine and be past it.
UV exposure is the main long-term threat, and this is the part that catches people. The bag riding in full sun clipped to the outside of your frame all season takes more abuse from that than from every rescue throw you’ll ever make. Store it in the dry box between trips rather than hanging where it’s convenient.
Prusiks get retired on a different trigger: after a hard catch, cord glazes where it gripped, and glazed cord loses bite in a way you can feel by hand but won’t see. Run each loop through your fingers and feel for stiff, shiny sections. Webbing gets checked for abrasion at the fold points and for creep in the water knot, which should still have long tails.
Rinse the silt out and dry the rope and bag out of direct sun after every single use, not just at the end of the season. That one habit does more for throw-rope life than anything you’ll buy, and it takes about ninety seconds at the takeout.
The Preseason Walkthrough
Dump everything on a table where you can see it. Count it against 4-3-2-1-1. Work every gate, spin every sheave, run every loop through your fingers, read the date on the rope. Then re-flake the throw rope back into the bag properly rather than stuffing it, because a rope that was jammed in wet last October is a rope that birdnests on the throw that counts.
The Short Version
Three things worth carrying out of here.
The 4-3-2-1-1 count is a floor, not a wish list. It exists because that’s the exact parts inventory for one 3:1 haul system, and it’s sized to fit in a PFD pocket. Short one carabiner and you’re improvising.
Buy the class before the hardware. A rescue belt you’ve never drilled is the one piece of this kit that works against you, and two days fixes that permanently.
Open the pocket every spring. Metal can outlive your raft, rope can’t, and the date printed on it does not care how gently you’ve treated it.
Before your next trip, dump the whole kit on the tailgate and count it. If any of the five numbers comes up short, or the manufacture date on that rope has a decade on it, you found out at the truck instead of on the bank.
Frequently Asked Questions
01Do you need training to use a river rescue kit?
Yes for the technical hardware and the rescue-PFD belt, no for the throw rope, knife and whistle. A two-day swiftwater rescue course is the dividing line. The rope layer is usable and worth carrying immediately; the 3:1 system hardware and the quick-release belt are not.
02What are the 4 water rescue techniques?
The standard progression is talk, reach, throw, row, with go as a trained last resort. Each step is ordered so the rescuer takes on less risk than the next one down. Most private-boater situations are solved at throw with a floating rope.
03What to bring for a day on the river?
A PFD, helmet, throw bag, river knife, whistle, layers chosen for the water temperature rather than the air because cold water immersion is what catches people out, and the 4-3-2-1-1 kit if you are trained on it. Permitted runs often add a required-equipment list beyond that, so check the managing agency first.
04How to save someone from a river?
Work the talk, reach, throw, row, go order and start with a floating throw rope from stable footing on shore. Entering the water is a trained decision, not an instinct to follow. A tethered live-bait rescue is a class-level skill and never something to improvise.