
In this article
The bag strapped to your frame looks exactly the same on day one and day sixty. The first real throw of the season is usually the one that matters, and it’s also the one nobody has practiced for. Most private boaters shop this category backwards, starting with the rating printed on the tag and working down to the rope, when the rope is the only part of a river rescue throw bag that actually performs the rescue. Ask anyone who has taken a swiftwater course: the rating never comes up on the water, but rope diameter, rope length, and whether the bag pays out clean come up every single time.
Here’s what actually matters when you buy one, which bags earn a spot in a private boater’s kit, why the NFPA-rated tier is a procurement spec you’re probably paying for without needing, and the two things almost nobody covers: what the swimmer should do, and when a rope that still looks fine has quietly aged out.
Here’s the short version before we get into the why.
| Pick | Best for | Rope | Why it earns the spot |
|---|---|---|---|
| NRS Pro Rescue Throw Rope | Crews that do unpins | Dyneema-class core | Roughly double the strength of polypro at the same diameter |
| NRS Wedge Rescue Throw Bag | Clean, fast re-stuffs | Polypropylene, high-vis green | Wedge profile is the easiest shape to repack without tangles |
| NRS Guardian Rescue Throw Bag | Waist carry, all day | Compact belt-mounted line | The bag that’s actually on you when you’re out of the boat |
| NRS Pro Guardian Wedge Waist | Guides and pin-prone runs | High-strength waist line | Strong enough to double as a light unpin assist |
| NRS Standard Rescue Throw Rope | First bag, boat-stored | 70 ft polypropylene | Budget-friendly and genuinely enough for swimmer rescues |
| NRS Pro Compact Rescue Throw Bag | Kayaks and tight rigs | 70 ft floating Dyneema | Small profile plus reflective tape for low-light takeouts |
What a River Rescue Throw Bag Actually Does
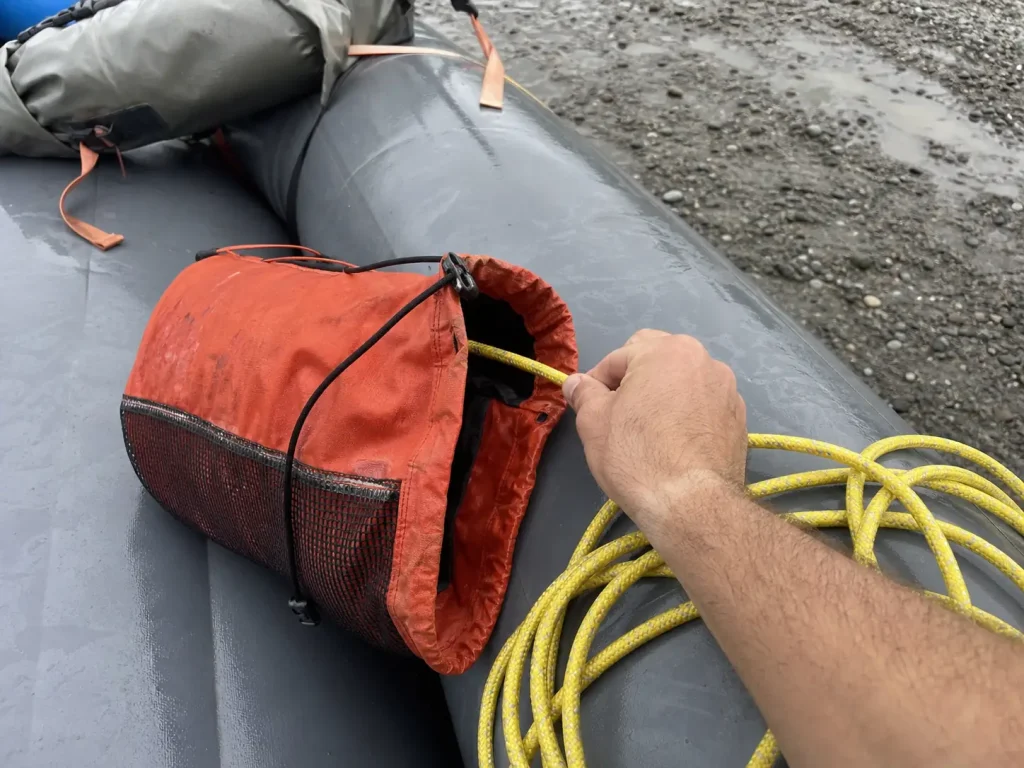
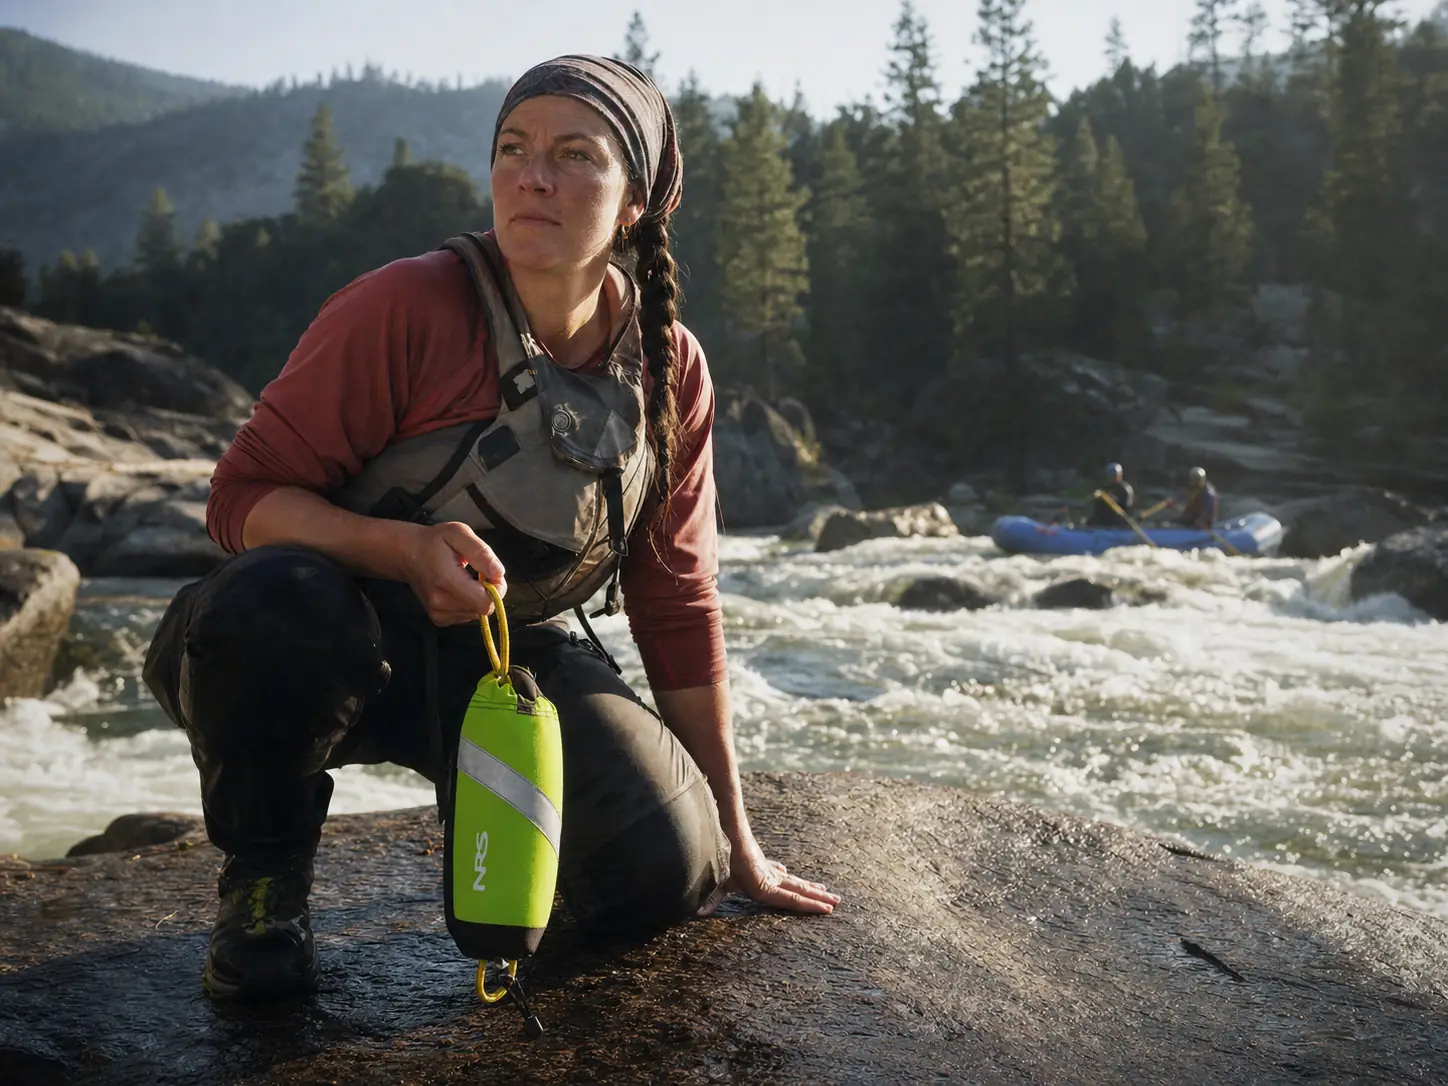
A throw bag is a stuff sack holding 50 to 75 feet of buoyant rescue rope that pays out as the bag flies. That’s it. The bag is the delivery system. The rope is the rescue tool, and once you internalize that split, most of the buying decisions in this article answer themselves.
For a private boater, the realistic jobs are narrower than the marketing suggests. You’re throwing a line to a swimmer flushing past your eddy. You’re pulling someone off a foot-entrapment situation before the current wins, or getting a line to somebody drifting toward a strainer. And with the right rope, you’re contributing a strand to a haul system on a wrapped raft, which is one component of the rescue kit most guides actually carry rather than a standalone solution.
It’s worth being just as clear about what a throw bag doesn’t do. It doesn’t reach across every river. It does nothing for an unconscious swimmer. And it accomplishes exactly zero sitting cinched shut under a dry bag on the back of your frame.
There’s one more thing, and it’s the most-cited beginner mistake across every source reviewed for this article: if the swimmer grabs the bag instead of the rope, they keep floating an extra 30 to 40 feet before the line ever comes tight. That’s a rapid’s worth of river, lost to grabbing the wrong object. We’ll come back to that, because fixing it costs nothing and it’s the single highest-value thing you can tell your crew at the put-in.
Rope Diameter and Length, Sized to the Water You Run
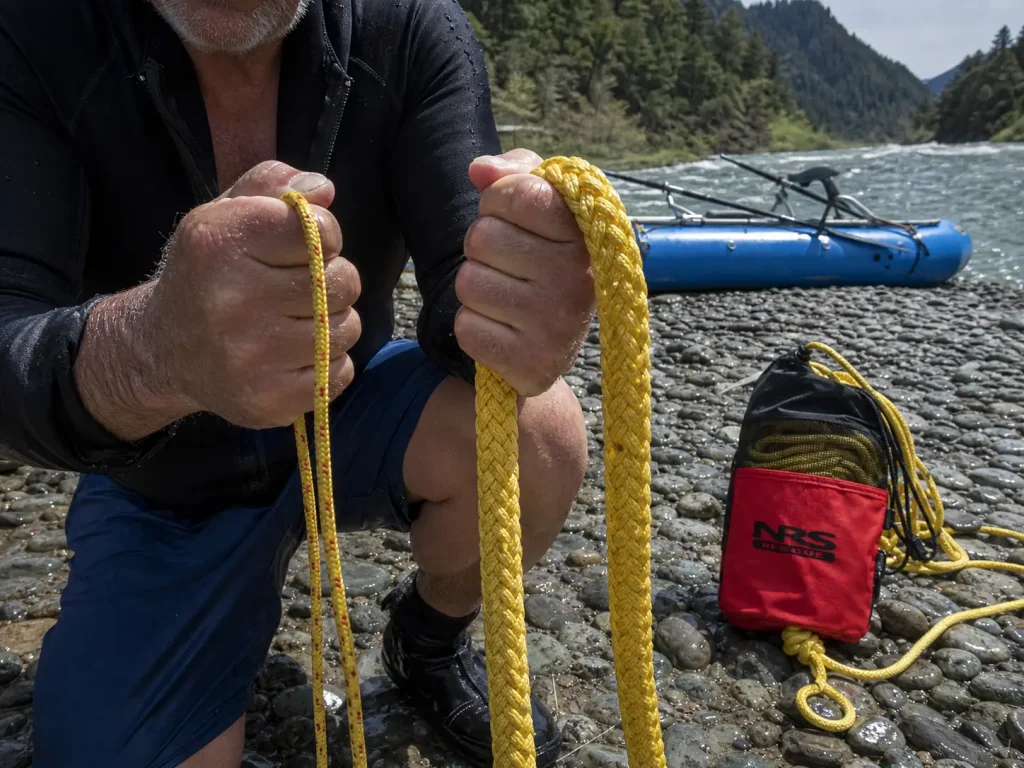
Everyone reaches for the burlier rope in the shop in July. Then they try to hold it in November with numb hands and a swimmer on the other end, and the calculus changes.
Diameter and the grip trade-off
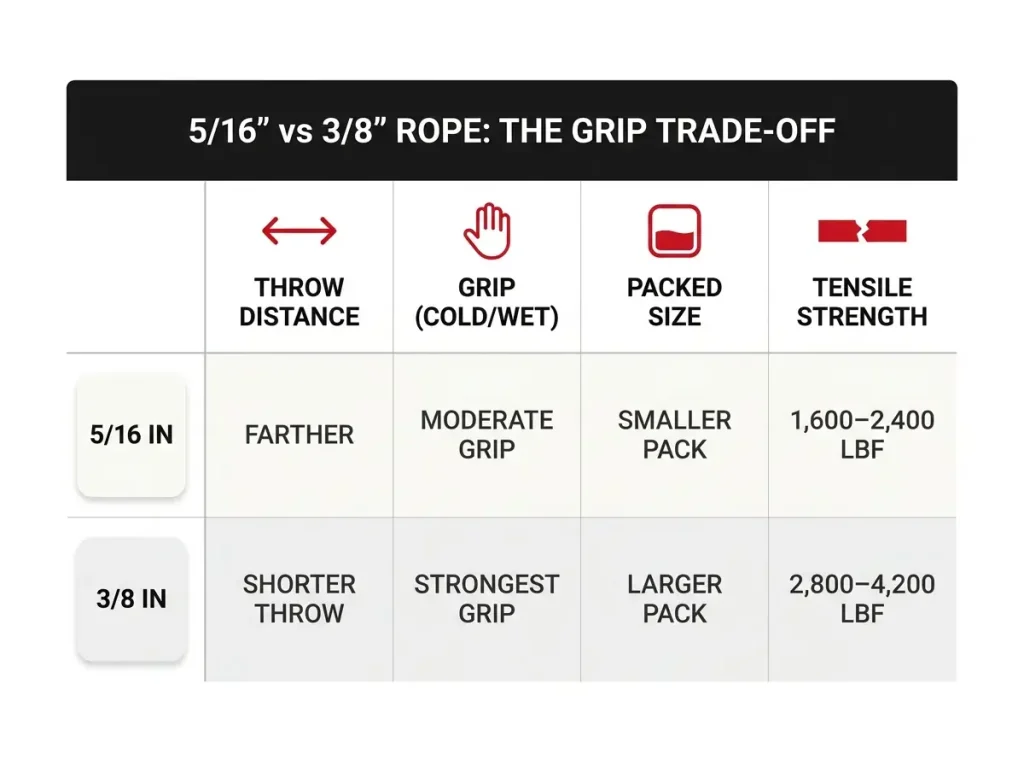
Rope diameter in this category runs roughly from 5/16 inch to 3/8 inch, and the trade is simple. Thinner rope throws farther, packs smaller, and lets a compact bag hold more line. Thicker rope is easier to grip under load, easier to hold onto with cold, wet hands, and better for a fast second recoil throw.
The sizing rule taught in courses is blunt: small hands, small rope. It sounds like a joke until you watch someone with smaller hands try to close a fist around a fat, wet line while a swimmer is loading it. A rope you can’t grip is a rope you can’t use, and that’s a fit question, not a strength question.
Cold changes everything here. The rope that felt fine in the shop is a different rope at 48-degree water, especially if you’re one of those people whose fingers stop cooperating early. If that’s you, gloves that still let you feel a rope are a cheaper fix than sizing up your entire bag.
Length matched to your river, not to the catalog
Standard rope length for a throw bag is 70 to 75 feet, which covers most rivers under about 70 feet bank to bank. Measure the water you actually run, not the water you’re aspiring to. On typical class III rapids with a defined eddy on each side, 70 feet reaches everything a raft guide would realistically throw to. Most people who think they need 100 feet of line are describing a mid-channel pin, and that’s a second-bag problem rather than a longer-bag problem.
Length also matters for the other job. If your line is going to be part of a haul system, you want enough left over after the anchor wraps and the redirect to still have working rope in your hands.
The strength you lose before you ever throw it
Here’s a number that reframes the whole spec sheet: knots can cut a rope’s rated tensile strength by up to 60%. A stopper knot or an anchor hitch tied into a rescue line has already erased more than half the number printed on the tag.
So when you’re comparing two bags with different strength ratings, remember that a break strength on a tag is a best-case laboratory figure your own rigging will immediately erode. That’s the honest context for everything in the next section.
Rope Material, Polypropylene vs Spectra and Dyneema
Every rope in this category has to float. That’s the baseline, not a feature, and any bag that doesn’t advertise a floating line isn’t a throw bag. Where the price separates is the core.
Polypropylene, the honest default
A polypropylene rope in 3/8 inch runs around 1,900 pounds of tensile strength. It’s cheap, it floats high, and it grips well in a wet fist. Its real weakness isn’t strength, it’s sunlight, which is a maintenance problem rather than a purchase problem and gets its own section further down.
For throwing a line to a swimmer, polypro is not a compromise. Nothing about a swimmer on the end of a rope comes close to loading 1,900 pounds.
Spectra and Dyneema cores, double the number and half the grip
Spectra and Dyneema (both HMPE fibers) change the math. A 3/8 inch Spectra rope runs around 4,600 pounds, roughly double polypro at the same diameter. That extra headroom isn’t for swimmers. It’s for mechanical advantage work and unpinning a raft, where a Z-drag multiplies your pull by three or more and the loads on the line get genuinely serious, usually alongside the pin kit that turns a throw line into a haul system.
The trade is grip. HMPE fibers are slicker than polypro, and slick rope in a numb hand is a real cost that spec sheets never list.
Best Dyneema Core Rope
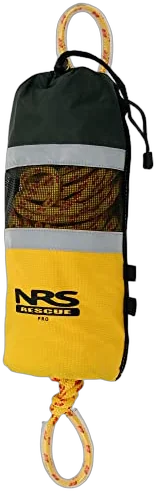
The NRS Pro Rescue Throw Rope is the premium end of a private boater’s realistic options, and it’s the right call for exactly one profile: a crew that runs pin-prone water and drills mechanical advantage. If your bag exists to reach swimmers, you’re buying capability you’ll never load.
There’s also a middle ground almost nobody mentions. MaxGrip and Grabline-style cores run around 3,575 pounds in 3/8 inch, which is close to Spectra territory with a hand feel much closer to polypro. If you find Dyneema too slick but want more than basic poly, that’s the tier to go looking for.
Pull your rope out on the lawn and grab it with a wet hand before you commit to a core material. Slick line and cold fingers is a combination you want to discover in your driveway, not on a gravel bar with somebody’s head bobbing downstream.
Bag Design Details That Actually Matter
You find out what your bag’s closure is really like on the day you need it open in two seconds, one-handed, while tracking a swimmer with your eyes.
Closure and opening
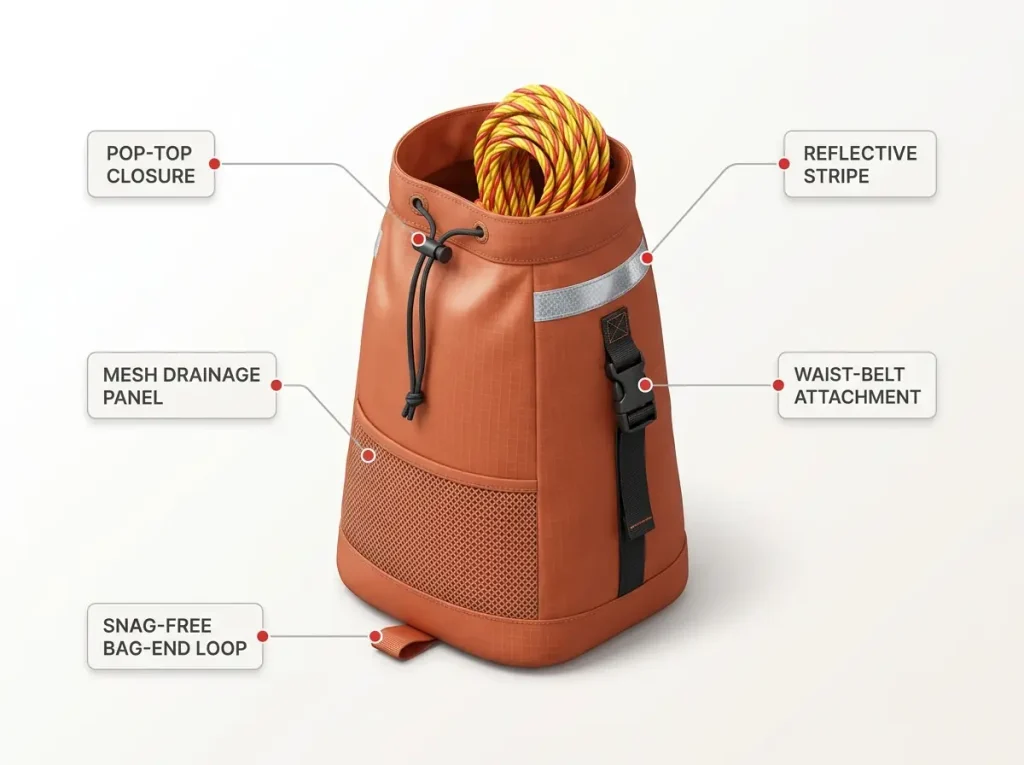
A pop-top closure, a wire rim opening, a magnetic flap, a buckle: the marketing distinguishes them at length, and the only test that counts is whether you can open the thing fast, cold, one-handed, without looking down. Try it in the shop. Try it with gloves. If it takes two hands, it’s a storage bag with ambitions.
Mesh drainage and the shape of the re-stuff
Mesh drainage is unglamorous and pays off every trip, because a bag without it hauls a liter of river home with you and stays wet through the drive. Most bags in this category also carry a strip of foam flotation in the base so the bag sits high after the throw instead of sinking out of the swimmer’s sight line. The bag’s shape matters more than people expect too. A wedge profile guides the rope into the bag in a way that flat rectangular sacks don’t, which is the whole game when you’re repacking on a rocking boat.
The Clean Line Principle and being findable
The Clean Line Principle is the one design rule worth memorizing: nothing on the bag end should be able to hook a rock, a foot, or a frame. The handle loop on the bag is there to hold, not to clip things to, so keep the carabiner storage on your PFD or your frame rather than on the rope. A snag hazard under load is one you built at home, which is also why a river knife you can reach with one hand belongs on your PFD any time there’s rope in the boat.
A high-visibility rope and a retro-reflective stripe on the bag are the other underrated features. In a raft loaded with grey and black dry bags at dusk, the bag nobody can find is functionally not in the boat.
While we’re being honest: magnetic closures and stainless hardware look excellent in a product photo and change nothing about the outcome of a swim. Buy them if you like them. Don’t pay a tier up for them.
Best Bag Design
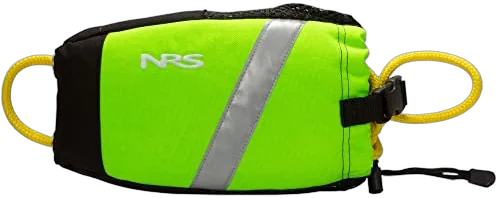
The NRS Wedge Rescue Throw Bag is the bag to hand somebody who is going to repack it in a hurry, which is everybody. The shape does the thinking for you.
Re-stuff the bag the exact same way every single time, feeding loose handfuls rather than coils. An inconsistent, rushed repack is what causes birdnesting, where the rope knots inside the bag and refuses to pay out. You always find out on the next throw, and the next throw is never a practice one.
Is NFPA 2500 Overkill for a Private Boater
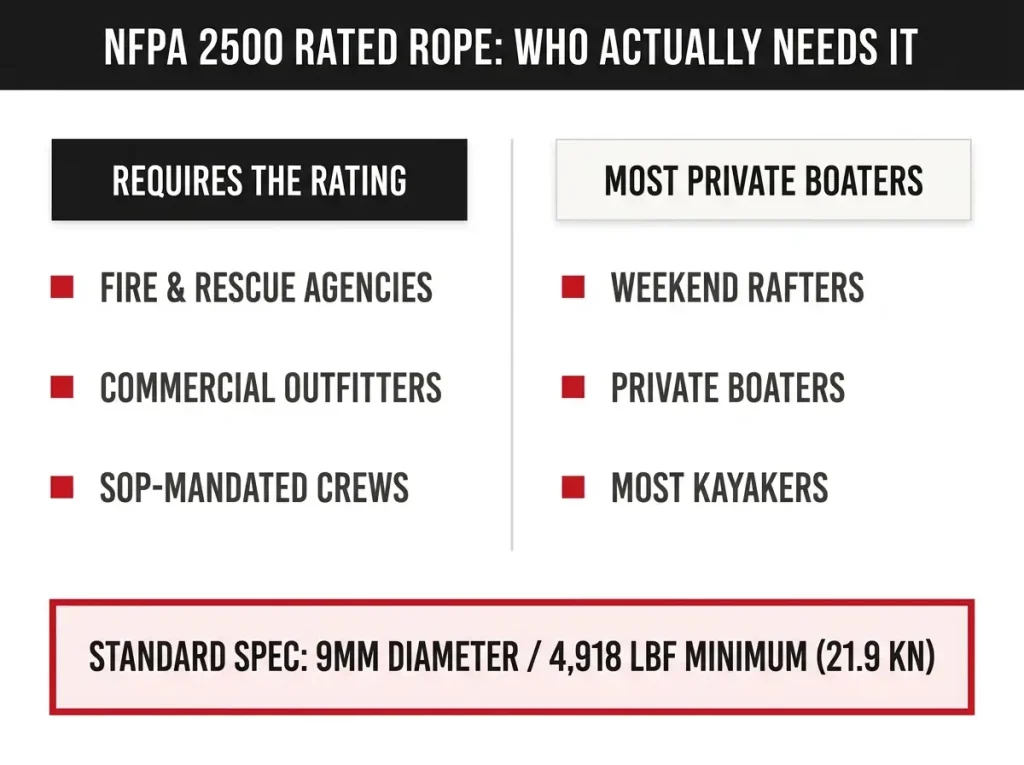
This is the part gear shops skip. The NFPA 2500 rating isn’t a scam and it isn’t marketing fiction. It’s a real standard that was written for somebody who isn’t you.
What the rating actually certifies
For a throw line, the NFPA 2500 standard for life-safety rope and rescue equipment specifies a 9mm diameter and a minimum tensile strength of 4,918 pounds-force, or 21.9 kN. It’s an equipment standard inside a broader document covering operations and training for technical search and rescue incidents. That’s the whole context: technical rescue, run by agencies.
Who the standard is written for
NFPA standards exist so a fire department or rescue squad can write a purchase order that satisfies its own legal and training obligations. An agency buying rope for crews it must equip, certify, and defend in a review needs an external spec to point at.
You, buying one bag for your own boat, are solving a completely different problem. You don’t need a third-party floor to justify your purchase to anyone, and the failure modes in real private-boating swims are not tensile failures. Nobody at the takeout is telling a story about a rope that snapped. They’re telling stories about bad throws, tangled bags, and crews who had never practiced.
Worth naming the concrete example so you can recognize an NFPA rated throw bag on a shelf: the NRS NFPA Rope Rescue Throw Bag is the rated tier in this category, built around a Sterling Rope Grabline line. It’s also the tier that’s hardest to keep in stock and the most expensive, which is exactly what you’d expect from equipment priced for institutional procurement.
To be fair about it: if you run commercial trips, sit on a rescue squad, or your program’s SOP requires the rating, buy the rated line without hesitation. The standard exists for good reasons in that world.
Where that money does more
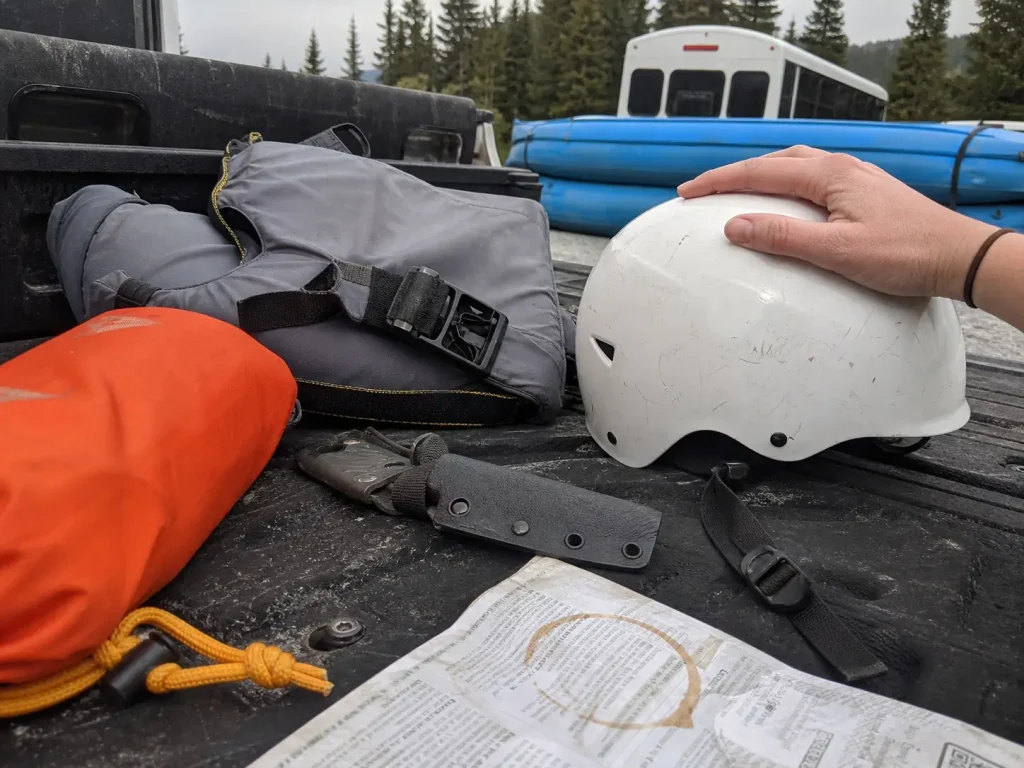
For a private boater, the same spend moves the needle much further somewhere else. A whitewater helmet, specifically a helmet matched to the class you actually run, prevents the injury that ends the trip. A rescue PFD with a quick-release belt that works gives you options a rope alone doesn’t. And a course teaches the skill that makes any bag useful.
The Two-Bag System Most Private Boaters Should Copy
Here’s the framework that solves more problems than any single purchase. Run two bags.
The bag in your boat is the one you own. The bag on your waist is the one you have when you’re standing on a rock scouting a horizon line and somebody swims past you. Those are different jobs, and asking one bag to do both is why people end up buying an expensive compromise.
The waist bag, the one that’s actually on you
A compact hip belt throw bag rides on your waist or clips to the D-ring quick release on a rescue PFD with a belt that actually releases under load. Test that quick-release buckle with a loaded line before you trust it, because a belt you can’t dump is worse than no belt. Shorter line, smaller profile, and it goes where you go. The waist bag is a discipline decision more than a gear decision, because it only works if you clip it on every day without thinking about it.
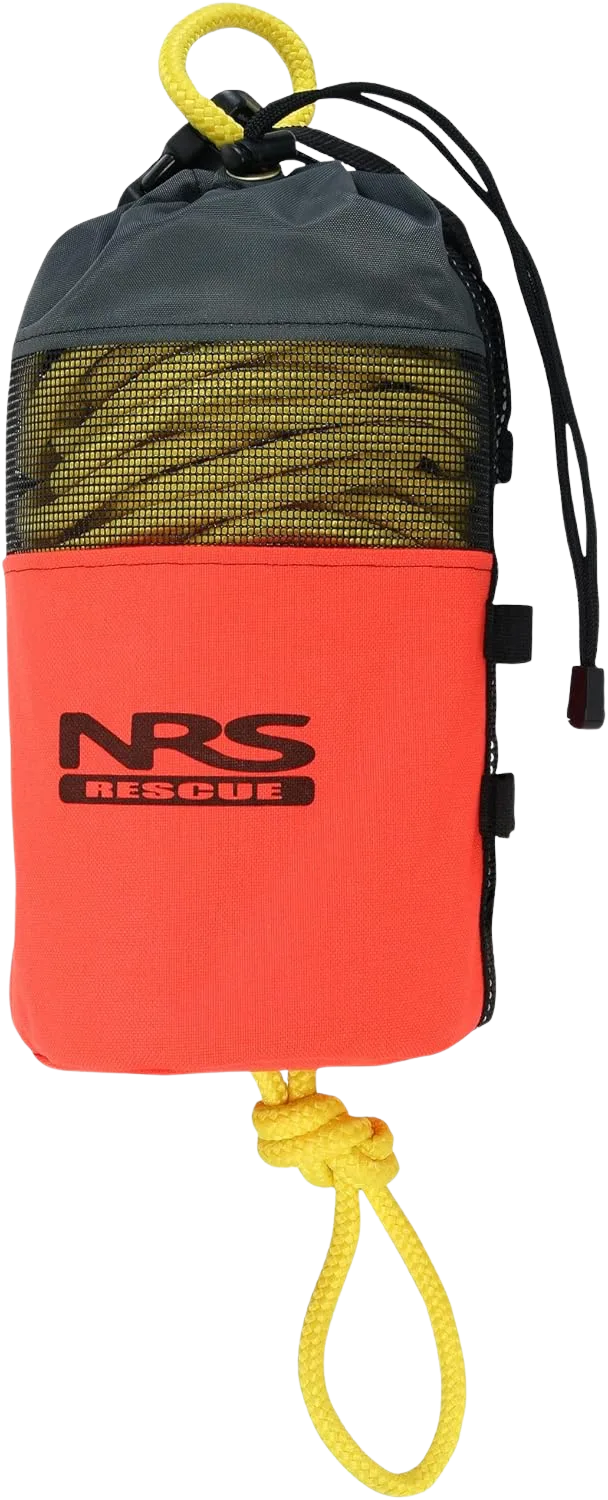
The NRS Guardian Rescue Throw Bag is the straightforward version of this idea and the easier one to actually wear all day.
The pro waist bag for pin-prone water
If your home run is class IV whitewater with a reputation for wrapping boats, the waist-mounted throw bag can carry more capability without getting much bigger.
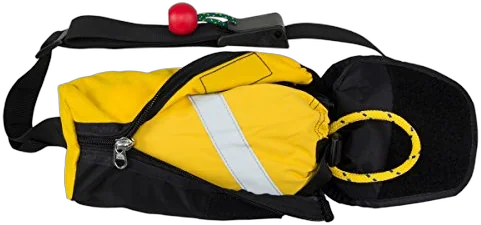
The NRS Pro Guardian Wedge Waist Throw Bag is the version to buy if you’ve ever spent an afternoon working a wrapped boat off a rock.
Rigging both so they’re reachable
The boat bag lives where somebody can grab it without moving three dry bags, ideally clipped within reach of the rowing seat or the bow position. Nothing about “in the boat somewhere” counts as rigged. And the cheap version of this whole system is real: a budget polypro bag in the boat plus any compact waist bag beats one premium bag strapped down under the load.
Throw Bag Picks for How You Actually Boat
Two questions decide this for most people. How much room do you have to store it, and how much are you willing to spend before you’ve thrown one even once?
Best Budget Pick
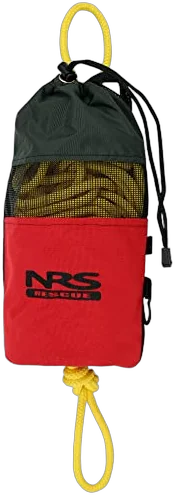
The NRS Standard Rescue Throw Rope is where the anti-sell lands hardest. A budget throw bag you’ve thrown fifty times beats a professional rescue throw bag you’ve never opened, and it isn’t close.
Best Compact Pick
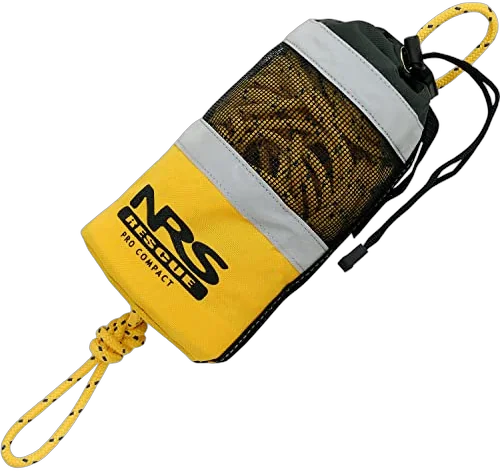
The NRS Pro Compact Rescue Throw Bag solves the storage problem that keeps people from carrying a bag at all.
One note on shopping this category: stock runs thin and listings go dark for months at a time, especially at the pro end. A bag being out of stock is a supply story, not a verdict on the gear.
Throwing It, and What to Do When You Miss
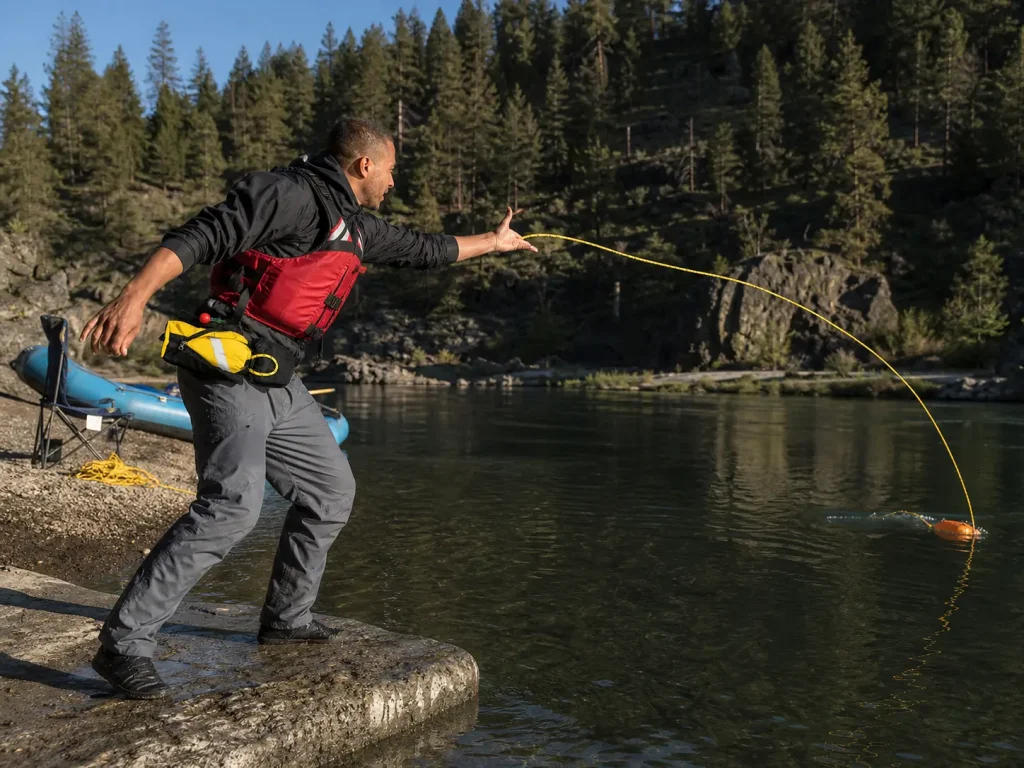
A throw bag is a skill purchase wearing a gear purchase costume. Nobody’s first throw under stress is their best one, and the gap between owning a bag and being able to use one is the entire subject of this section.
Where to aim
Land the rope across the swimmer somewhere between head and hip, ideally at chest level. You’re not trying to hit them with the bag. You’re trying to drape a line across their torso so there’s something to close a hand around, which means you throw past them rather than at them.
Give yourself margin. A rope that lands slightly long still swings into them. A rope that lands short is a wasted throw.
What the thrower must never do
Never tie the line to yourself. Never tie it to a fixed object. Never wrap it around a hand, a wrist, or your waist. The moment you’re anchored to a loaded rescue line, you’re the second problem, and this is simultaneously the most repeated rule in swiftwater training and the most violated one on real rivers.
Brace with your stance, sit down if you need to, and keep the ability to let go at all times.
The missed throw, and the decision after it
Here’s where most guides stop writing, and it’s the moment that actually decides outcomes. You missed. What now?
If the swimmer is still upstream of your position, you have time for a fast partial repack and a second throw. Grab a rough armful of line back into the bag, don’t try to make it neat, and throw again. This is exactly why some people prefer a thicker rope: it recoils and re-throws better in a hurry.
If the swimmer is already past you, a second throw from where you’re standing is throwing at their back into moving water, which almost never works. Move. Run downstream along the bank and get ahead of them for a new angle, because your legs on a gravel bar are faster than they think they are.
And if the water is pushing them beyond where you can reach at all, the throw window is closed. Switch modes: the whistle signals your crew already knows get downstream boats and downstream backup activated faster than you can sprint. Recognizing a closed window early is a skill, not a failure.
Once the swimmer has the rope, start walking downstream along the bank instead of standing your ground. It converts a hard, ripping stop into a controlled pendulum that swings them toward shore, and it takes a load off both of you.
Practice reps and where the skill is taught
Practice both the underhand throw and the overhand throw. Which one you get to use is decided by the bank you’re standing on, the brush behind you, and the wind, not by which one you prefer.
Formal training helps more than any upgrade in this article. Throw bag work sits inside an ACA-certified swiftwater rescue course at the River Rescue level, which is Level 3 and the shorter, more accessible option. Full swiftwater with mechanical advantage systems and pin work is Level 4, and a Rescue 3 course covers similar ground through a different provider. If a course isn’t happening this season, flat water and your actual crew will still get you most of the way.
What the Swimmer Should Do When the Bag Lands
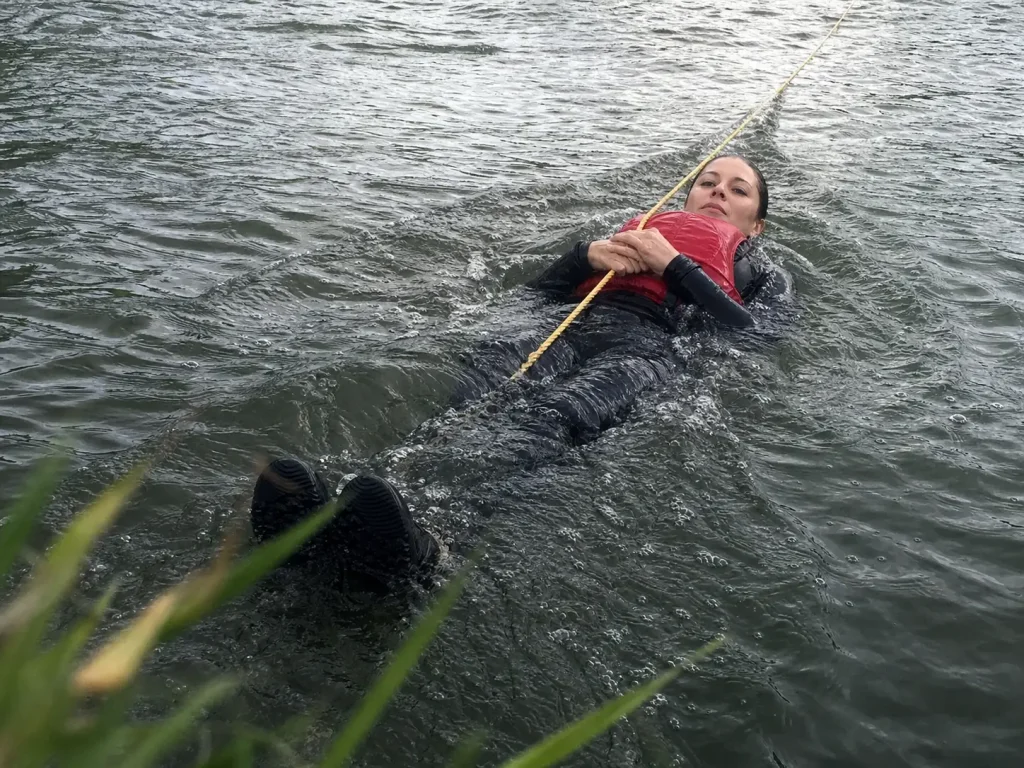
Half your crew will be the swimmer at some point. Every buying guide on this topic writes to the person on the bank, which means the person in the water gets taught nothing.
Grab the rope, not the bag
This is the 30 to 40 foot mistake. A cold, adrenalized swimmer reaches for the biggest, brightest floating object in front of them, and that’s the bag. The rope keeps paying out while they hold it, so they keep traveling downstream until the line finally comes tight, which can be most of a rapid later.
The fix costs one sentence at the put-in: the bag means nothing, grab the line. Nobody reasons this out in the water. You do whatever you rehearsed, so rehearse it out loud before you launch.
Never wrap it around anything
No hand wraps. No wrist loops. No coiling it around a forearm and definitely nothing near the neck. Under load, a wrapped rope becomes an entrapment, and rope burn is the mild version of that story.
Hold the line over one shoulder and pin it against your chest with both hands. That grip is strong enough for the tension of a pendulum, and it releases instantly if you need it to.
Roll onto your back and let the rope work
You should already be in the defensive swim position before the bag ever lands: feet up, nose downstream, on your back, breathing in the troughs. When the line arrives, take it over the shoulder, keep your face up, and stop fighting.
The current is going to swing you toward shore on its own. Swimmers who try to crawl toward the bank across the tension end up pulled under the line and swallowing water for no gain. Let the pendulum do it.
Cold makes all of this harder and faster than people expect. Grip strength and decision-making both go early in a swim, which is the practical argument for a dry suit and dressing for the swim instead of the air temperature on any run where the water is still carrying snowmelt.
When to Retire a Throw Rope You Can’t See Anything Wrong With
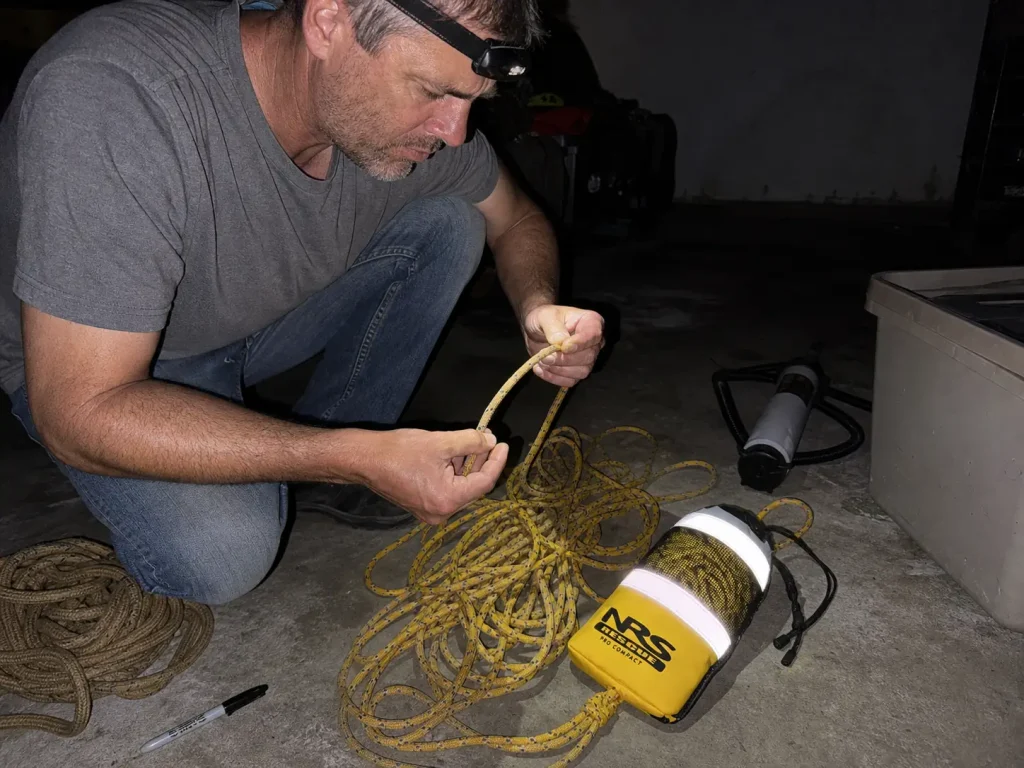
Your throw bag is the only piece of your kit that gets weaker while sitting still. Nothing about a sun-cooked line looks wrong from the outside, which is precisely the problem.
What sun does to a rope that looks fine
UV degradation of rope is invisible until it isn’t. Unprotected polypropylene loses roughly 30% of its strength after about six months of high-intensity sun exposure. Read that again with your own bag in mind. A rope that passes a visual inspection can already be a third weaker than the number it was sold with.
The longer arc: untreated poly is functionally finished after about a year of full exposure, while UV-treated line stored out of direct sun can run up to three years. Same rope, two very different retirement clocks, decided entirely by where it lives between trips.
Track age, not appearance
Write the purchase date on the bag with a marker. That single habit replaces every guess you’d otherwise make.
Then count exposure honestly. A bag that rides open on the frame all summer is aging at the fast rate. A bag that lives in a dry box between trips is aging at the slow one. Stack the knot fact on top of this: your line is rated at best case, minus up to 60% wherever there’s a knot, minus whatever the sun has taken. Those losses compound quietly.
The triggers you can actually check on your own gear:
- Stiffness or a chalky, dry feel in the sheath compared with a new section of the same rope
- Visible fading or a dusty, powdery surface where the sun hit it hardest
- Glazing or fused fibers from friction under load
- Any core showing through the sheath, anywhere
- One hard shock load, a pin, or a big fall taken on the line
Storage and the end-of-season routine
Rinse the rope, then dry it completely before it goes back in the bag, because a damp stuffed rope in a hot garage is the worst storage condition on this list. Keep it out of direct sun, away from heaters, and far from solvents and fuel.
Repack it at the start of the season rather than the end, so the first throw of the year is going out of a bag you just packed with your own hands. That habit fits naturally into the off-season gear routine that isn’t a once-a-year job, which is where the rest of your kit gets the same treatment.
When a rope retires, demote it. It becomes a tie-down, a tow line, a tree strap for the shuttle rig. What it never does is quietly stay in the rescue kit because it still looks okay.
The Bottom Line
Buy the rope, not the rating. Diameter and core material determine what your line can actually do, while the NFPA badge mostly tells you which agency’s purchasing department signed off on it.
Run two bags. A compact one on your waist that’s always with you, and a heavier line rigged reachable in the boat for pins and long throws. That combination solves more real scenarios than any single premium purchase.
Practice the throw and brief the swimmer. The rope, not the bag, feet up and nose downstream, and no wraps around anything. Thirty seconds at the put-in.
Before your next trip, pull the bag off the frame, throw it three times on flat water, repack it the same way each time, and write the purchase date on it with a marker. That’s twenty minutes, and it’s the whole difference between owning a throw bag and having one.
Frequently Asked Questions
01What is the best rope for water rescue?
A floating line between 5/16 and 3/8 inch: polypropylene for swimmer rescues, a Spectra or Dyneema core if your crew works pinned boats. Polypro runs about 1,900 lb in 3/8 inch and Spectra roughly double, but the stronger line is slicker to grip with cold hands.
02How do you pack a rope throw bag so it does not tangle?
Feed the rope in loose handfuls without coiling it, the same way every time, because coils are what cause birdnesting inside the bag. Work from the bag end inward and keep the line untwisted. A consistent routine matters more than speed.
03Should a river rescue throw bag be worn on your waist or kept in the boat?
Both, if you can, and that is the two-bag system. A compact waist bag on your rescue PFD belt is the one that is on you while scouting, and a longer boat-stored line handles pins and wide water. Buying one? Keep it in the boat, reachable.
04How often should you replace a throw bag rope?
Untreated polypropylene left exposed is finished after roughly a year, while UV-treated line stored out of the sun can last up to three. Unprotected poly can shed about 30% of its strength in six months of strong sun, so retire by age and exposure rather than appearance.
05Do you need a swiftwater rescue course to use a throw bag?
You do not need one to own a bag, but you need reps before the day it matters. Throw bag skills sit in an ACA River Rescue course at Level 3, while full mechanical advantage and pin work is Level 4. Flat-water practice with your crew is the next best thing.