
In this article
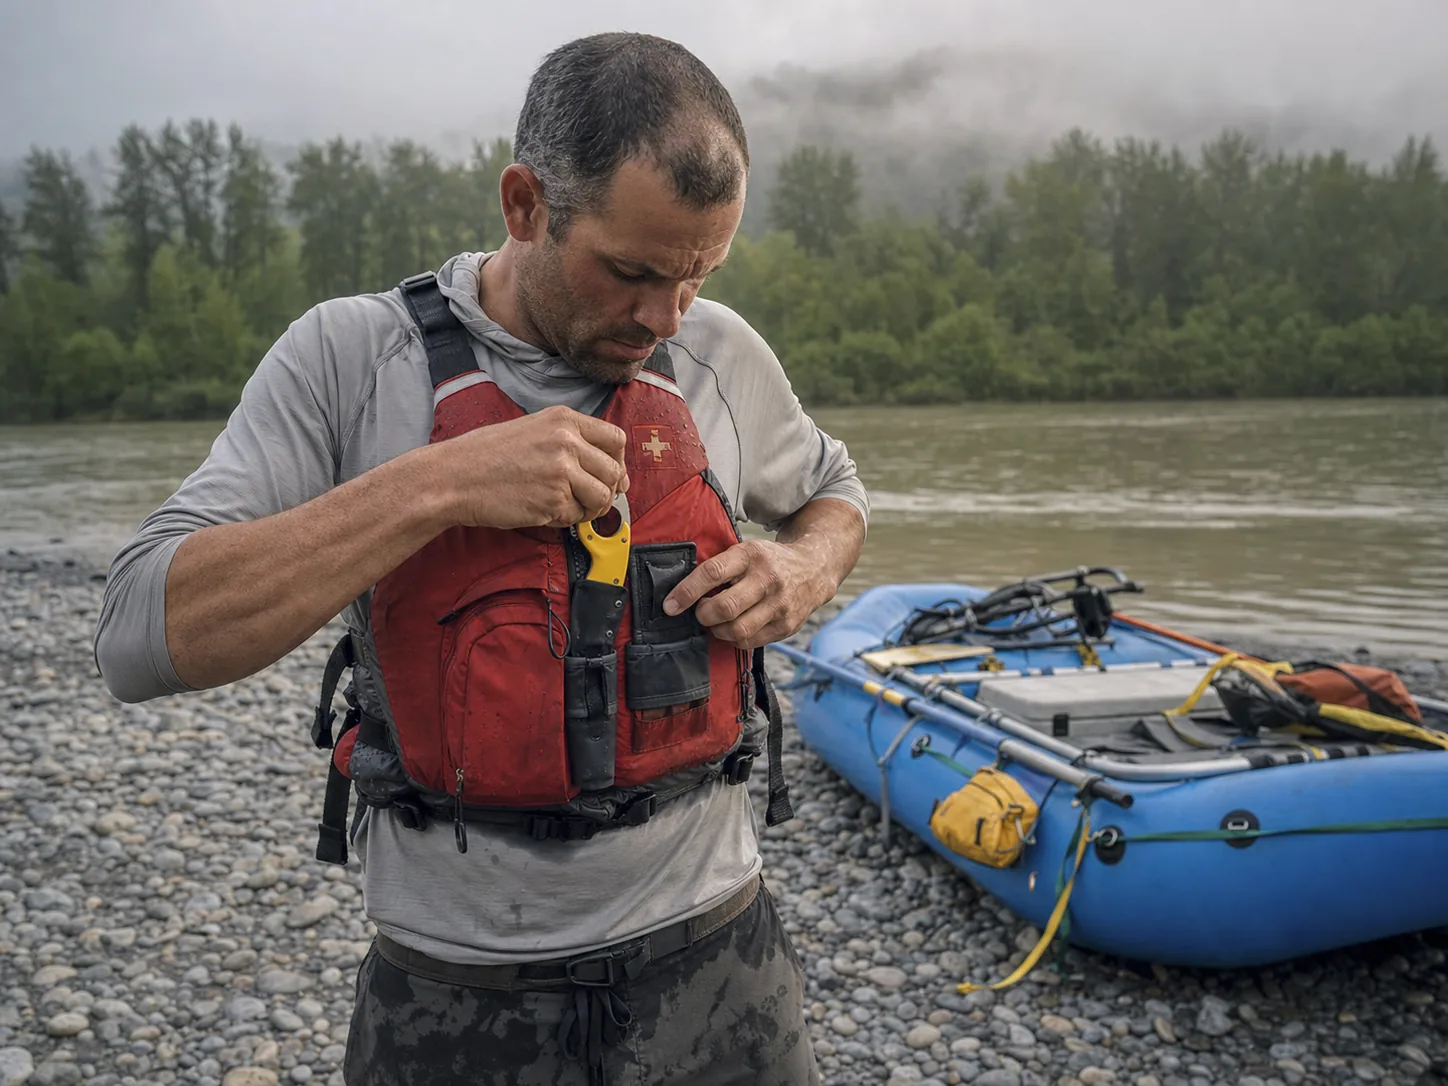
You reach down for the knife on your PFD and your hand closes on an empty sheath. It went downriver two rapids ago, and you never felt it leave. That scenario is the reason this guide spends as much time on plastic as it does on steel: ask around long enough and you find that almost nobody’s blade snaps, while plenty of boaters have reached for a knife that simply wasn’t there anymore. Below is what actually matters when you buy a river knife, which picks make sense for the kind of boating you do, and why the sheath is the part that quits first.
Here’s how the picks stack up before we get into why.
| Knife | Blade & Tip | Sheath Type | Best For |
|---|---|---|---|
| CRKT Bear Claw | 2.39″ AUS-8, blunt tip, Veff serrations | Friction-fit, finger hole | Best overall |
| Gear Aid AKUA | Serrated, blunt tip | Quick-release latch | Best budget |
| NRS Pilot Knife | 3.6″ 420 HC, blunt tip, combo edge | Friction-fit Thumbs Up | All-around river tripper |
| NRS Titanium Co-Pilot | 2.25″ titanium, blunt tip | Squeeze-release | Packrafters and kayakers |
| Eezycut Trilobite | 440A replaceable, shrouded groove | Harness or wrist mount | Numb, gloved hands |
What a River Knife Is Actually For
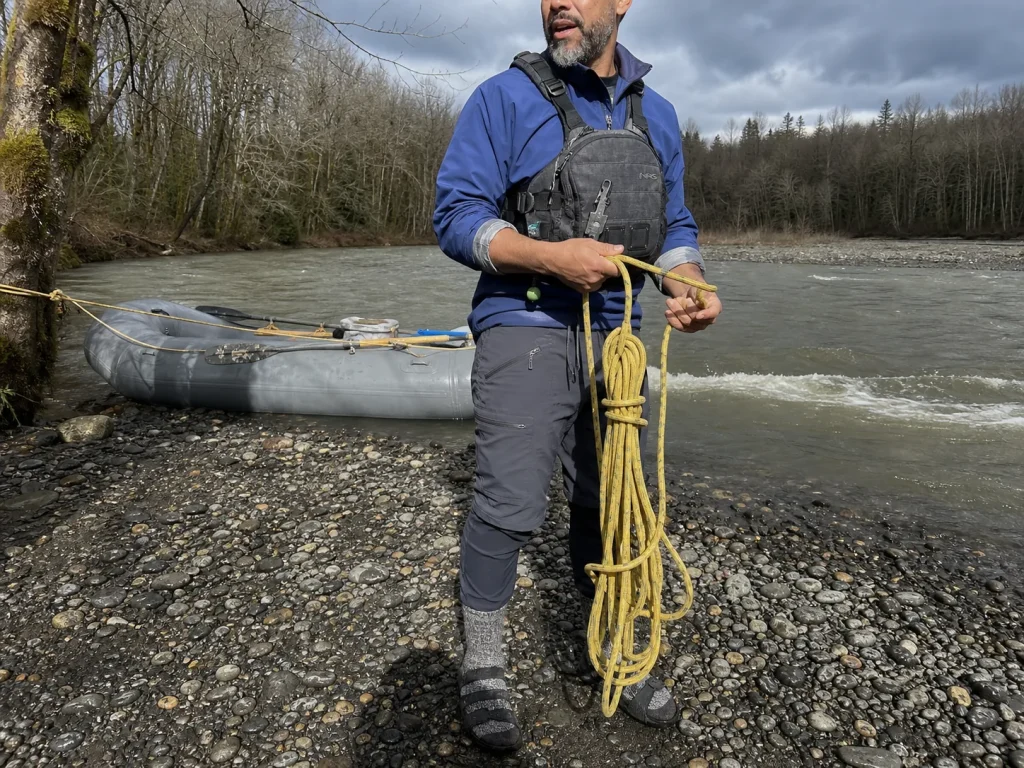
Most private boaters buy a knife because a packing list told them to. It gets clipped to the PFD on day one and never thought about again, which is a shame, because the job it exists for is narrow and specific: cutting a loaded rope or piece of webbing off a person, in current, with seconds to work.
Rescue Knife vs Utility Knife
A rescue knife is built around one motion: get it out, get it through the rope, get it away from the person. Everything about it, from the blunt tip to the serrated edge to where it rides on your chest, serves that motion. A utility knife is built for leverage, point work, and fine control at camp. A knife that slices salami beautifully can be actively bad at the one thing you bought it for, and the reverse is just as true.
The numbers say this is worth taking seriously. American Whitewater’s own accident database, which has tracked entrapment incidents since 1972, catalogues 66 equipment-entrapment incidents since 1983 that a knife might have resolved. Thirty-eight of those came from rope or perimeter-line entanglement. That’s a countable track record, not a hypothetical someone invented to sell blades.
Who Actually Needs One
Here’s the honest version, since this blog isn’t in the business of moving inventory: equipment entrapment accounts for roughly 3% of catalogued river fatalities. Foot entrapment is about 2%. The things most likely to hurt you on a river are cold water, hydraulics, and your own feet, not a rope you couldn’t cut. Don’t let knife anxiety crowd out the bigger risks.
That said, if you’re running Class III and up, if there’s rope on your boat, or if you’re rigging anything, carry one. It’s the same class-by-class logic we apply to every piece of rescue kit, starting with the helmet: match the gear to the water you actually run. Most of a river knife’s real work happens in a pin scenario.
The common mistake isn’t buying the wrong knife. It’s treating the purchase as the safety measure. Buying it is the easy 10%.
Blunt Tip vs Pointed Tip
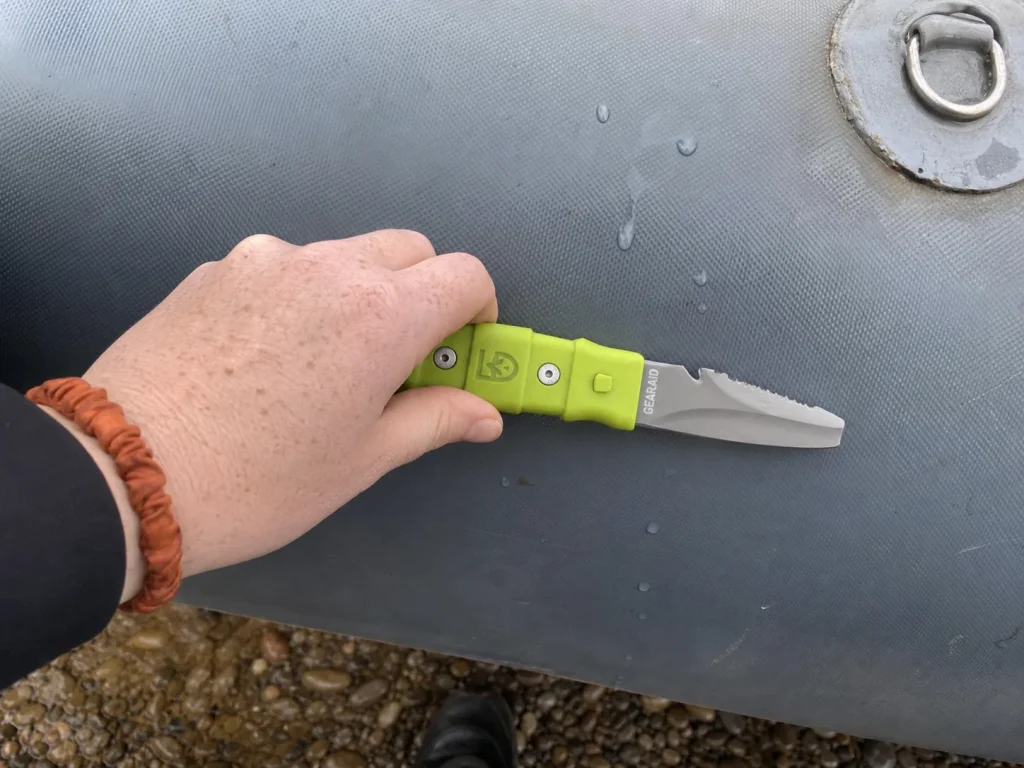
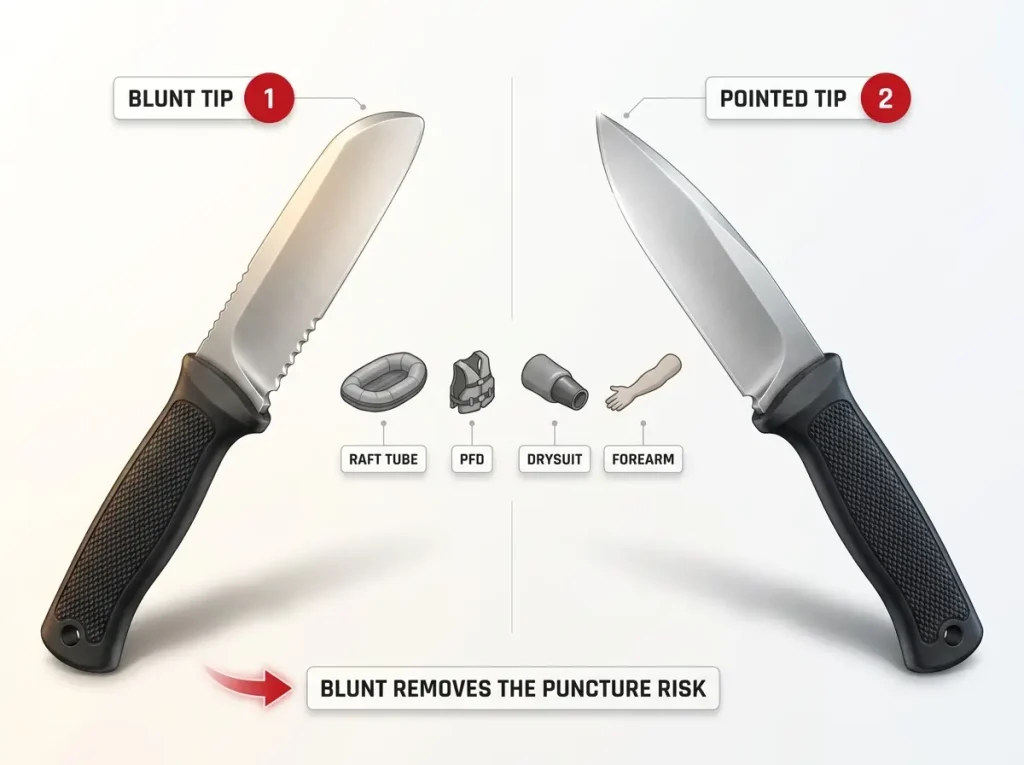
If you’re coming from a hunting or EDC knife, a river knife looks broken. Someone cut the end off. That squared-off nose is the single most deliberate design choice in the category, and it exists because of what sits within arm’s reach of that blade in a real rescue.
Why Blunt Is the Default
Picture what’s around you when the knife comes out: an inflated raft tube, your PFD, somebody’s drysuit, and a person. A pointed blade that pops loose, gets dropped, or slips under load punctures any of them. The blunt tip removes that failure mode completely, which is why it’s treated as a hard requirement across the category.
The cost is real but small. You can’t pierce, and you can’t start a cut in the middle of a tensioned section. You work from an edge, always. On a cold-water run, that tradeoff gets more obvious, since a slit sleeve or a nicked gasket on the drysuit you’re wearing on a cold-water run turns a gear problem into a cold problem in about ten minutes.
The Case the Guides Make for a Point
Every roundup on the internet says “blunt, end of story.” That’s not quite honest, and you should hear the other side.
A vocal minority of working guides argue that a point is sometimes the only thing that will penetrate thick Hypalon fast enough in a real pin. One long-running BladeForums thread includes an account from a boater pinned under a raft who credits a pointed tip with being what actually got him through the tube and free. It’s a real disagreement, held by people who’ve been there.
Blunt is still the right default for something like 95% of boaters, and it’s what every pick below uses. But if you guide pin-prone water for a living, know that the argument exists and that it doesn’t come from armchairs. You don’t notice how close that blade is to the tube until you’re cutting with the raft pinning your forearm.
Serrated, Plain, or Combo Edge
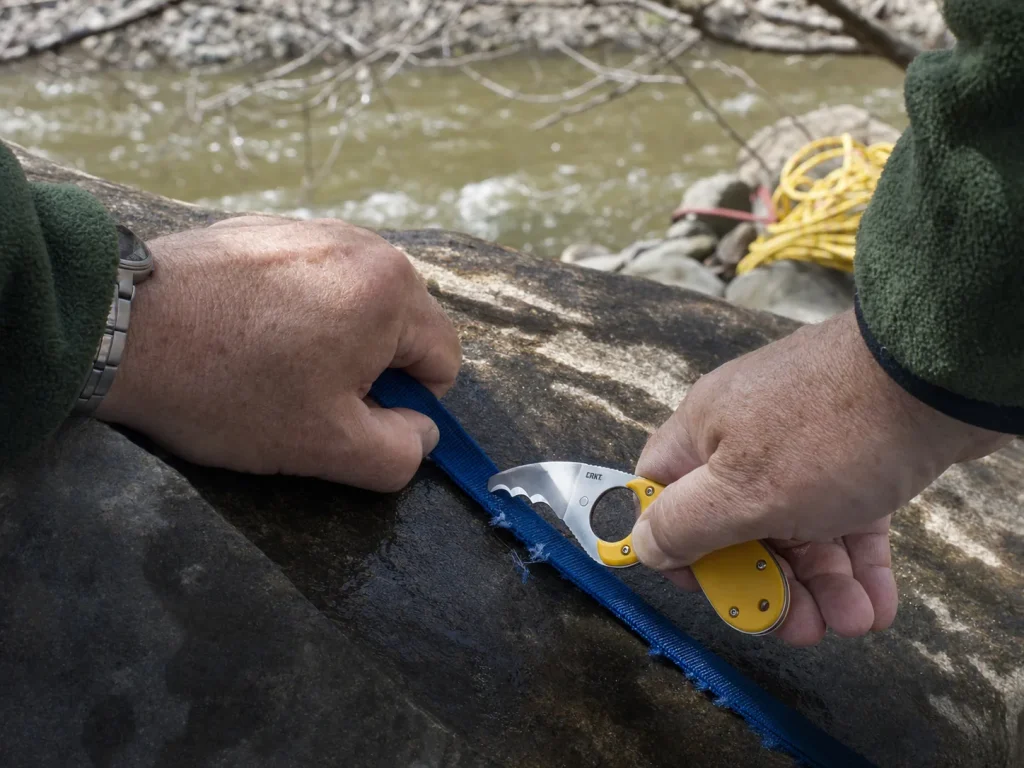
Everybody tests a new knife on paper or a stray branch at camp. Nobody tests it on a wet, loaded, half-frozen length of one-inch tubular webbing, which is the only cut that matters.
What Wet Rope Does to a Plain Edge
Wet, fibrous rope under load is exactly what serrations exist for. The teeth bite and saw instead of sliding along the fiber. A plain edge cuts cleaner on soft material and sharpens with anything you own, but it also slides on wet rope at the precise moment you can’t afford it to.
Rope type matters here too, and it’s worth knowing before you’re in a rope rescue rather than after. Static rescue rope and dynamic line don’t behave the same way under a blade, and tubular webbing behaves like neither. If the rope on your boat is static, you’re cutting something that doesn’t stretch away from the edge, which is good news.
Where a Combo Edge Earns Its Keep
The combo edge is the honest compromise, and it’s what most of the category has settled on: serrations near the handle where your power is, plain edge forward for everything else. You’ll see two named patterns on the shelf, Veff on the CRKT and Triple Point on the Spyderco. Both work. Neither is worth choosing a knife over.
Re-sharpen right after any rope or webbing cut, not when the edge finally feels dull. One pass through loaded webbing takes more off an edge than a whole season of camp chores. If you used it, sharpen it, same day.
Fixed Blade vs Folding
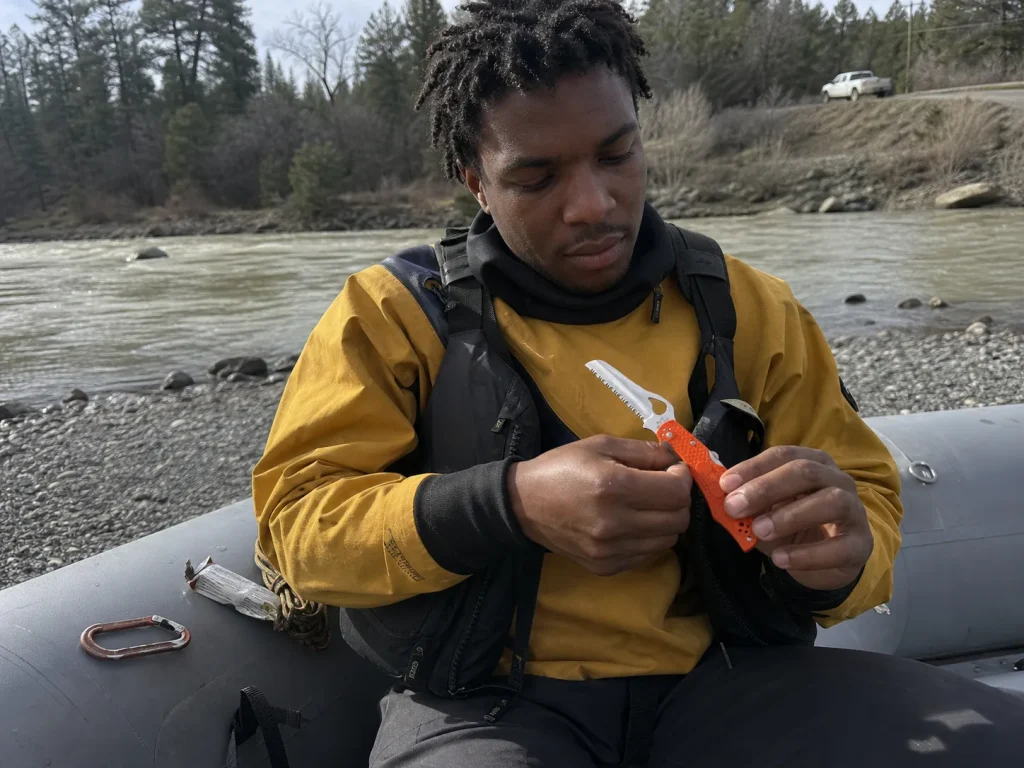
The folder in your PFD pocket is a fine knife. It’s also a knife that asks you to perform a two-handed fine-motor task while a rope is pulling someone under.
The Hinge Is the Problem
A folder needs opening, and opening needs a thumb stud, a nail nick, or a flipper. Those are all fine-motor tasks, and numb, wet, gloved hands do fine-motor tasks badly. A fixed blade deploys in one motion, one hand, with no mechanism between you and the edge, and a full tang running the length of the handle means there’s no joint to give out under load. That’s the whole argument, and it’s a good one.
There’s a secondary issue people mention less: lock failure under a hard sideways load. A lockback isn’t engineered for the torque of sawing through loaded webbing at a bad angle. It’s not common, but it’s not zero either, and it’s an odd risk to accept when a fixed blade costs the same.
Where a Folder Still Belongs
In your PFD pocket, as a utility blade. Cutting cord, opening packages at the takeout, camp jobs where you have both hands and all the time in the world. That’s a legitimate role, and it leads somewhere useful.
Plenty of experienced boaters run two knives on purpose: a dedicated rescue blade that never touches camp chores, plus a separate everyday folder for everything else. The rescue edge stays guaranteed sharp because nothing dulls it, and the sheath isn’t getting worn out by a hundred trips to the snack bag.
Steel, Titanium, and What Actually Rusts
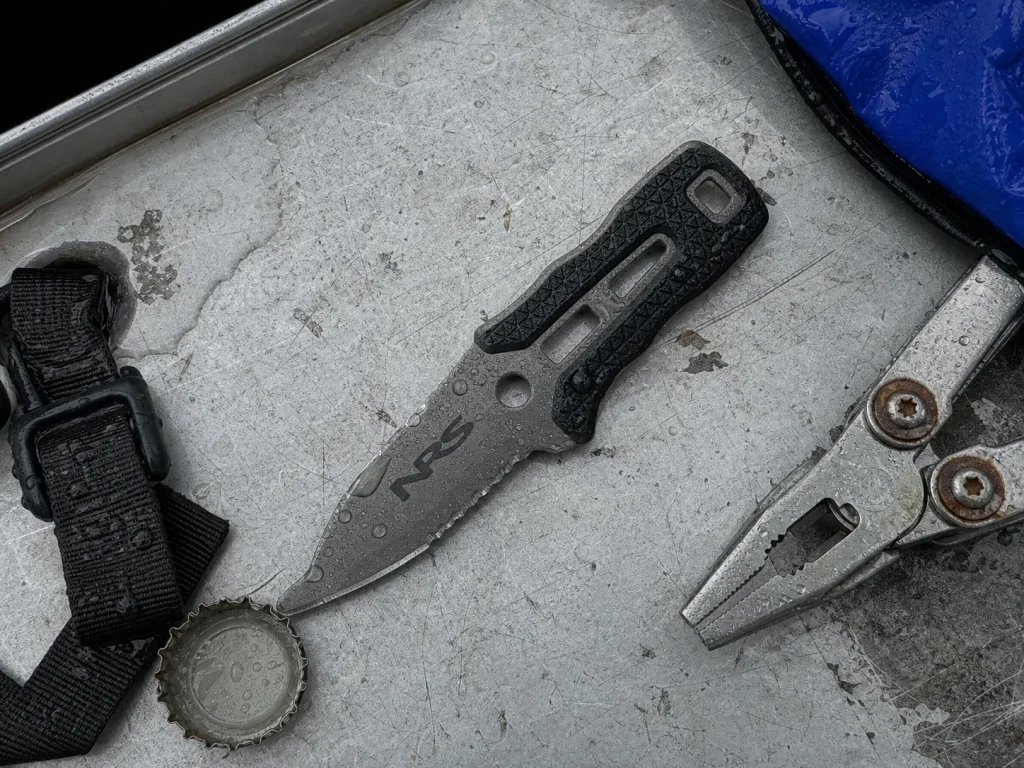
Steel is where knife marketing gets loudest and where a river boater’s actual needs are narrowest. You’re not batoning firewood. You’re cutting rope maybe never, and storing the thing wet constantly.
Budget Steels and What They Cost You
The shelf runs from budget 420 HC and 8Cr13MoV, through mid-grade AUS-8, up to LC200N and fully rust-proof titanium. What you’re really buying as you climb that ladder is corrosion resistance, not cutting power.
Here’s the part the spec sheets bury: for most private boaters on freshwater who rinse and dry their gear, a budget stainless steel is fine. Steel is not where your money buys the most safety. The sheath is, and we’ll get there.
Do the freshwater rinse after every trip, not just saltwater runs. River silt and hand sweat corrode steel almost as fast as salt does, and the boaters with rusty knives are almost always the ones who assumed fresh water meant no maintenance.
Titanium and LC200N
Where premium metal genuinely earns it: saltwater put-ins, and anyone who stores gear wet in a sealed hatch or dry box. That’s the real use case. A steel blade sitting in a dark, damp box between trips rusts on its own schedule whether you thought about it or not.
Titanium never rusts and never needs the check-for-rust step. That’s what you’re paying for. You are not paying for better cutting, because it doesn’t hold an edge like good steel does, and for cutting rope that’s a trade worth making.
How Your Sheath Holds That Knife
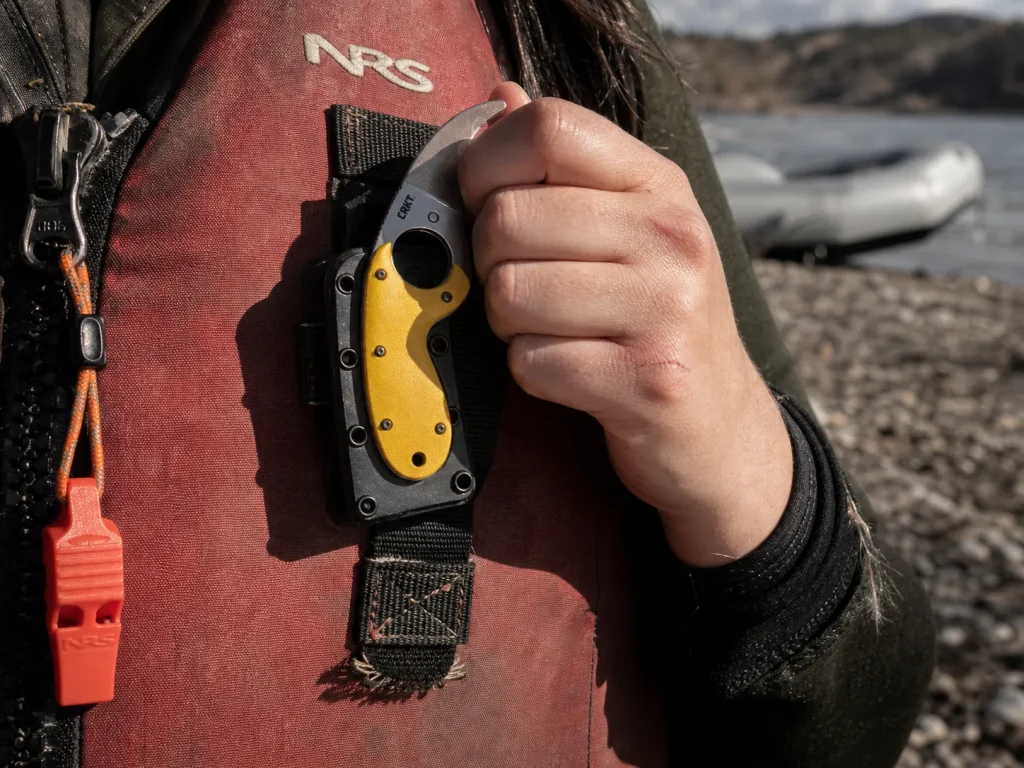
This is the part of the purchase nobody researches. Boaters compare blades for an hour, accept whatever plastic the knife shipped in, and then wear that plastic on their chest for five seasons. It’s backwards, and the next two sections are about why.
Friction-Fit, Quick-Release, and Squeeze-Lock
Three retention systems cover almost everything on the shelf. A friction-fit sheath holds the blade with a molded plastic detent, and NRS’s Thumbs Up design is the one you’ll meet most often. A quick-release sheath uses a real mechanical latch, like the Gear Aid AKUA’s. A squeeze-lock sheath releases when you pinch the housing.
They’re not equally good, and the difference has nothing to do with how they feel in the shop. It has to do with how they fail, which is the next section.
Where It Rides on Your PFD
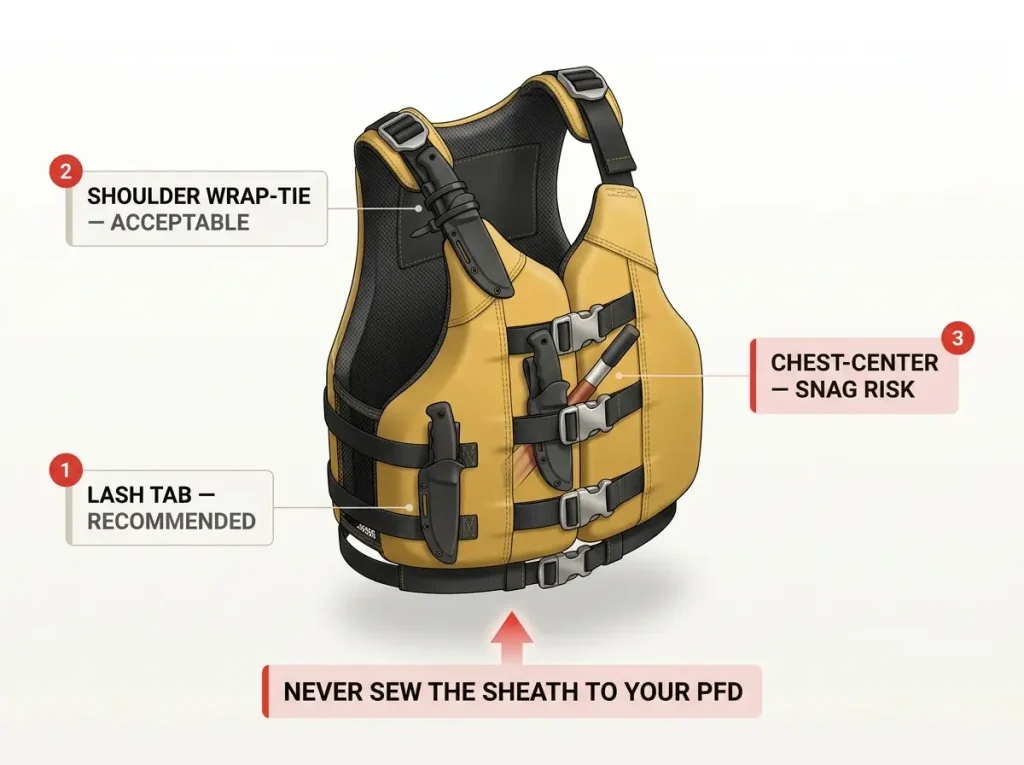
PFD mounting starts and ends with the lash tab on your PFD. That’s what it’s for, and it’s what the sheath was designed to attach to. If your PFD doesn’t have one, a wrap-tie or zip-ties to a shoulder strap is a legitimate fix. Rotate the zip-ties yearly, because UV makes them brittle and a brittle zip-tie is just a slower way to lose the knife.
Two mistakes come up constantly. The first is mounting front-and-center on the chest, where an oar handle and your own hands catch it all day and it turns into a snag during a raft re-entry. The second is worse.
Do not sew the sheath onto your PFD. It voids the manufacturer’s warranty, and it’s prohibited outright on permitted rivers like the Grand Canyon, where you can be turned back at the put-in for it. Boaters do this with good intentions, usually after losing a knife, and it’s the one fix that can end a trip before it starts.
When Your Hands Are Numb
Here’s the selection rule almost nobody writes down, and it’s the one that should drive your choice if you run early-season snowmelt.
A numb hand can still close a fist. A numb hand cannot execute a pinch-grip release, find a thumb stud, or do anything requiring two fingers to cooperate.
So for cold water, an ergonomic grip means one specific thing: a large fixed handle or a finger hole, paired with a squeeze or trigger lock. Anything a closed fist can operate. That’s the entire criterion.
This is the actual reason the CRKT Bear Claw’s oversized finger hole gets singled out over and over in user threads as the one feature that still works when hands are numb from ice water. It isn’t ergonomic marketing. It’s that a closed fist is the last grip you lose. The same logic applies if you’re boating in gloves, which stack another layer of clumsiness on top of the cold.
Why Sheaths Fail First and the Ritual That Catches It
Nobody’s blade snaps. People just reach down one day and the sheath is empty. Every competing roundup flags that “some users report security concerns” and then moves on to the next product. Nobody explains the mechanism, so here it is.
The Detent Wears Out
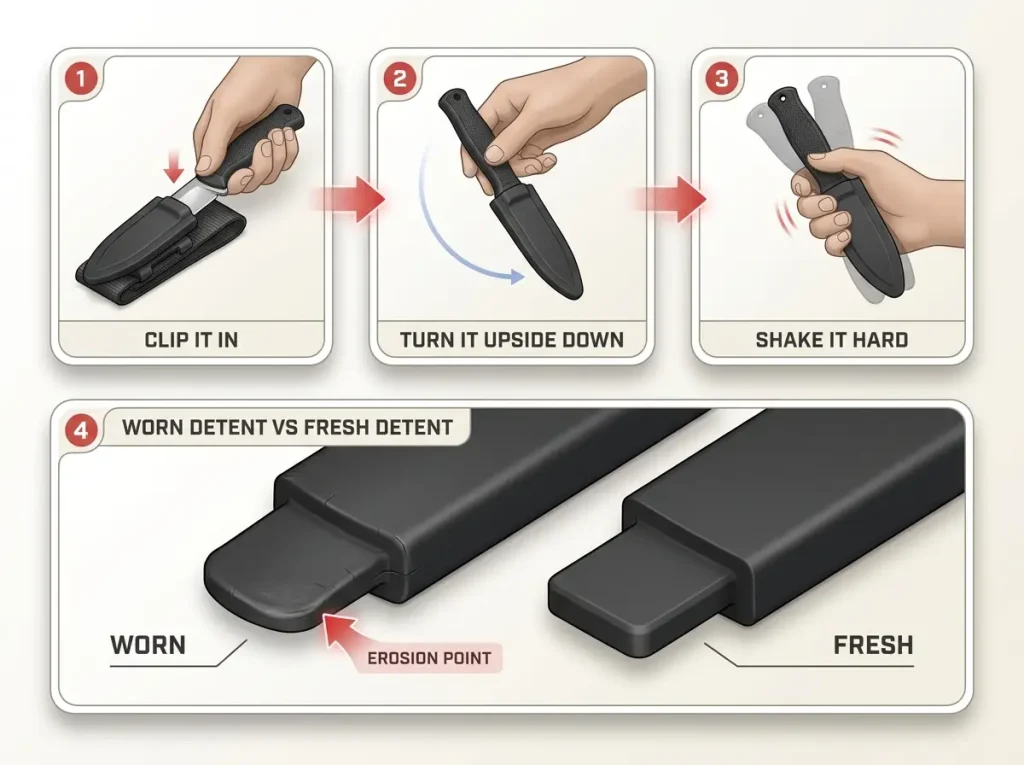
A friction-fit sheath holds your knife with a molded plastic detent, a small formed tab that grips the blade and clicks when it seats. Every single time you draw the knife and push it back in, that plastic gives up a little material. It’s not a defect. It’s how friction works on soft plastic.
The problem is that it never announces itself. The sheath goes from “clicks in firmly” to “clicks in” to “clicks in, mostly” across seasons, and none of those steps feel like a warning. By the time it’s loose enough to notice, it’s been marginal for a while. Then you take one hard swim, or one rough re-entry, and the knife is gone.
Sheath retention deserves more of your attention than blade steel, and this is why. The blade will outlive you. The plastic won’t.
The Shake Test
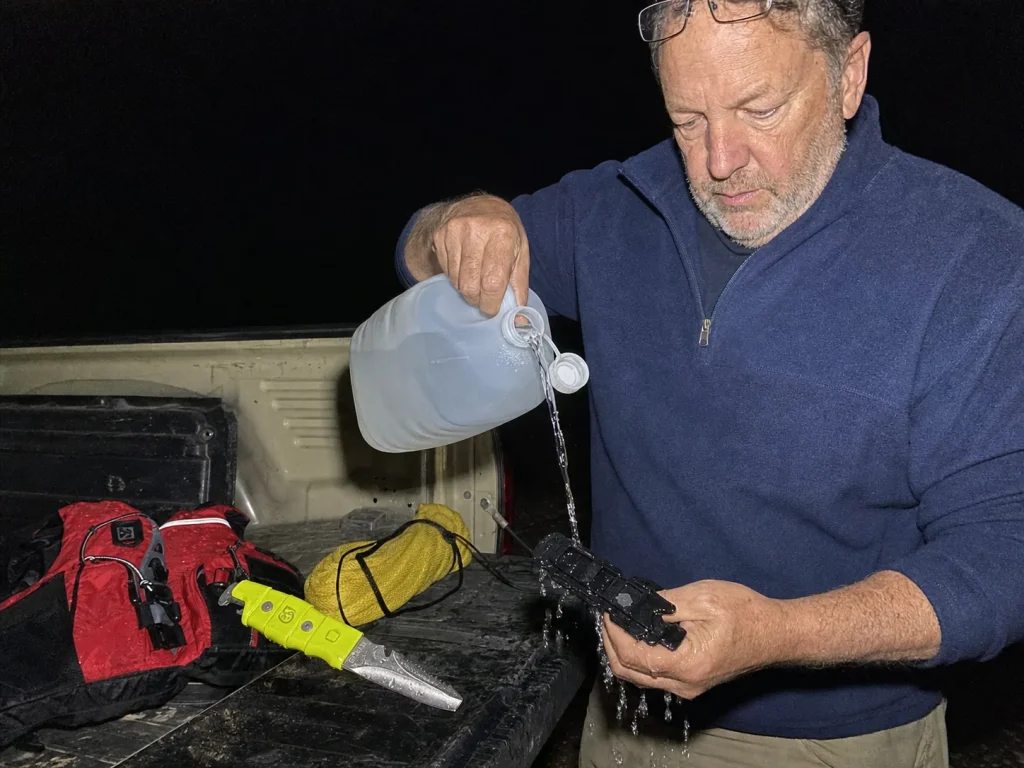
Ten seconds, before every put-in. Clip the knife into the sheath, turn the whole thing upside down, and shake it hard.
If the knife falls out, retire that sheath today. Not after this trip. Today.
That’s the whole test, and it’s the highest-value habit in this article. It costs nothing, requires no gear, and catches the exact failure mode that no amount of comparing steel grades will protect you from.
When a friction-fit sheath starts feeling loose, drop a metal washer under the detent screw before you replace the whole thing. It restores tension and can buy you another season for about a dime. It’s a stopgap, not a cure, so keep shake-testing it.
Not every mechanism fails the same direction, and that’s worth knowing. A worn friction-fit detent fails toward falls out. A squeeze-lock sheath packed with fine sand fails toward stuck, meaning it gets harder to open rather than easier to lose.
Stuck is the safer direction by a wide margin. Clear the grit after a sandy put-in and it’s a rinse-and-check problem, not a panic.
The After-Every-Trip Ritual
“Keep it sharp” is the entire maintenance advice you’ll find elsewhere. It’s not enough, and it’s aimed at the wrong part. Here’s the real version, and it takes about two minutes.
- Rinse the blade and the sheath in fresh water, separately, every trip. Both. The sheath collects silt in exactly the places the detent needs to be clean.
- Air-dry completely before the knife goes back into a sealed sheath. Trapped moisture rusts the blade and degrades the sheath plastic at the same time.
- One drop of light oil on a folder’s pivot, if you carry one.
- Re-sharpen after any rope cut, not when it feels dull.
- Shake-test before the next put-in, which is where this loop closes.
Then there’s the part that surprises people: plan to replace the whole knife-and-sheath unit every two to three years under regular use. Not the blade, which is fine. The unit, because the plastic is consumable and pretending otherwise is how boaters end up with empty sheaths.
One experienced boater who’s written about this at length does exactly that, on a schedule, for exactly this reason. Budget for the unit, and treat it with the same after-every-trip habit the rest of your kit needs.
If you want the concrete version of why any of this matters, it’s the paddler whose sheath was ripped clean off his PFD mid-rapid and swept downriver, never recovered. Nothing wrong with his blade. His blade was excellent. It’s at the bottom of a river.
River Knife Picks by the Boating You Actually Do
Every pick below clears the two non-negotiables this guide has been building toward: a blunt tip, and a retention system a closed fist can operate. The categories are organized by the boating you actually do, because a packrafter counting grams and a guide on Class IV are not buying the same tool.
Each card names its sheath type, because after the last section, that’s the spec you’re shopping for.
Best Overall — CRKT Bear Claw
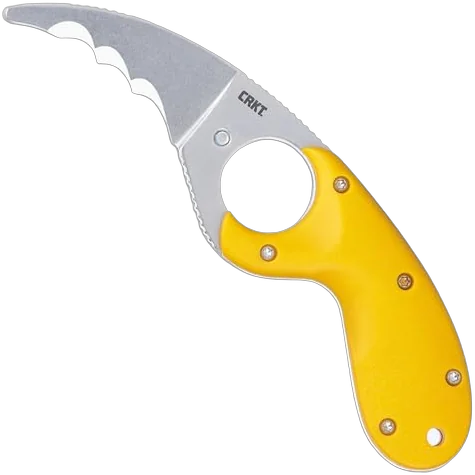
The CRKT Bear Claw wins on the criterion that matters most in the water most of us are actually scared of. Cold hands are not an edge case on a spring run. They’re the default condition, and this is the blade that accounts for it.
Honest trade-off: it ships with a friction-fit sheath, which is the exact mechanism the last section told you to watch. That’s not a reason to skip it, since the grip advantage is worth more than the sheath disadvantage costs. It is a reason to shake-test it religiously and to expect to replace the unit on schedule. Buy it knowing that, not despite it.
Best Budget — Gear Aid AKUA Blunt Tip Paddle Knife
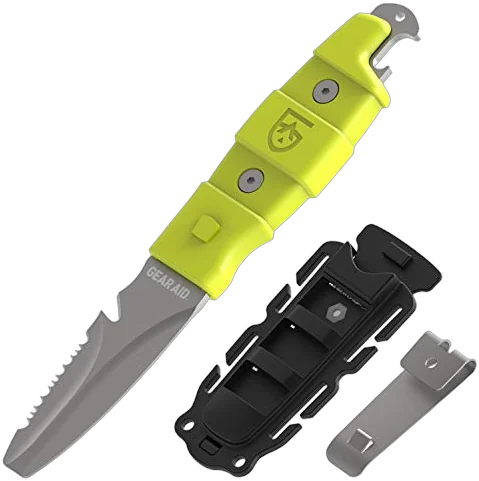
Here’s the thing about the budget tier in this category: it isn’t a compromise. The Gear Aid AKUA gives you a blunt tip and a mechanical quick-release sheath, which are the two things that decide whether the knife is on your chest when you need it. Everything above this tier buys refinement, not safety.
If you’re outfitting a whole crew, or buying a second knife so the rescue blade stays out of the salami, this is the one. Spending more here is a preference, not an upgrade.
Best All-Around River Tripper — NRS Pilot Knife
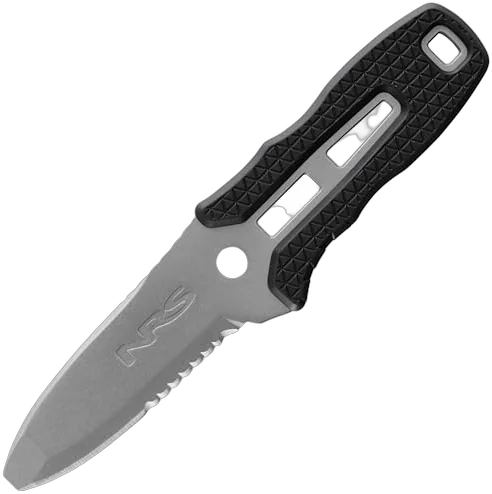
The NRS Pilot Knife is the pick for multi-day trips where the knife has a second job. That 3.6″ combo edge does real work at camp, and the length that makes it useful on a cutting board is the same length that makes it confident on webbing.
Its Thumbs Up friction-release sheath is exactly the mechanism this article spent a whole section on. That’s not a knock so much as a fact you should carry into the purchase: this is a knife with a consumable sheath, and it belongs to a boater who will shake-test it and replace the unit on schedule. If that’s not you, the AKUA’s latch asks less of your discipline.
Best Ultralight for Packrafters and Kayakers — NRS Titanium Co-Pilot Knife
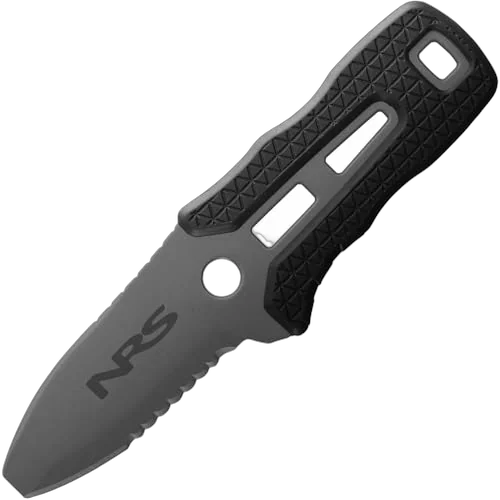
If you’re counting grams, the NRS Titanium Co-Pilot is the answer, and it rides well on the kind of minimal setup a packrafter already runs. But weight isn’t really why it’s here.
It’s here because of storage. Packrafters and kayakers stuff wet gear into sealed compartments and open them a week later. Steel does not enjoy that.
Titanium genuinely doesn’t care, and pairing it with a squeeze-release that fails toward stuck gives you the only pick in this guide with no maintenance asterisk at all. If you want the same role for less, the Pilot Knife does it with a rinse-and-dry habit attached.
Best for Numb Hands — Eezycut Trilobite
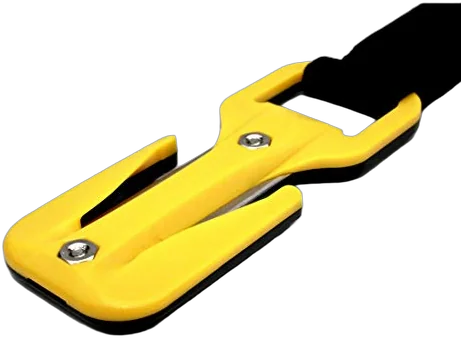
The Eezycut Trilobite is the most direct answer to the numb-hands problem in this guide, because it removes the requirement entirely. There is no correct grip. There is no blade angle. Line goes in the groove, you pull, it cuts.
It’s not a general-purpose knife and it doesn’t pretend to be. You can’t use it for camp, you can’t use it on anything you can’t feed into a slot, and it’s a specialist tool in a category full of generalists. That’s fine. For early-season snowmelt, or for anyone who boats in gloves as a matter of course, being a specialist in the one thing that goes wrong is the point.
Best Folding Backup — Byrd by Spyderco Cara Cara 2 Rescue
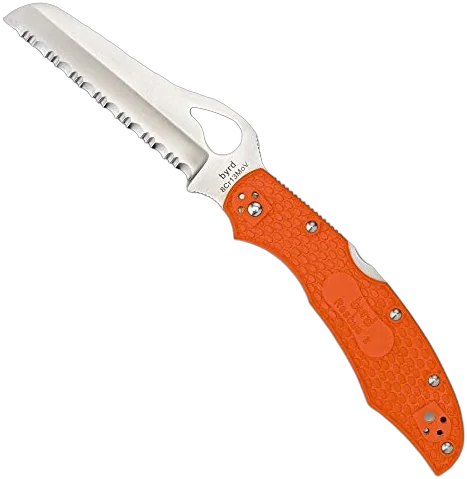
Read the badge carefully: backup. The Byrd Cara Cara 2 Rescue is the folder for the two-knife system, the one that opens dry bags and cuts cord so your rescue blade never has to. In that role it’s excellent and costs very little.
As a primary rescue tool it’s the wrong shape, for the reasons the fixed-vs-folding section laid out. Buy it as the second knife, not the first. If you only own one knife, own a fixed one.
Building the Reflex Before You Need It
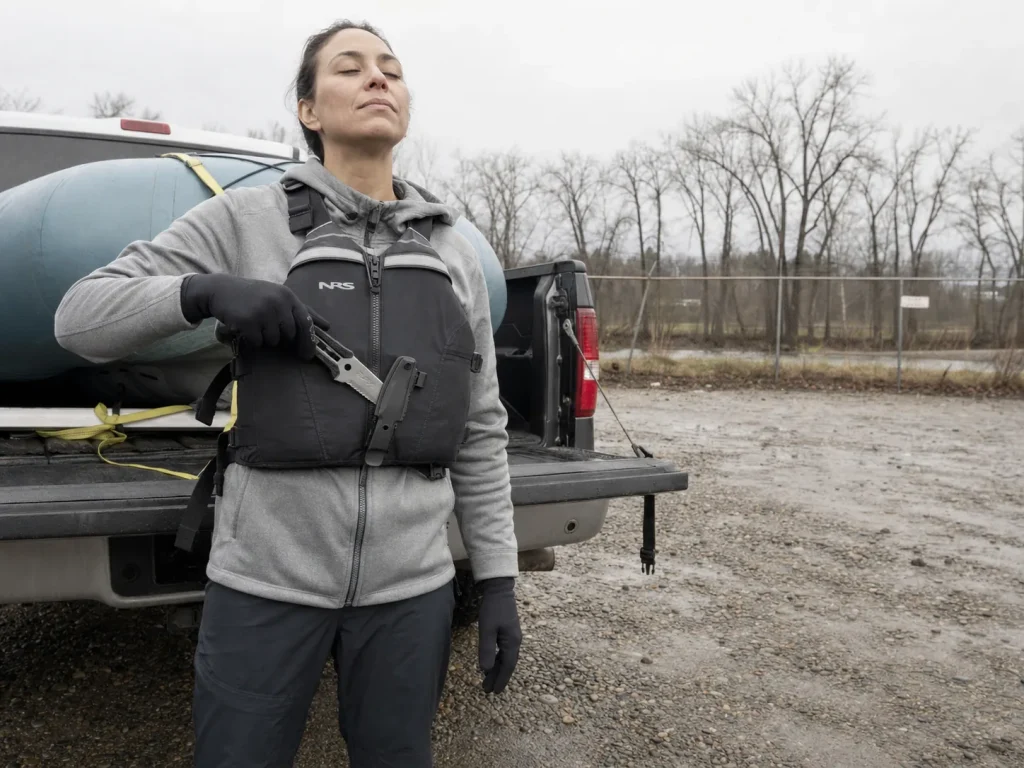
You will not rise to the occasion. Under a wrapped raft with a rope on your leg, you drop to whatever motion your hands already know, and that motion has to be built somewhere other than the rapid.
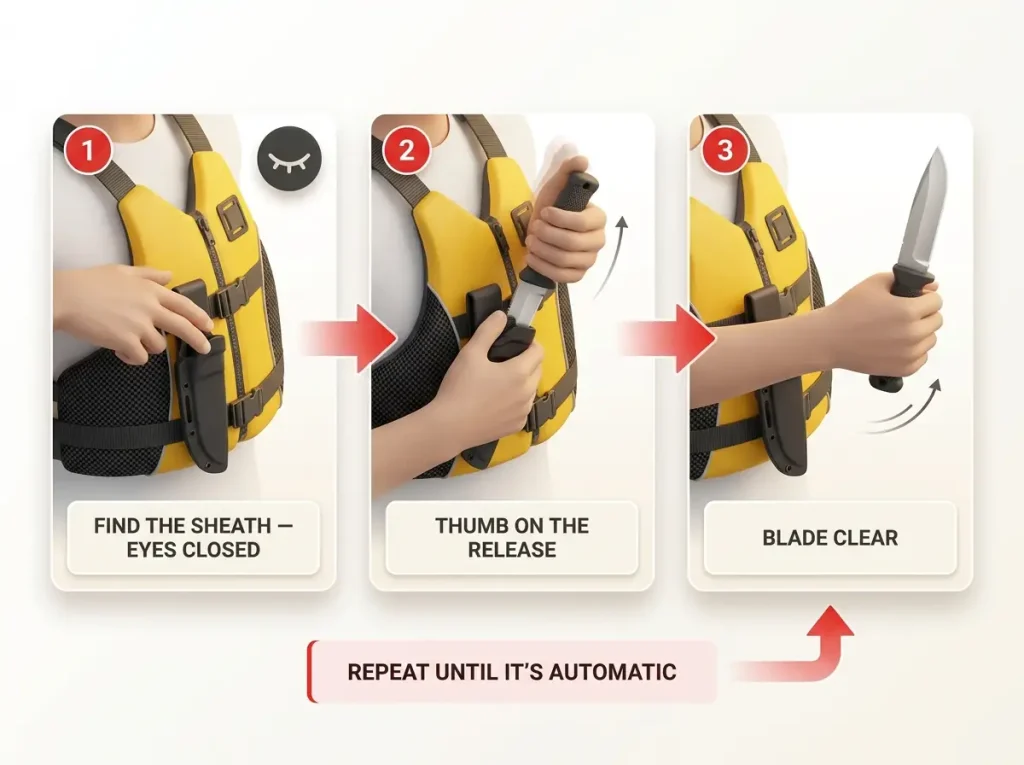
This is the part every roundup skips with one sentence about practicing. Here’s an actual deployment drill, in three tiers.
The At-Home Draw
Put the PFD on the way you’d wear it on the water. Close your eyes. Draw the knife, one hand. Reseat it. Do it again, and keep doing it until the motion is automatic, then with gloves on, then with the other hand.
That last part matters more than it sounds. The tangle decides which arm you get, not you. If you can only draw with your dominant hand, you’ve built half a reflex, and the river gets to choose which half you need. Muscle memory is cheap to build in a garage and impossible to build in a hole.
The Put-In Shake Test
Ten seconds, every launch. It’s a gear check that doubles as a rep, which is the best kind of habit: it catches the failing sheath and it keeps your hands familiar with where the knife lives. Boaters who do this don’t think about their knife on the water, which is the whole goal.
The Cut-Out Scenario
For anyone who guides, or who runs Class IV and up regularly, there’s a supervised drill worth knowing about. The Swiftwater Safety Institute runs what they call a cut-out scenario: a rope is tied around one leg, the student lies down in moving current, and while submerged they climb their own leg hand over hand until they reach the knife and cut themselves free.
This is a professional-course-only drill. Never attempt it solo, and never in your backyard creek with a buddy who watched a video. It exists inside a curriculum with instructors and safety in place, and that context is not optional.
Formal training puts the knife and the skill in the same room. A university-run Swiftwater Rescue Techniques course lists a river knife among the items students can bring, and spends three days teaching the entrapment rescue techniques you’d be using it inside of. The purchase and the training are the same conversation, which is worth remembering when a knife feels expensive.
The mistake to avoid is the passive one: buy the knife, clip it on, let five years go by. The reflex never gets built, and the one time it matters, cold hands and adrenaline mean you freeze. It’s the same reason you drill with the throw bag you’re already practicing with instead of just owning one.
How Many Knives Your Crew Actually Needs
The assumption that sinks a crew is “the guide has a knife.” It’s true, and it works right up until the guide is the one tangled. Then the boat has zero knives that can reach the problem, and everyone aboard is a spectator.
Everyone on Class III+
The rule is simple: everyone paddling Class III and up who’s had basic swiftwater rescue training carries their own, and on Class V it isn’t a discussion. Not because more blades are better, but because the knife has to be on the person who can reach the rope, and you don’t get to pick who that is in advance.
Nobody will give you a fixed number, and you should be suspicious of anyone who does. The real number is “everyone who might have to act,” which changes with the boat, the water, and the crew.
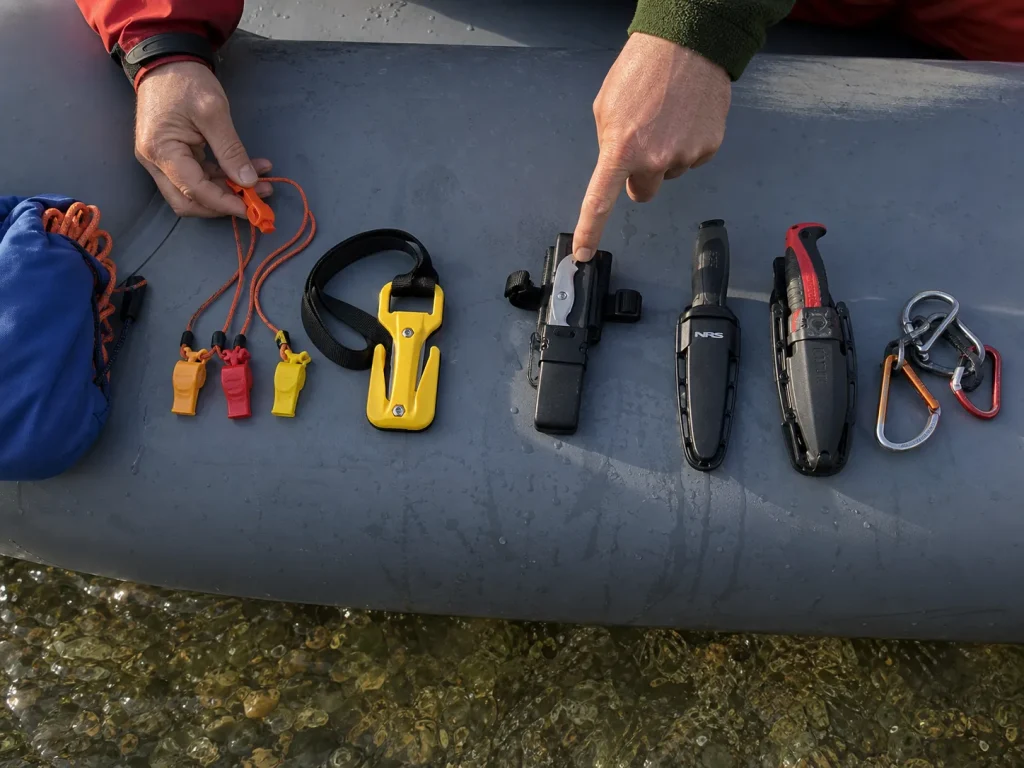
The Hardware Huddle
Before any Class IV+ launch, take sixty seconds and lay it out. Knife, whistle, throw line, on a tube, where everyone can see it. Confirm who’s carrying what instead of assuming.
The inventory isn’t really the point. The point is that afterward, everyone knows where everyone else’s knife lives, which is the information you need when you’re the one reaching for someone else’s chest. Knife, whistle, and throw line all get the same treatment in that check, and none of them are optional above Class III.
If you want the protocol behind the habit, the National Park Service’s own swiftwater rescue manual is the reference search-and-rescue teams train from. It’s dry reading and it’s the real thing.
Two Knives, Two Jobs
For experienced boaters, the pattern worth copying: a dedicated rescue blade that never opens a dry bag, plus a separate utility knife for camp. The rescue edge stays guaranteed sharp because nothing dulls it. The sheath’s detent stays tight because it isn’t getting cycled forty times a trip for snacks.
That second reason is the one people miss. Every trip to the salami is another draw, and every draw is another sliver of plastic. Two knives isn’t gear collecting. It’s the cheapest way to make the sheath last.
The Short Version
Blunt tip, and a lock your closed fist can work. Those two decide more than steel grade ever will, and they cost nothing extra.
The sheath is the part that quits. Shake-test it at every put-in, replace the whole unit every two to three years, and stop treating the plastic as an accessory to the blade.
A knife you’ve never drawn is a knife you won’t draw. Build the motion at home, confirm the crew’s kit at the put-in, and the purchase finally starts doing its job.
Go do the shake test on the knife already on your PFD, right now, before your next launch. If it falls out on your kitchen floor, you just found the failure somewhere a lot better than the river would have shown you.
Frequently Asked Questions
01Where should you carry your river knife on your PFD?
On the lash tab it was designed for, or wrap-tied to a shoulder strap if your PFD has no tab. Front-and-center on the chest is the common mistake, since an oar handle and your own hands catch it constantly and it becomes a snag during a raft re-entry.
02Should a river knife have a blunt tip or a sharp tip?
Blunt, for almost everyone. A pointed blade that pops loose or slips under load punctures a raft tube, a PFD, a drysuit, or a person. Some working guides argue a point penetrates thick Hypalon faster in a real pin, but blunt remains the right default.
03Can you sew a knife sheath onto your PFD?
No. It voids the PFD manufacturer’s warranty and is prohibited outright on permitted rivers such as the Grand Canyon, where you can be turned back at the put-in for it. Use the lash tab, a wrap-tie, or zip-ties instead.
04How often should you replace a river knife sheath?
Every two to three years under regular use, and immediately if it fails a shake test. Friction-fit sheaths grip the blade with a molded plastic detent that erodes slightly with every draw, so the sheath usually quits long before the blade does.
05Is a fixed blade or a folding knife better for whitewater rescue?
Fixed, as your primary. A folder needs a two-handed fine-motor opening exactly when your hands are numb, wet, and gloved, and its hinge is one more thing between you and the edge. Keep the folder as a utility backup in a PFD pocket.