
In this article
The number stamped on a carabiner is the most reassuring thing about it and the least useful. Two carabiners can both read like plenty of strength and still be built for completely different jobs, and the one you pulled off a climbing rack was engineered around a clean fall on a dry rope, not a raft wrapped in silty water with four people leaning into a haul line. Ask anyone who has taken a swiftwater course and then gone home to look at their own gear bag: the stamp tells you more than the shape, the color, or the brand ever will. This is what the ratings actually mean, which carabiners and pulleys earn their place on your rescue belt, how to tell when a piece is finished, and honestly how little of it a private boater needs.
Here is the short version of what to look for in each piece of rescue hardware before you spend anything.
| Hardware | What to look for | Spec that matters |
|---|---|---|
| Locking carabiner | Lock you can work one-handed with cold fingers | NFPA G-rated (40 kN min) or T-rated (27 kN min) |
| Rescue pulley | Sealed bearing for efficiency, bushing for grit tolerance | Sheave at least 4 times your rope diameter |
| Prusik-minding pulley | Side-plate clearance that lets a prusik pass through | Rated rope range matching your main line |
| Prusik cord | Sewn loop, clearly thinner than the main line | 6 to 8 mm against a 10 to 11 mm rope |
| Rigging plate | Enough holes to keep attachments on their own axes | 30 kN or higher, aluminum |
What Makes River Rescue Hardware Different From Climbing Gear
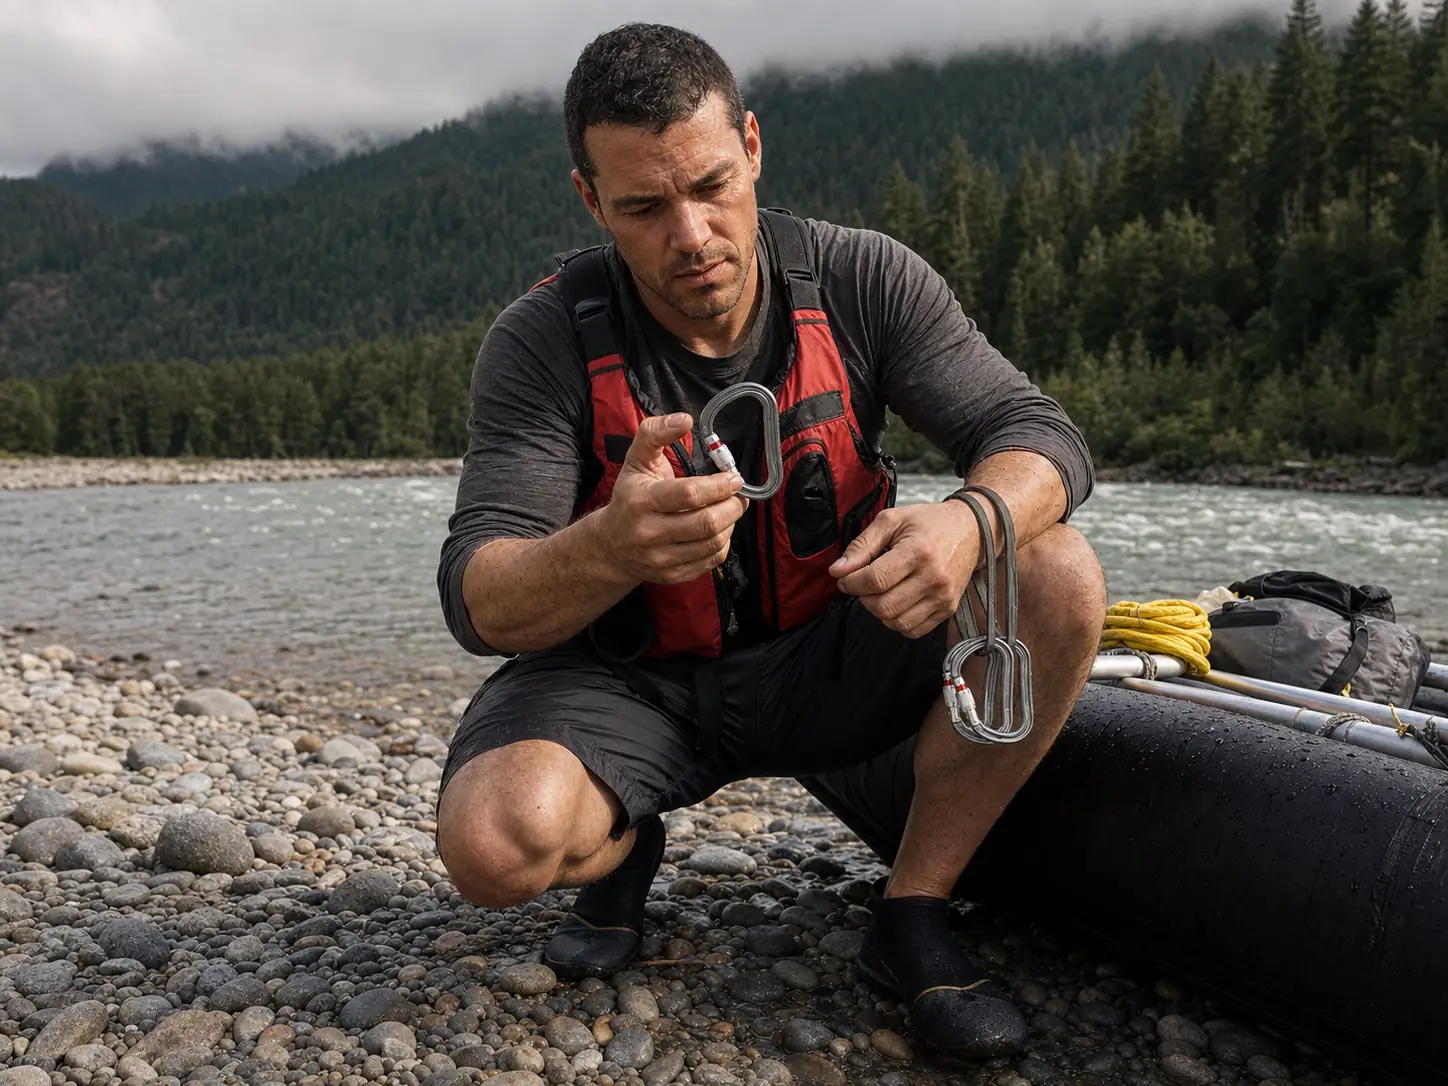
Everyone’s first rescue kit is half scavenged. A couple of lockers off a trad rack, a pulley someone handed down, a length of cord from a climbing shop. That is a normal place to start, and the honest conversation is not “throw it all away.” It is about learning to read what the stamp is telling you, because there is exactly one place where the substitution genuinely bites.
G-Rated vs T-Rated, in Plain Numbers
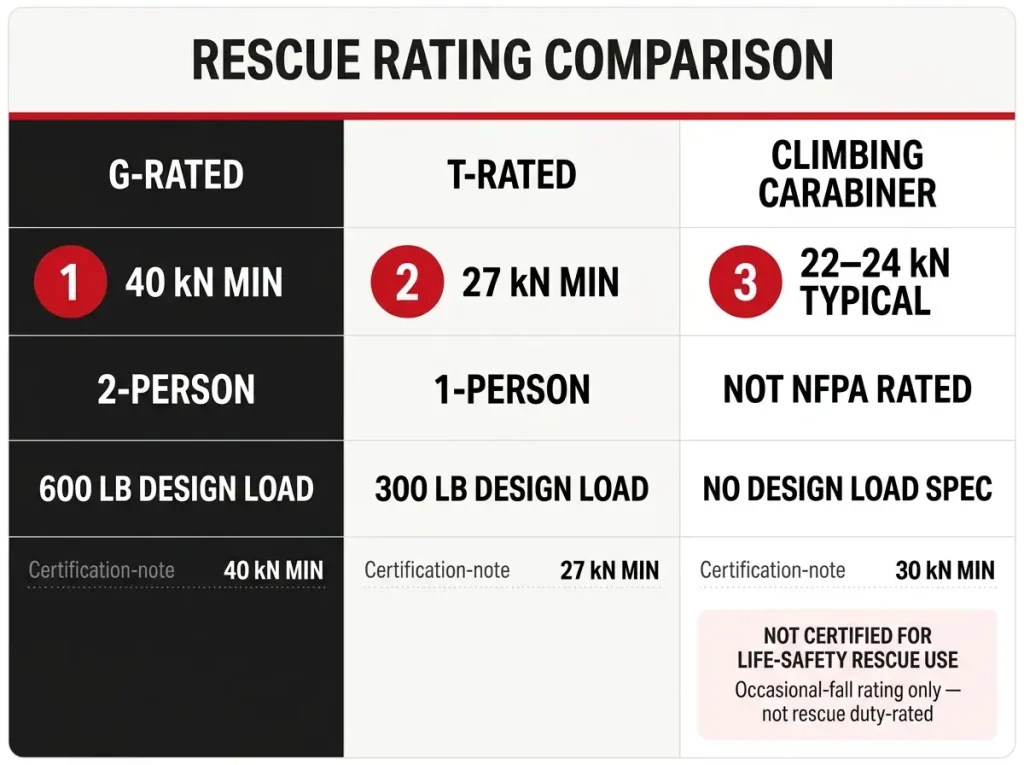
Two markings do most of the work. Under the NFPA 1983 standard governing life-safety rope and hardware, a general use rating requires hardware to hold a minimum of 40 kilonewton, written 40 kN, and a technical use rating sets that floor at 27 kN. Those are not arbitrary tiers. G-rated gear is engineered around a two-person design load and T-rated gear around one person, and the load rating stamp on the spine is where you read which one you are holding.
The math underneath is simpler than it looks. NFPA builds on roughly 300 pounds of design load per person on the system with about a 15:1 safety factor, which is why a 22 kN carabiner and a 40 kN carabiner can both be entirely appropriate, just for different jobs. Note that the stamped figure is a minimum breaking strength, not a working load limit; the two get used interchangeably in forum threads and they are nowhere near the same number. Grabbing a T-rated locker for a raft pin haul because the kN rating looked big enough is using gear built around a lighter task.
One footnote that trips people up: NFPA 1983 was folded into NFPA 2500 back in 2021. The G-rated and T-rated marking logic did not change. Gear stamped 1983 is still current, so do not second-guess a good carabiner over a document number.
Why a Climbing Carabiner Isn’t a Rescue Carabiner
Here is the part the spec sheets skip. A climbing carabiner is rated for occasional clean falls on a dry rope in a controlled system. A rescue carabiner spends its life wet, gritty, and cycled repeatedly under sustained load with silt working into the gate. The printed breaking strength can look comparable and the intended service life is not. That same reasoning is why the NFPA question comes up with throw bags too, where the rating is often more certification than a private boater needs.
Locking Carabiners: Screw, Twist, and Triple-Action Gates
The gate debate looks academic in a shop. It stops being academic the first time you try to run a screw lock with hands that have been in snowmelt-cold water long enough to stop reporting back.
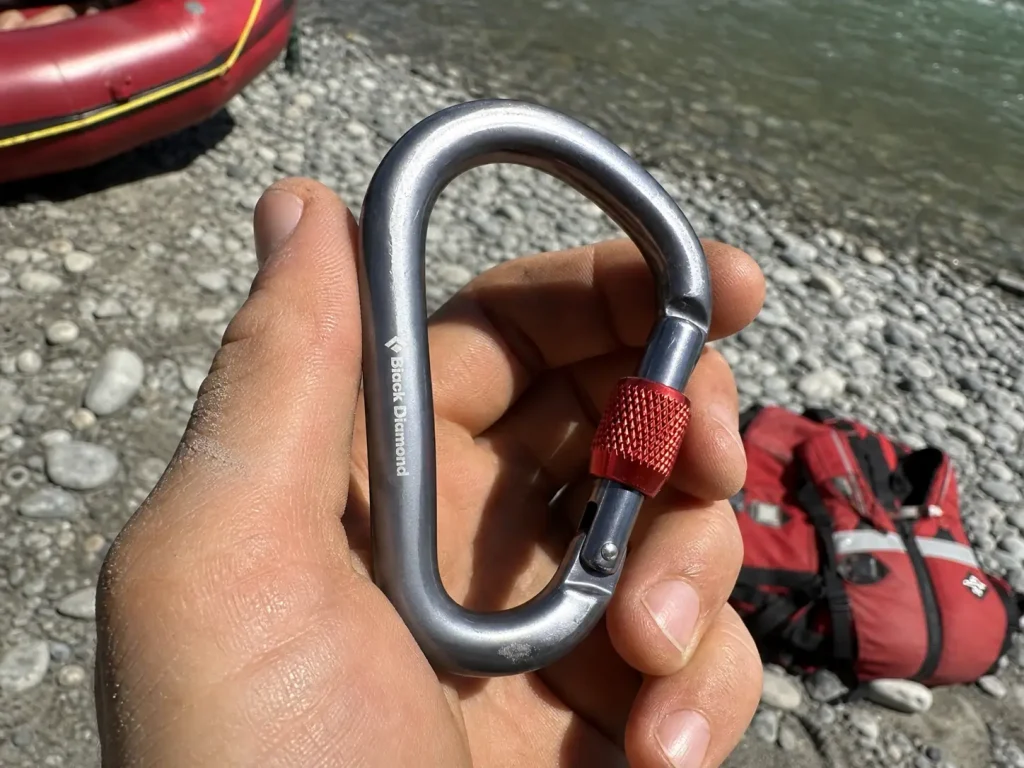
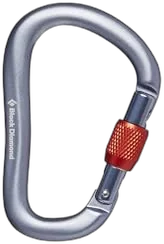
Three mechanisms cover almost everything you will see. A screw lock is manual, which makes it the simplest to inspect, the simplest to teach, and the one most likely to be found unscrewed at the end of a long day. A twist lock closes itself in one motion. A triple lock takes three deliberate motions and is the most secure and the slowest. River forums keep landing on twist-lock and auto-locking carabiner designs for swiftwater specifically, because they work one-handed with wet, stiff fingers. That is close to the opposite of the rope-access world, where screw locks dominate.
Nose design deserves a look too, and it is cheaper to get right than the lock. A keylock carabiner has a smooth notchless nose that will not catch on webbing or a bight of rope when you unclip in a hurry, and a hooded gate shields the nose from the same snag. Neither adds strength. Both remove a fumble.
Then there is the quantity question, which is where most people overspend. An ACA swiftwater course expects students to show up with two lockers. The four-carabiner pin kit is the next tier up. That is the entire honest range for a private boater, and it is why the three-pack is the sane first purchase.
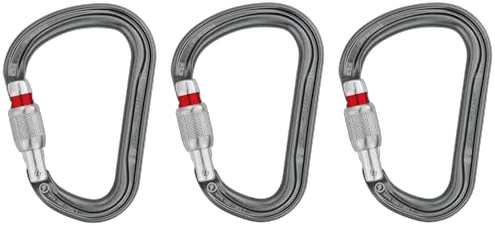
Screw locks do have one real weakness, and it is not strength. Nobody checks them. A screw sleeve that vibrated open against a raft frame all morning is just a non-locking carabiner with extra steps, which is why the habit of thumbing every sleeve closed before you clip into anything matters more than the mechanism you bought.
Short a locker at a rig point? Two standard carabiners with the gates opposed and reversed is the accepted field substitution, not a shortcut to feel bad about. Clip them so the gates face opposite directions and open opposite ways, and the pair behaves like a locker.
Carabiner Shape and Why Loading Direction Matters
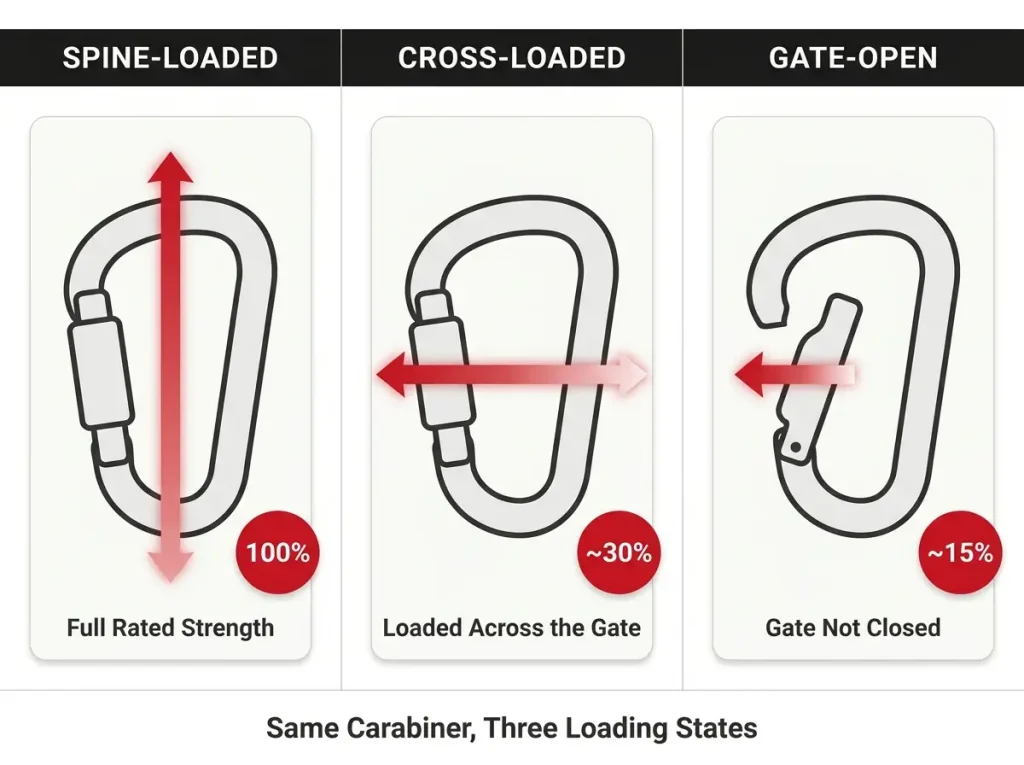
A carabiner’s rating assumes it is being pulled one specific way. Rig a haul in a hurry and it will find the other way on its own.
The three shapes each have a job. A pear-shaped carabiner, usually called an HMS carabiner, has a wide end that handles a Munter hitch and multiple attachments without them stacking on top of each other. An oval carabiner loads evenly and pairs neatly with a pulley. A D-shaped carabiner pushes the load onto the spine, which is where the strongest numbers come from.
That last point is the whole game. The stamped number applies to spine loading along the major axis. Load a carabiner across the gate, which is cross loading or gate loading, and you are working with a fraction of the printed strength. On a river this rarely happens because someone chose to do it. It happens because a carabiner rotated inside a rigging plate during a haul and nobody was watching that particular piece of metal at that particular moment.
The habit that catches all of this has a name in rescue circles. You CHASE the rig before it gets weighted: a slow visual and hands-on pass over the whole system, watching for a carabiner that has rotated, a gate resting against a plate, a prusik sitting crooked. It takes about fifteen seconds and it is the single most useful thing an untrained bystander can be taught to do.
Pulleys: Sheave Size, Bearings, and the Prusik-Minding Difference
A pulley is the one piece where paying more buys something you can measure. It is also the piece where the expensive feature is easiest to buy without needing it.
Start with efficiency. Bronze bushing axles run somewhere around 70 to 92 percent efficient. Sealed ball bearing axles run roughly 90 to 97 percent. That gap sounds academic until you put it in a system. A Z-drag’s theoretical 3:1 mechanical advantage already bleeds through every carabiner and standard pulley in the line, and a vector pull, meaning a haul team dragging at an angle instead of parallel to the load, bleeds more. Two cheap pulleys and an off-angle haul can leave you working with something closer to a real-world 2:1, with nobody on the rope aware of it.
Sheave diameter is the other number that matters. The D/d ratio of sheave diameter to rope diameter should be at least 4:1, and 6:1 or better is kinder to the rope over time. A sheave too small for the rope you’re actually running bends the core sharply on every haul cycle, which shows up as fatigue long before it shows up as anything visible.
The Reference Prusik-Minding Pulley
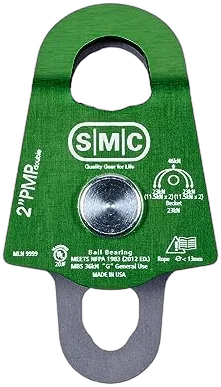
The PMP premium is not marketing. Side-plate clearance is one design detail with one job: keeping a progress-capture prusik from binding halfway through a haul, at the exact moment when stopping to fix it costs the most. If you plan to run any system with progress capture, this is the feature you are paying for.
The Compact Wearable Pulley
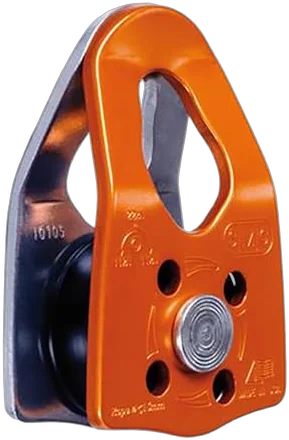
The trade is straightforward. A 2 inch sheave hauls more efficiently and treats your rope better. A 1 inch sheave gets carried. Gear you actually have on you beats gear that is theoretically better and sitting forty feet upstream in a dry bag.
The Carabiner and Pulley in One
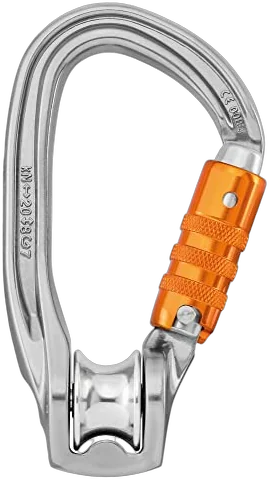
Prusik Cord, Webbing, and Rigging Plates
The carabiners and pulleys get all the attention. The cheapest items in the bag are the ones that decide whether a system captures progress or slides backward while everyone watches.
Prusik Cord
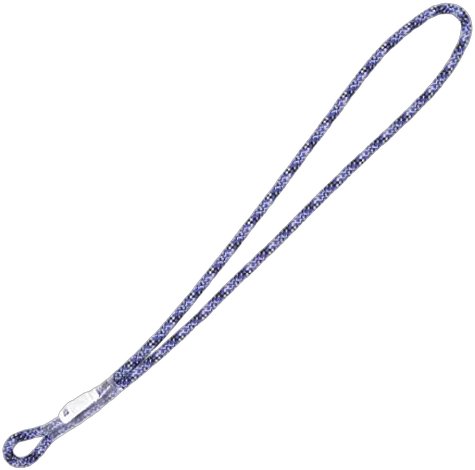
Diameter matching is where self-built kits quietly go wrong. A prusik cord too close in diameter to the main line will not grip and release the way the prusik knot is supposed to, and you find that out under load. The working rule is cord clearly thinner than the rope it grabs, which for most river systems means 6 to 8 mm cord on 10 to 11 mm line.
Tubular Webbing
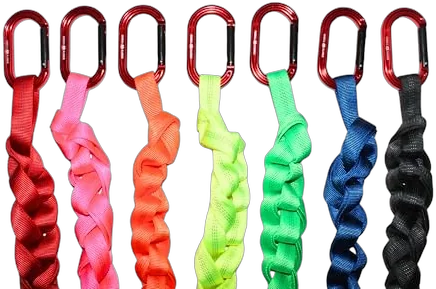
Tubular webbing is the piece that lets you build an anchor around whatever the river actually gave you. A cottonwood at an awkward angle, a boulder with no clean horn, a bumper on a truck parked at the top of the bar. Webbing wraps it, spreads the load, and extends your anchor point to where the haul line wants to run.
Rigging Plates
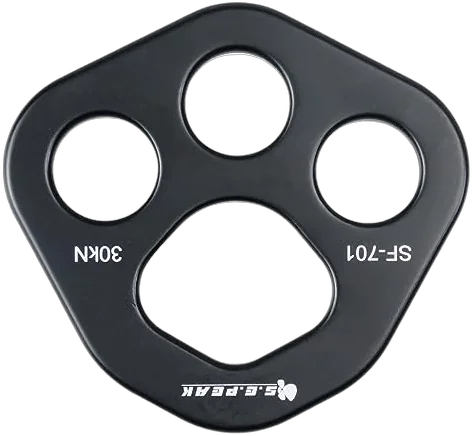
A rigging plate exists to stop four attachments from stacking inside one carabiner. Each leg gets its own hole, each pulls on its own axis, and the cross-loading problem from earlier mostly disappears. You do not need one for a basic Z-drag. You start wanting one the moment your anchor system carries more than a couple of legs, or when you build a 5:1 mechanical advantage system off a single anchor and every piece suddenly needs its own attachment point.
What Actually Seizes a Pulley on the River
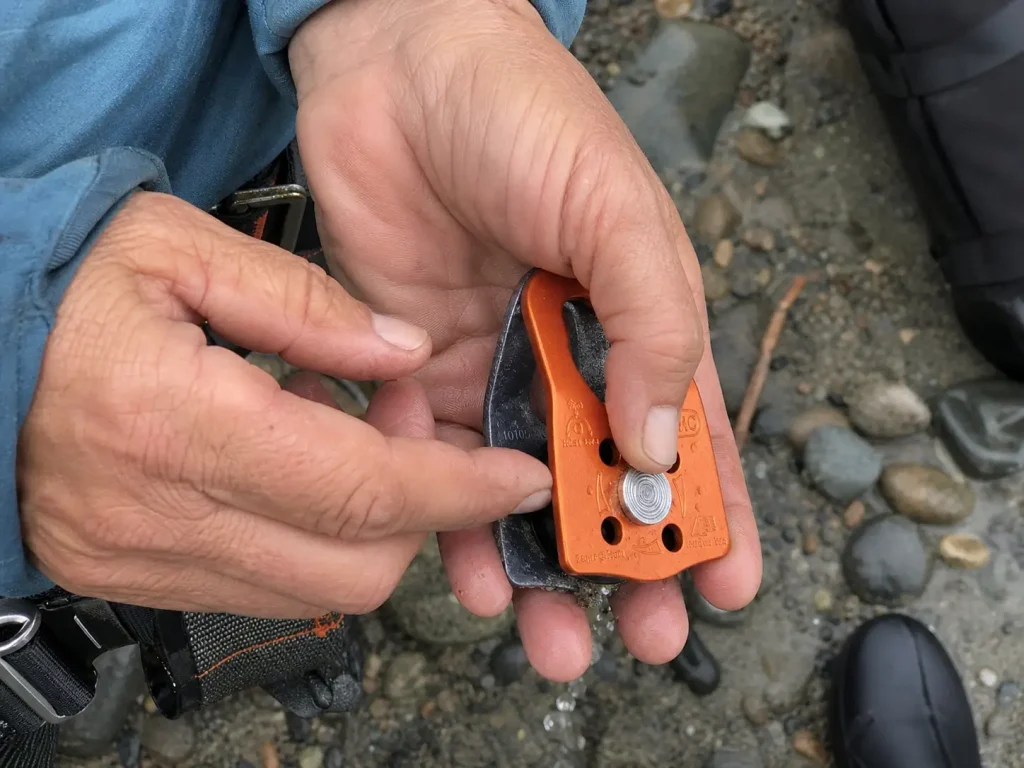
Nobody’s pulley fails on day one. It fails in July, on the trip where it matters, because it spent June in a wet dry bag with a river’s worth of sand inside it.
Sealed Bearings vs Bushings on a Silty River
Here is the trade-off nobody spells out. Sealed ball bearings are the efficient choice, and they are also the design most vulnerable to fine grit working into the bearing race. Bushings give up efficiency and shrug off dirt. On a clear tailwater the sealed bearing wins easily. On a sandy desert river where every put-in coats your gear in fine silt, the calculation is genuinely closer than the spec sheet suggests.
Corrosion resistance is the other half of it. River water carries chlorides and minerals that work on aluminum steadily, and the same exposure that stiffens a carabiner gate over a season works its way into a sheave. You will feel it before you see it: the spin gets shorter, then gritty, then it stops being a spin and becomes a drag.
The Rinse-and-Check Habit
The fix is unglamorous. Rinse hardware in clean water after sandy days, let it dry before it goes back in the bag, and never store it wet. Then check it partway through the season rather than only in the spring, because silt and grit accumulate gradually and the failure shows up mid-season, not on the first trip.
Spin every sheave with your thumb at the take-out, not at the put-in. Gear you check while you are already unloading gets checked; gear you plan to check before the next trip does not. A pulley that coasts for a second or two is fine. One that stops the moment you let go has sand in it.
When a Carabiner or Pulley Is Actually Done
Most gear articles end at “inspect regularly,” which is advice you cannot act on. Gear retirement on a river is a hands-on call, not a calendar date. Here is the check a guide runs with their fingers, plus permission to stop retiring perfectly good hardware out of superstition.
The Thumbnail Test and Gate Check
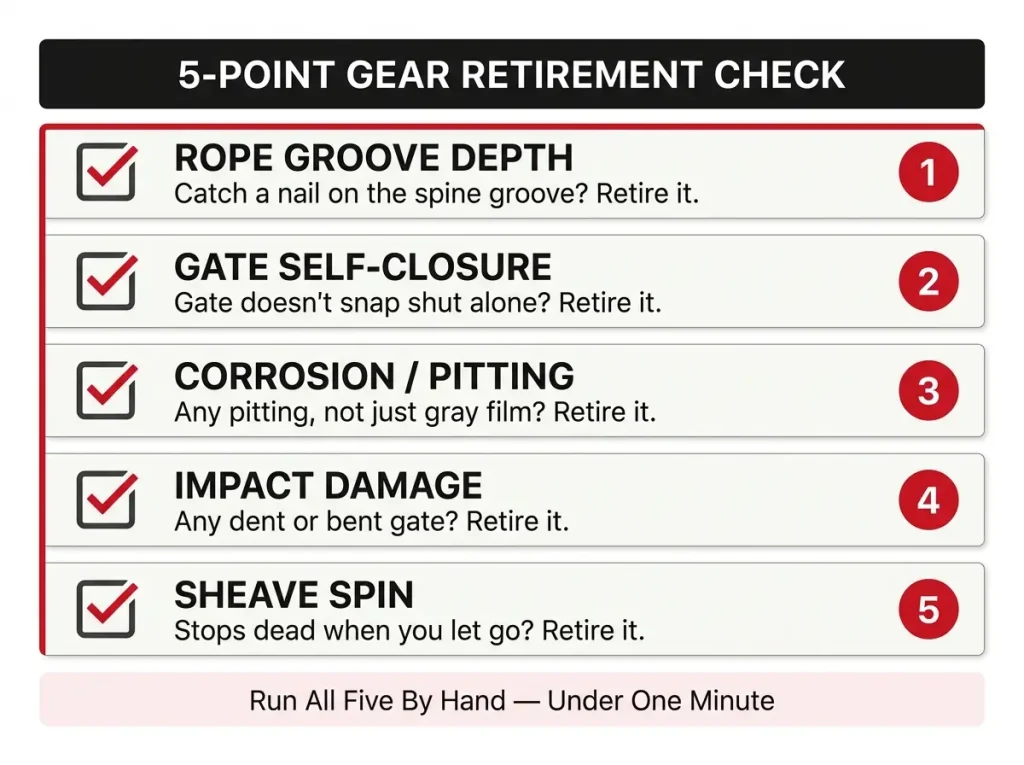
Run a thumbnail across the spine where rope and webbing ride. A rope groove deeper than about a millimeter, or one with a sharp edge you can catch a nail on, means that carabiner is done. It is the failure that never announces itself, and the reason a piece that has been clipped to the same rescue belt for three seasons deserves the check even though it looks fine.
Then the gate. It should close fully and instantly on its own, every time, with no help. Gate flutter or a lazy return means spring fatigue, and spring fatigue means retirement regardless of how good the metal looks.
Corrosion Beyond Surface Oxidation
Light gray or white surface oxidation on aluminum is normal and not a problem. Pitting is. So is any corrosion that changes how the gate moves. The UIAA’s SafeCom guidance on retiring carabiners is direct about this, and the underlying mechanism matters on a river specifically: chloride exposure drives stress corrosion cracking in aluminum, and a season of mineral-heavy water is exactly that exposure.
The Dropped Carabiner Myth
Now the part that saves people money. REI’s drop test put 30 carabiners through six drops each from 33 feet onto concrete and found no statistically meaningful loss of open-gate strength. A carabiner that bounced off a raft frame onto a gravel bar is not automatically finished.
Read that carefully, though. Flat concrete is not a fall onto a sharp edge from height, and the test measured strength, not deformation. Inspect for dents, a bent gate, or anything that changed shape, and retire on evidence rather than on the sound it made when it landed.
The Buying Mistakes That Are Specific to Swiftwater
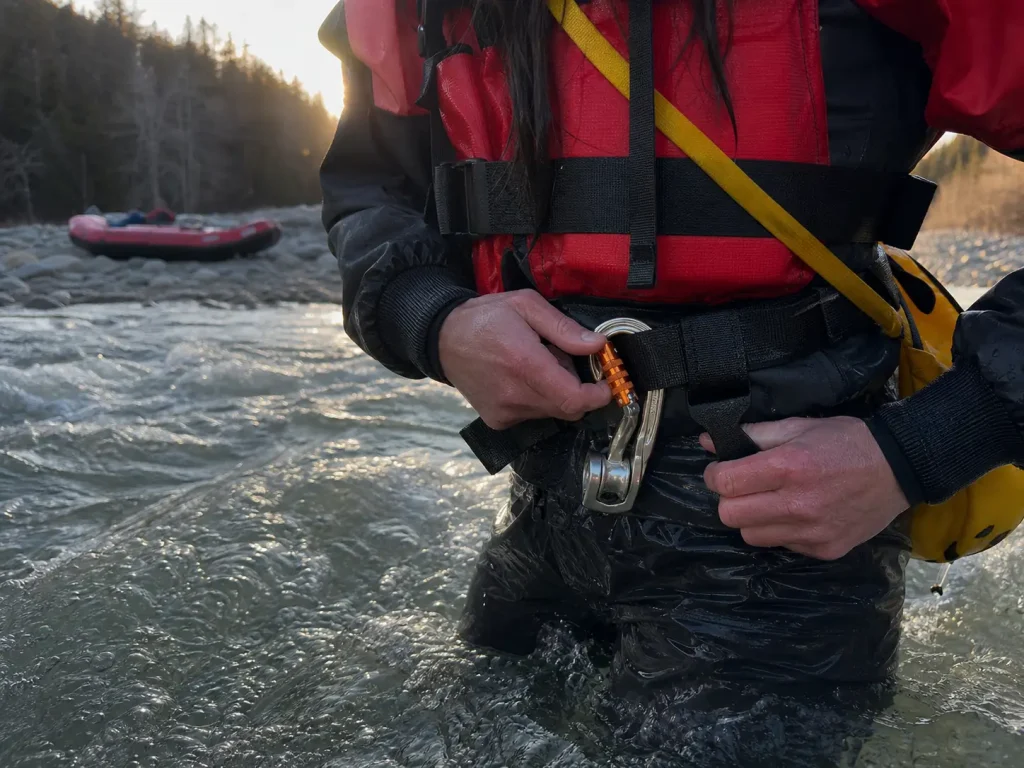
Most of the good technical writing about this hardware was written for canyons and rope access. Almost all of it is right. A few pieces of it quietly stop being right once the gear is wet, cold, and hanging off a PFD.
Cold Hands Change the Right Answer
Cold water dexterity is not a minor footnote, it is the whole reason swiftwater gear preferences diverge from rope access. Fine motor control goes first. A screw sleeve that takes three seconds in a shop takes fifteen with numb fingers, and the fifteen-second version is the one that gets skipped. That is the argument for twist-lock and auto-lock mechanisms on a river.
The counterargument is real too, which is why this is a trade rather than an answer. Silt gets into an auto-lock mechanism more readily than it gets into a simple screw thread. Pick the one whose failure mode you would rather manage, then rinse it.
Worn Gear Takes a Different Beating
A carabiner clipped to a rescue PFD’s belt, which is where most of this hardware actually lives, gets hammered against a raft frame for eight hours a day. That is an abrasion pattern the climbing literature never models, because a rack carabiner rides in a gear loop and gets used deliberately. Wearable rescue gear wears from being worn, not from being loaded.
The last mistake is the most expensive one. Buying a full personal rescue equipment kit from an internet gear list before taking a course reliably produces the wrong gear in the wrong quantity. Take the course, then buy for the curriculum.
How Much of This You Actually Need
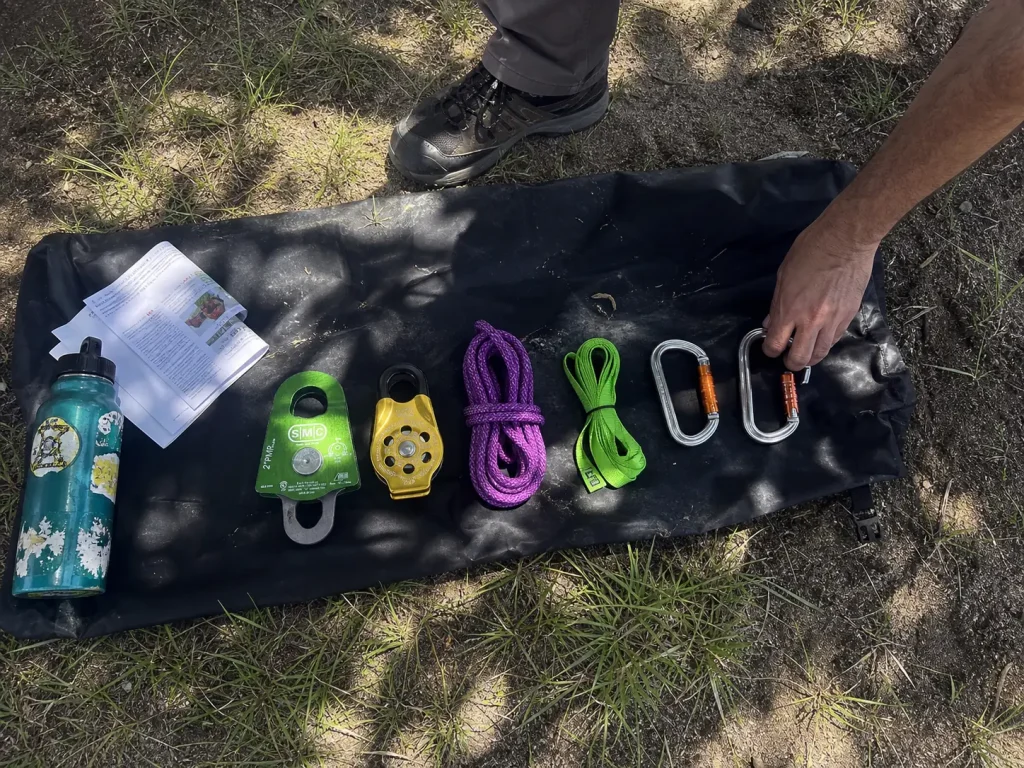
This is the section a catalog page cannot write. For most people running Class III and IV on weekends, the honest answer is less than the internet thinks, and after training rather than before it.
The Two-and-Two Floor
Students showing up for an ACA Swiftwater Rescue Skills course are expected to bring two locking carabiners and two pulleys, on top of the throw rope and PFD they already own. That is it. That is the sport’s own certifying organization publishing its entry-level personal kit, and it is the best sanity check available against a six-carabiner rack bought at 11pm on a Tuesday. From there, the 4-3-2-1-1 kit guides actually carry is the next honest tier, and that guide kit is a team load, not a personal one.
Where the Price Spread Actually Comes From
Walk a rescue gear page and the spread between the cheapest carabiner and the most expensive swivel pulley is enormous. The money buys three things: bearing quality, certification, and machining tolerance. Pro-grade hardware buys a commercial outfit rigging several times a week the repeatability and the inspection records it needs. A private boater is buying two good lockers, a pulley that spins, and a course. A budget carabiner carrying a real certification stamp is not a compromise at that level, it is the correct purchase. Assembling a solid personal kit from scratch lands in the same cost neighborhood as the rest of the safety gear that earns its place in the boat, which is to say noticeable but not the reason anyone skips it.
What’s Actually Buyable Right Now
One honest note, because it is current and it cuts against the usual advice. As of 2026, most of the named professional rigging plates are hard to find in stock through mainstream retail, while generic 30 to 45 kN aluminum plates are readily available. The brand name is not always the answer that ships. Buy the certified piece you can actually get, inspect it yourself, and spend the difference on training.
Buy your hardware after you register for a course, not before. Instructors publish a gear list for a reason, and half the people who show up with a fully loaded rescue belt spend the weekend learning that they carried three things they will never use and left out the one they needed.
The Short Version
Read the stamp, not the number. G and T describe different jobs, and a climbing carabiner’s rating does not make it rescue hardware.
Spend on the pulley’s bearing and the carabiner’s gate. Skip the rest until a course tells you otherwise.
Check your gear mid-season with a thumbnail, not once in the spring with your eyes.
Before the next trip, pull the rescue kit off your PFD, run a nail down every spine, and spin every sheave. Whatever fails that two-minute check is the only thing you actually need to buy this season.
Frequently Asked Questions
01Can I use a carabiner as a pulley?
For a short haul under light load, yes, a carabiner will redirect a rope in a pinch. For longer hauls, heavier loads, or a smaller person hauling a larger one, friction costs enough mechanical advantage that a real pulley stops being optional.
02What is the strongest type of carabiner?
A cold-forged steel D-shaped locking carabiner is typically the strongest combination, because the D profile drives the load onto the spine where the rating applies. For river rescue, whether it is G-rated or T-rated tells you more than the shape does.
03What is the best carabiner brand?
Petzl, Black Diamond, SMC and Rock Exotica all make hardware a rescue professional would clip into without a second thought. Brand matters less than the certification stamp and a lock you can work with cold, wet hands.
04What is the best rope for rescue?
Low-stretch static rope, usually 10 to 11 mm, is the standard for river hauling systems, since dynamic climbing rope stretches under load and bleeds mechanical advantage. Match the diameter to your pulley’s rated rope size and its D/d ratio.
05Do rescue carabiners need to be NFPA rated?
For a private boater, no. NFPA 1983 certification is written for emergency services, not recreational use. It is still the clearest signal that a carabiner was engineered around rescue loads rather than climbing falls, which is why it is worth looking for.