
In this article
It’s day five in a desert canyon, you crack the jug that’s been baking on the deck since seven in the morning, and what comes out is soup-warm and tastes faintly of plastic. Nobody mentions that part when you’re standing in the garage deciding which container to buy.
Search for water storage and jugs for river trips and almost everything Google hands back was written for car campers and overlanders, where the jug rides in a shaded trunk and the worst thing that happens to it is a bumpy forest road. On a river the jug lives strapped to a frame, in full sun, on a boat that can go over. Private boaters and outfitters running the Green and the Colorado have sorted this out over decades of trips, and their answers look nothing like a camping catalog’s.
Here’s what the rest of this covers: how many gallons to actually load for your group and season, which jugs hold up to river life, how they get rigged so a flip doesn’t cost you your drinking water, and what to do when the water runs out before the canyon does. Start with the shortlist.
| Jug | Capacity | Best for | Why it works on a river |
|---|---|---|---|
| Scepter Military Style Container | 5 gal / 20 L | Raft frame workhorse | Rectangular and stackable, pours on its side, factory rigging accessories exist |
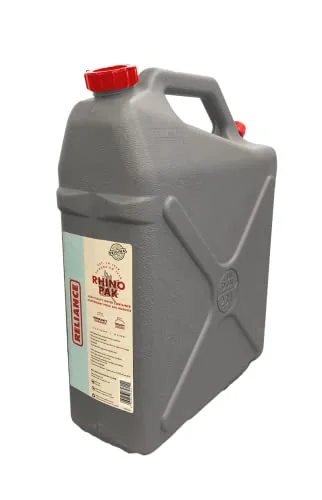
| Reliance Rhino-Pak | 5.5 gal / 20 L | Budget builds that still take abuse | Walls 33% thicker than a standard container, 5-year warranty |
| Reliance Jumbo-Tainer 2.0 | 7 gal | Base camp and the kitchen water station | Largest single container still available, built-in spigot for camp use |
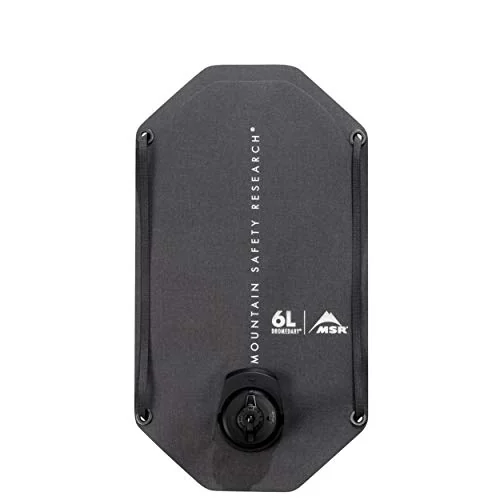
| MSR Dromedary Bag | 10 L / 2.6 gal | IKs, duckies, packrafts | Cordura shell with perimeter webbing, so it straps down like a rigid jug |
| HydraPak Seeker | 10 L / 2.6 gal | Small boats and the trip home | Seamless build, folds flat, zero dead space when empty |
How Much Water You Actually Need for a River Trip
Everyone shows up asking which jug is best. The real question is how many, and it’s the one that gets answered last, usually the week before the put-in with the roster finally locked and a calendar on the workbench.
The river standard is one gallon per person per day, for drinking only. Outfitters like Tex’s Riverways on the Green have used that number for years, and it works because it’s simple. Coffee, cooking, and the dish line all come out of a separate budget. That’s where the arithmetic quietly doubles on people.
Then adjust for conditions. Cool weather with easy paddling runs closer to three-quarters of a gallon per person per day; hot weather with hard rowing pushes past a gallon and a half. A May trip and an August trip on the same stretch of river do not carry the same water. Boaters on Mountain Buzz have been repeating that split for years, and it’s the single biggest lever you have on how much weight ends up on your boat.
Hot weather hydration is also where dehydration creeps up on people, because rowing in dry desert air doesn’t feel like sweating. Sweat evaporates before it registers, so the usual signal that you’re behind never arrives. Groups that run electrolytes in one designated jug rather than in everyone’s individual bottle tend to notice the problem earlier, because the level in that jug is a group-wide gauge instead of twelve private ones. On a permit trip with no resupply and no road access, the water you launched with is the water you have.
Run the numbers all the way through and the scale gets obvious. Six people for five days is 30 gallons of drinking water, roughly 45 gallons once camp cooking is in the budget. Sixteen people for five days is 80 gallons, which works out to 16 five-gallon jugs, about four per raft. That’s around 170 pounds of water riding on each boat before a single dry bag goes on.
For a straight purchase rule: on four- and five-day trips, plan on one 5- or 6-gallon jug per person. On seven-day trips and longer, one per person plus however many more fit in the load.
The mistake that catches groups is budgeting for drinking water only and discovering on day four that the pasta night ate a jug and a half. In a canyon with no road access, add 20 to 25 percent on top of your number. It’s the cheapest insurance on the boat, and it costs you nothing if you don’t need it. How much of that cushion you need depends a lot on how much you plan to actually cook in camp versus how many meals are cold and quick.
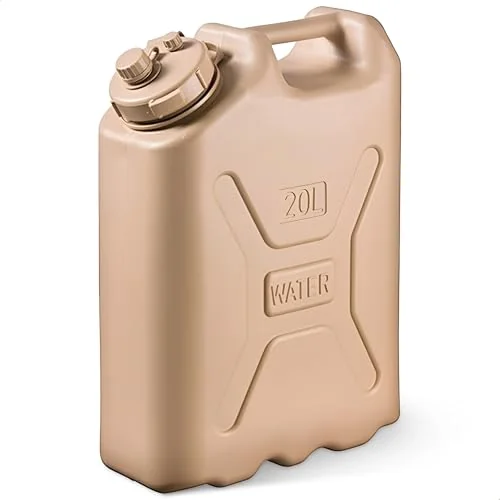
The Scepter is the reference point for a reason. Minimum wall thickness of a tenth of an inch in food-grade LDPE and HDPE, no BPA, and a vented screw cap with nothing on it that can pop open under load. It weighs about four and a third pounds empty, which matters when you’re carrying eight of them from the truck to the boat ramp. Rotoformed walls are what make that thickness consistent all the way into the corners, which is precisely where thin-walled containers split when a loaded boat lands on them.
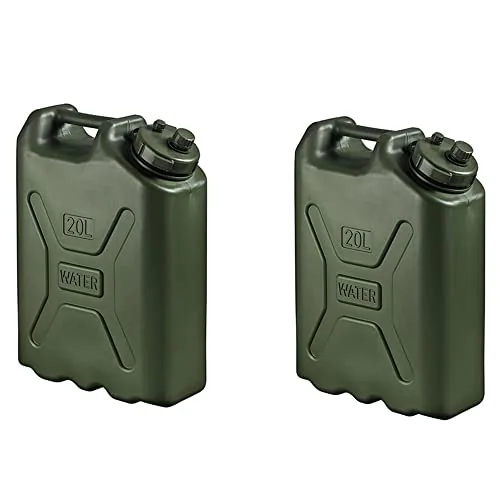
Buying them one at a time is how most people start and it’s rarely how they finish. If your group is five people going out for five days, the math lands on 25 gallons, and that’s five containers.
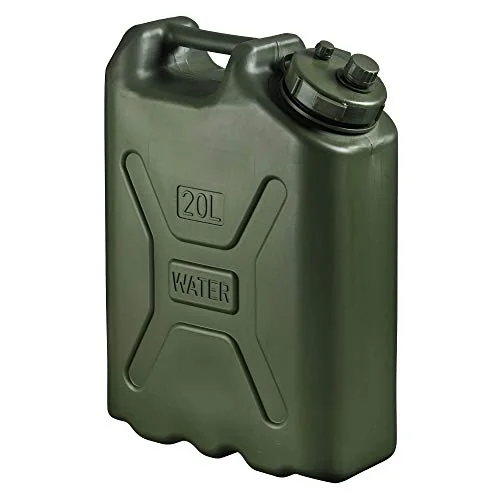
Not every trip needs 25 gallons on the first purchase. Two people out for four or five days need ten, and that’s where most private boaters actually start before the trips get longer and the group gets bigger.
Why River Trips Destroy Water Jugs That Work Fine Everywhere Else
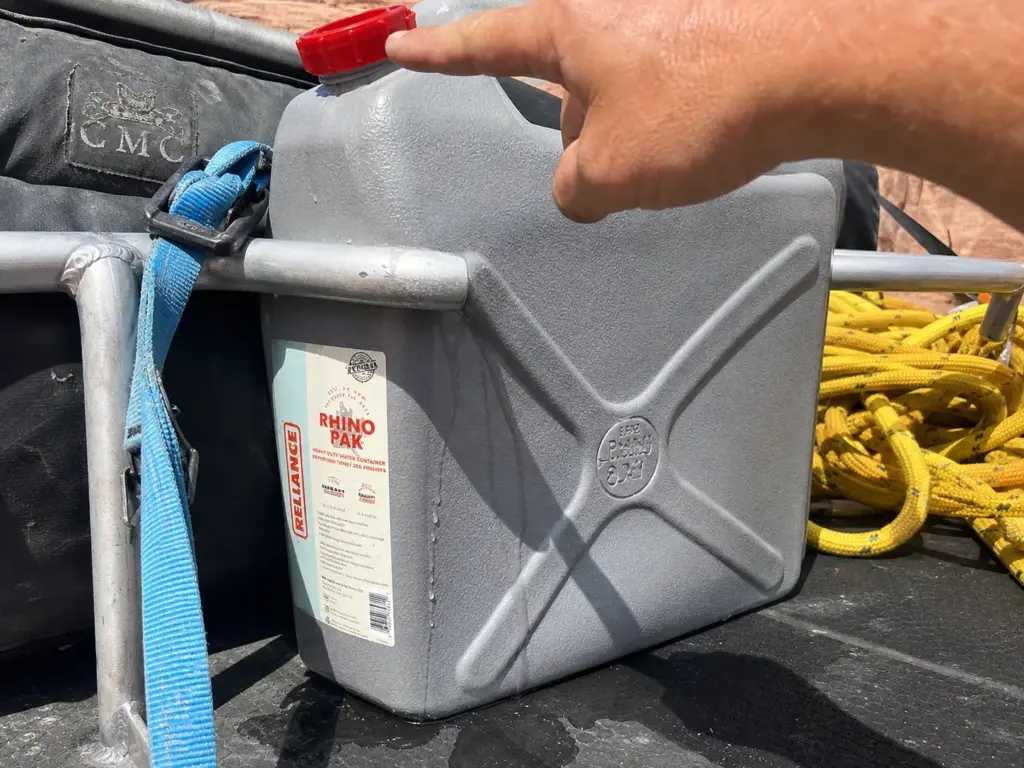
There’s a conversation that happens at every take-out where somebody admits they lost five gallons on the deck and didn’t notice until camp. It’s always the same handful of failures, and they all trace back to the same three facts: the jug moves, the jug gets compressed, and the jug lives in the sun.
Start with the spigot, because it’s the one that costs the most water. A built-in spigot sits proud of the container wall, and when the jug gets pressed against a frame crossbar under a load of dry bags, that spigot is the thing taking the pressure. It cracks open a quarter turn and drains into the river all afternoon while everyone’s watching the horizon line. That single failure mode is why experienced boaters gravitate toward plain screw caps for anything that rides on deck.
Loose parts are the second one. A cap that vibrates off, a pour spout that unthreads and disappears between the tubes, a gasket that squirts out when you overtighten it in the dark. Any of those turns a full jug into a bucket by day two, and you can’t buy a replacement in a canyon. The criterion that private boaters keep landing on is captive parts: caps tethered, spouts that thread into the cap rather than sitting loose in a dry box.
Then there’s the cheap translucent jug from the grocery store, and this one has a specific verdict attached. Tex’s Riverways says flatly that translucent containers do not hold up in the desert environment. Sunlight passes straight through the wall, which does two things at once: it degrades the plastic until the corners go brittle and blow out, and it lets algae grow in water that looked perfectly clear at the put-in.
Which is exactly backwards from every storage guideline ever written. The CDC’s guidance on storing water containers between 50 and 70 degrees, away from direct sunlight describes a basement. A river trip is the opposite of a basement for eight hours a day, six days running, and the container has to be chosen with that in mind.
There’s also a loading detail worth stealing: pick containers where the spout ends up on the upper side in the way the jug actually rides. Gravity works against leaks instead of with them, and a jug that seeps a teaspoon an hour from a tired gasket loses nothing overnight if the spout is on top. Treat leak-proof on a product page as a claim about a new gasket sitting upright on a shelf, not a promise about year three riding upside down under a strap.
Collapsible containers have their own version of this. The fabric almost never fails. The fold lines do, cycle after cycle of full and empty, until one crease develops a pinhole that only shows up when the thing is full and hanging. Storing a soft container loosely rolled in a drop bag instead of folded on the same three creases is most of the fix, and it costs nothing.
All of it comes back to a single rule that governs every load on the boat: anything that isn’t rigged to flip is gone.
Hard-Sided vs Collapsible Water Storage
The honest version of this decision has nothing to do with which container is better in the abstract. It has to do with what you’re rowing. A raft frame and a packraft are two completely different loading problems, and the answer flips between them.
Rigid jugs — what a raft frame is built to carry
A frame boat is a rigid platform, and rigid containers are what it’s shaped to hold. The rectangular format is the whole argument: square jugs sit flush against each other, stack in a block, and become part of the deck instead of lumps under the load. People stand on them. Cylindrical containers waste the space between them and roll when a strap comes loose.
Material matters more than the marketing suggests. Food-grade HDPE and LDPE with no BPA, a minimum wall around 2.5 millimeters, and an opaque color. That last one isn’t cosmetic. Opaque walls stop light before it reaches the water, which shuts down both the algae problem and the UV degradation problem in one move.
Tex’s Riverways puts it about as plainly as an outfitter can: rigid containers hold up better than collapsible ones. Not “some prefer,” not “depends on your style.” That’s a shop that rents to hundreds of trips a season watching what comes back broken.
Framed that way, a rigid jug isn’t a season purchase. Treated reasonably it’s a ten-year piece of gear, which changes how the sticker feels.
Collapsible containers and bladders — zero dead space
The case for soft containers is simple and it’s a good one: empty, they take up nothing. On an inflatable kayak, a duckie, or a packraft, where every cubic inch is contested and there’s no frame to strap a block of jugs to, that argument wins outright.
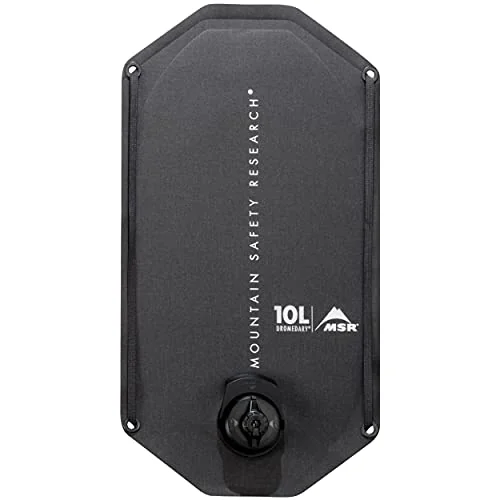
The 10-liter is the main-supply size for a small boat. The 6-liter is the one that lives somewhere reachable.
The other approach to soft storage is to eliminate the seams entirely, which is what HydraPak does.
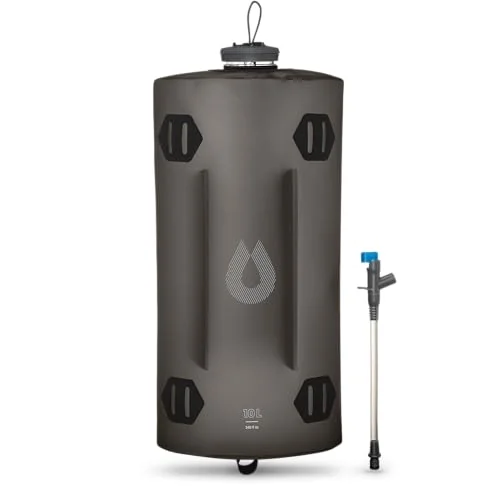
If you’re the person joining someone else’s trip and you only need to cover your own gallons, the smaller Seeker is the cheapest honest way in.
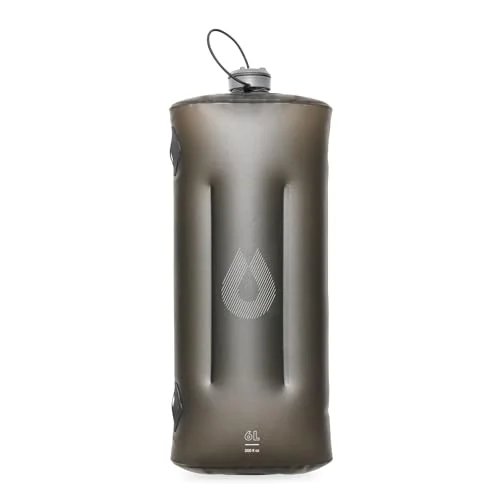
Where soft containers actually fail is worth repeating, because people brace for the wrong thing. It isn’t abrasion and it isn’t puncture. It’s the fold lines, slowly, over dozens of cycles, until a crease that’s been bent the same direction fifty times finally gives. Store them loosely rolled instead of creased flat and they last years longer.
The same soft-versus-rigid tradeoff runs through the rest of your load, and it gets resolved the same way every time.
What Tex’s Riverways tells small-boat paddlers
For kayaks, SUPs, and packrafts, the outfitter recommendation shifts completely: carry collapsible containers around two gallons, and make up the difference by purifying river water as you go. That’s not a smaller version of the frame-boat system. It’s a different system, where the boat carries a couple of days of margin and the filter carries the rest.
And it comes with that same blunt warning about the cheap translucent jugs: they don’t hold up in desert conditions, so don’t build a small-boat system around them just because they pack small.
The decision rule is about as short as gear rules get. Frame? Buy rigid. No frame? Buy soft, and buy a filter.
Spigot vs Screw Cap — the Detail That Decides Your Jug
Most roundups treat this as a preference. On a river it’s a function, and the answer depends entirely on where the jug spends its day.
In camp, the spigot wins and it isn’t close. You want water flowing into pots and bottles hands-free while somebody chops onions and somebody else runs the dish line. Nobody wants to lift a full container thirty times before dinner.
On deck, the spigot is the liability described earlier, sticking out where a crossbar can press on it. Which is why the practical answer isn’t one or the other, it’s both, on different containers. Screw caps for everything strapped to the frame, one spigot container that comes out when camp goes up.
The vented screw cap is the standard for the on-deck jugs. Fewer parts, better seal, nothing proud of the wall for a strap to lever against. That small breather hole matters more than people expect, because an unvented container glugs and surges when you pour and half of it ends up on the ground. An integrated lid with a captive spout beats any add-on part you can drop between the tubes.
The Scepter’s spout is the sleeper feature in all this: it pours with the container lying on its side and the cap still sealed. That sounds minor until you’ve filled four bottles at a lunch stop without moving 42 pounds of water off the deck.
For camp, capacity is what you’re buying.
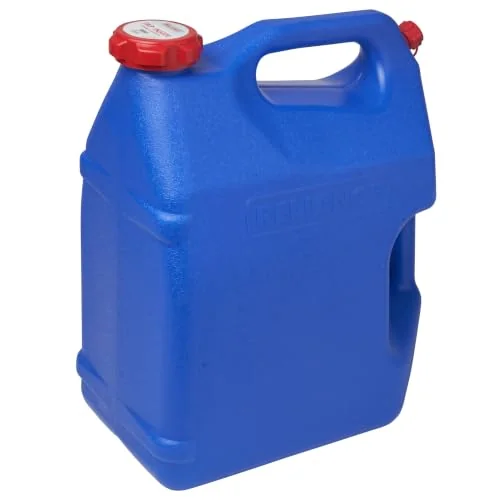
If you’ve read any camping roundup you already know the name Reliance Aqua-Tainer, the 7-gallon jug that shows up on every list. It’s the category reference, and worth knowing by name so you can recognize what people are describing when they mention it in a thread. The Jumbo-Tainer 2.0 does the same job in the same family.
A note on accessories while we’re here: Scepter sells its own dispensing nozzle and replacement lid assemblies through rafting shops, and both are worth a look once you’ve committed to that container family. They’re not on the big retail sites, so you’ll be ordering from a specialty outfitter.
Where any of this pays off is where the water station actually lives in camp — a spigot jug with nowhere to sit at working height is just a heavy jug on the sand.
The Budget Math Nobody Runs — and the Honest Alternative
Here’s the number the SERP skips. Six people, five days, and you’re buying six to nine five-gallon containers. That’s roughly $350 to $440 in containers alone, before a sling, before a filter, before a single cam strap.
Search results are happy to tell you the military-style jug is the best one. Very few of them mention what outfitting an entire trip costs.
So let’s put the anti-sell on the table: you do not need a fleet of premium containers to run a river safely.
There’s a second budget path that doesn’t show up on retail sites at all. The LCI 5 Gallon Water Can from Lexington Container Company is the same basic design as the military-style jug with rougher finish work, and it takes the same accessories. Grand Canyon private boaters buy them by the stack. You’ll be ordering direct or through a rafting shop, but if you’re outfitting a sixteen-person trip, the difference across eight containers is real money.
Before you buy anything, though, scale the purchase to the season instead of the worst case.
Buy for the trip you actually run, not the hottest one you can imagine. Three-quarters of a gallon per person per day in cool spring conditions versus a gallon and a half in August heat means a spring trip needs literally half the containers of a summer trip with the same roster. Buy the spring number, and rent or borrow the extras the one time a year you run in real heat.
Cheap reserve capacity is the other move that saves money. A pair of collapsible containers rides empty and weighs nothing until the trip runs long or somebody’s estimate was optimistic, and then it’s twenty spare gallons of camp water. The Cedilis 2 Pack Collapsible Water Container 5.3 Gallon with Spigot fills that slot for very little.
Be clear about what it is, though: that’s camp reserve, not a deck jug. Don’t strap it under a load and expect it to come out the other side of a rapid.
And the most honest option of all is the one nobody selling containers will mention. Some boaters have stopped carrying jugs almost entirely and make water in camp with a gravity filter instead. Less rigid weight on the boat, more time in camp, and the water is produced where it’s used. It’s the same overbuying trap that catches people shopping for a frame: the answer often isn’t a bigger system, it’s a different one.
How to Rig Water Jugs to a Raft Frame
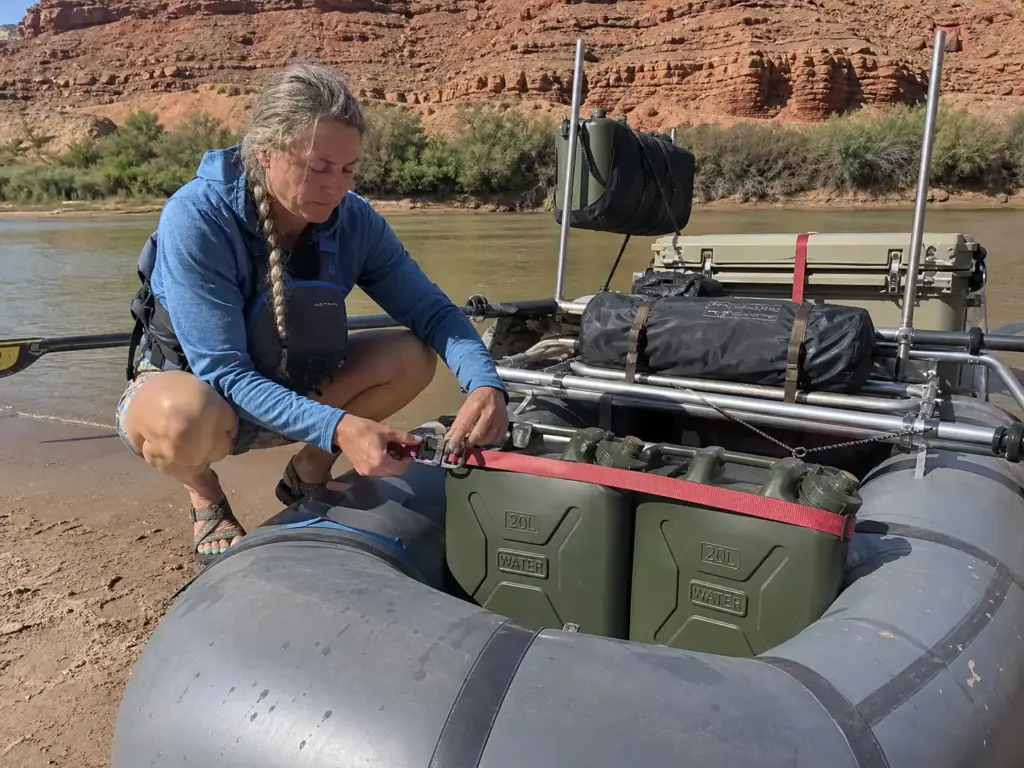
Seven in the morning at the ramp, the whole group is rigging, and somebody is standing there holding two full containers asking where these go. This is the part no camping guide covers, because a car trunk doesn’t flip.
Start by seeing water as part of the whole load rather than its own problem. Where the jugs sit changes where the cooler sits, which changes where the groover sits, which is the entire logic of how the water fits into the rest of your multi-day kit.
The jug sling — how it actually hangs
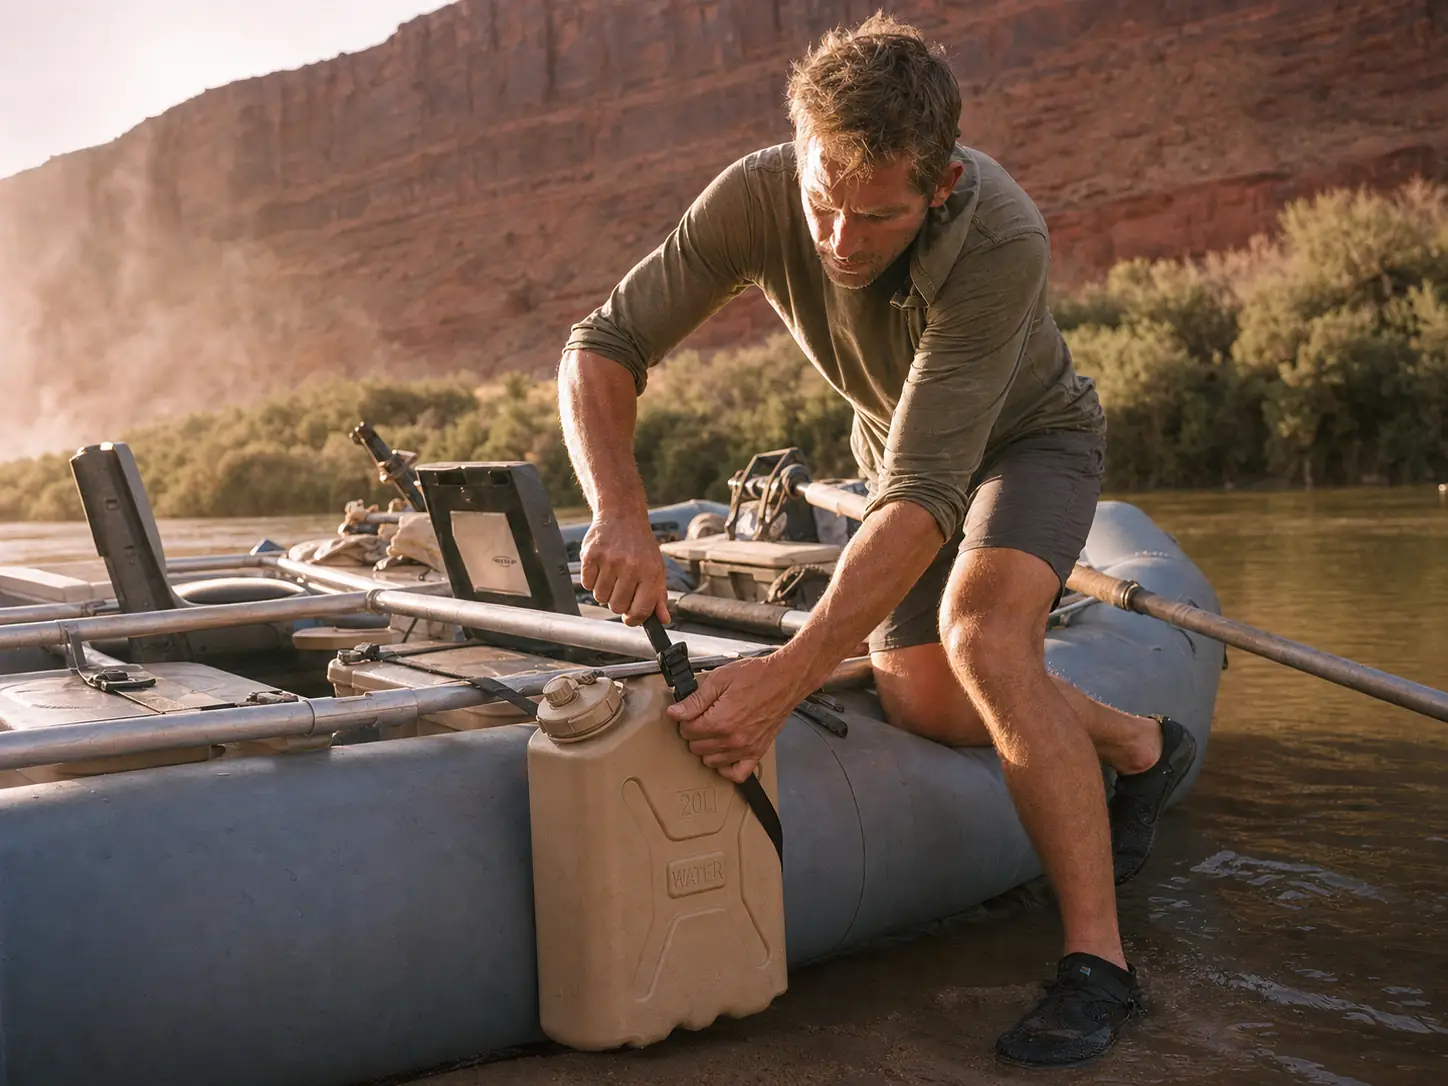
The purpose-built solution hangs the jug below the frame instead of stacking it on top. A sling suspends between two frame crossbars, attaches with sewn-in cam straps, and holds the container with two quick-release buckle straps. That last detail is the rig-to-flip part: the jug is captive when the boat goes over, and it comes out in one motion when you actually want it.
Hanging weight low also does what you’d expect for stability, and it clears deck space that a stack of containers would otherwise own.
The Down River Equipment water jug sling runs around $72 through rafting shops and is sized specifically for the Scepter 20 liter container. That’s the quiet argument for buying that jug format in the first place: the accessory ecosystem already exists. Solgear makes a Scepter jug sling, and the Good Vibes Scepter Can Holder solves the same problem differently. None are on the big retail sites, so plan on a specialty order.
Worth knowing which crossbars you’re working with before you buy anything, since the crossbars the sling hangs from determine the spacing you need.
Rigging without a sling
Plenty of boats never buy a sling and do fine. The field technique is to strap the containers to each other first, then strap that block to the frame. A single jug has a few attachment points and a lot of ways to shift. Four jugs strapped into a unit have many attachment points and behave like one object.
Placement on an oar rig is behind the rowing towers, where the weight sits centered and stays out of the oar arc. Get that wrong and you’ll feel it every stroke for six days. The jugs are also what defines the usable cargo bay behind you, so they go in before the dry bags and the rocket box, not after.
Then you walk on them, which is the whole reason the rectangular format matters. A block of square containers is deck floor. A pile of round ones is an ankle hazard you renegotiate every time you move to the bow.
On a paddle raft with no frame, the jugs line up under the forward thwart. About four per boat is the standard load on Grand Canyon trips launching from Lees Ferry, tucked where they’re low and out of the paddlers’ way. Long canyon stretches like Desolation Canyon work the same way, since there’s no shuttle access to top off partway through.
Count your straps before you leave, because water is one of the loads people forget in the tally and the strap count most people underestimate is what leaves somebody improvising at the ramp.
Keep one jug reachable all day
One container stays accessible while you’re on the water. Not buried, not under the dry bags, not strapped beneath the cooler.
The reason is behavioral, not logistical. If refilling a bottle means unrigging the boat, nobody refills. They wait for camp, and they row all afternoon dehydrated in desert heat with a full jug three feet away. It’s the most preventable problem on any summer trip.
The 6-liter soft bag handles this perfectly. It fits where the day-use jug rides, stays soft against your legs, and packs to nothing once it’s empty.
Sun, Heat, and the Plastic Taste Nobody Warns You About
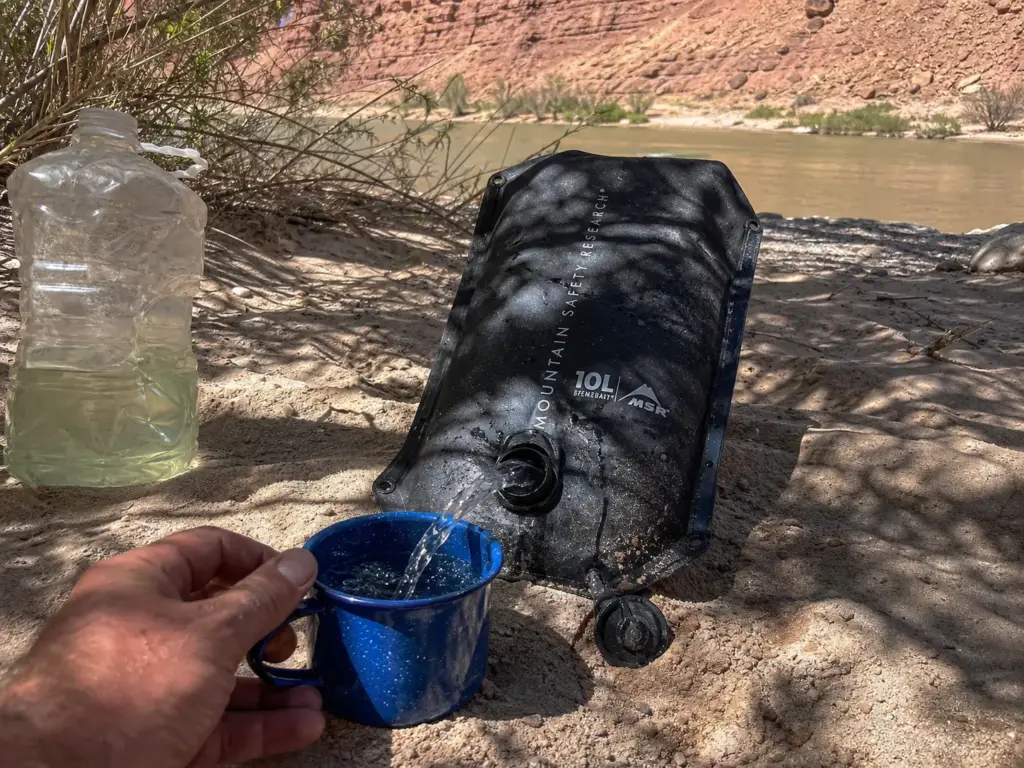
Every water storage guide ever written assumes storage guidance that assumes a cool, dark basement: 50 to 70 degrees, out of direct sunlight. A river trip does the exact opposite for eight hours a day, six days in a row, and then people wonder why the water tastes like a pool toy by Thursday.
The physics are straightforward once you look at the container wall. A 2.5-millimeter opaque wall blocks light. A thin translucent wall passes it through, which heats the water faster, accelerates plastic degradation from the inside and the outside at once, and gives algae the light it needs. That’s the whole reason the cheap grocery-store jug fails in the desert while the thick opaque one doesn’t.
Plastic taste scales with heat. Warm water pulls more from the container walls, and it’s worse in a jug that’s new, worse in a jug that got stored sealed and damp, and worse again in thin plastic. Baking soda in the rinse water helps with a jug that’s already picked up a taste. Not buying translucent containers helps more.
Placement is free and works better than any of it. Jugs in the shade of the load, or tucked under a thwart, or with a wet cotton bag draped over them run noticeably cooler than the ones sitting in open sun on the deck. Evaporative cooling from a soaked bag is the oldest trick on the river and it costs you a t-shirt.
Freeze a 2.5-gallon container solid before the put-in and load it into the cooler as a block of ice. It chills food for the first few days, then thaws into cold drinking water for the back half of the trip. One object doing two jobs, and it beats block ice because you drink the meltwater instead of draining it. Works in the same cooler you’re already fighting to keep cold, and it buys you a day or two of ice life for free.
Treating River Water When Your Jugs Run Dry
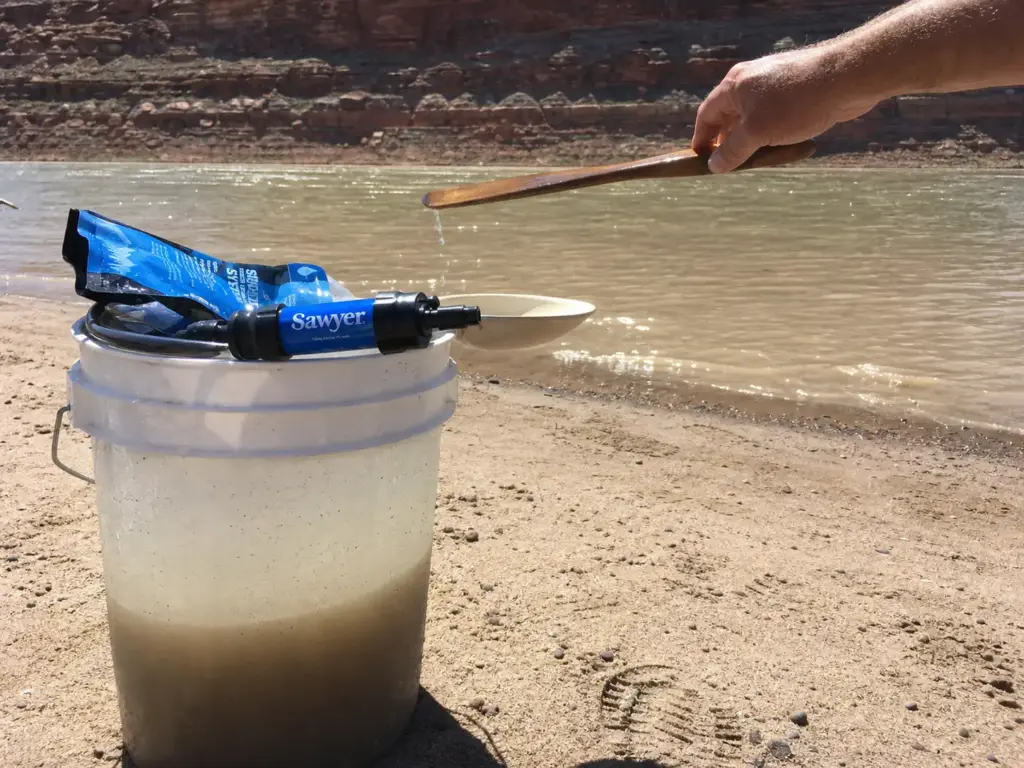
Spring runoff on the Colorado has the color of coffee with milk in it. You screw a filter onto a bottle, pull two liters through, and then nothing comes out at all. That’s the moment most people learn there’s a step before filtering.
Worth saying plainly: on most permitted western river trips there is no water cache waiting for you downstream. Unlike a thru-hike, nobody drove a resupply to mile 140. Treating river water is the only refill that exists between the put-in and the take-out, which is why the process below is a core skill and not a curiosity.
Settle the silt before it touches your filter
Flocculation with alum is the old western-river answer and it works exactly as advertised, as long as you do the counterintuitive part right.
– Add about one tablespoon of alum per gallon of silty water – Stir very slowly, in one direction only, for about five minutes – Stop when you see floc forming, which looks like snow suspended in the bucket – Let it settle undisturbed for roughly 20 minutes – Dip the clear water off the top with a ladle into a clean container, leaving the sludge behind
The part everyone gets wrong is the stirring. Fast, vigorous stirring tears the floc apart as it forms and you end up with cloudy water and wasted alum. Slow and one-directional lets the particles clump instead of shredding. It feels wrong the entire time you’re doing it.
This is documented practice on the Green, the Rio Grande, the San Juan, and the Little Missouri, and it’s the classic alum method Cliff Jacobson documented for silty western rivers. Boaters running muddy water have been doing it for generations.
Now the non-negotiable part: flocculation does not remove pathogens. Clear water is not safe water. All you’ve done is take out the suspended sediment so the next step can work. Settling is step one of two, and skipping step two is how people get sick on day six.
If you’d rather buy the process than mix it, the Water Wizard Sediment Remover packages the same chemistry for river use, sold through rafting shops rather than the big retailers.
Where the sediment load comes from is worth knowing before you launch. On the Colorado through Cataract and Westwater, a Paria or Little Colorado inflow upstream can change the river from drinkable-after-settling to chocolate milk in a single afternoon. Groups launching out of Moab tend to plan around that seasonally rather than assuming a filter will cope.
Filtration AND disinfection — both, always
A 0.1-micron squeeze filter in Colorado River or Green River water clogs in liters, not gallons. That’s not a defect. It’s what happens when you ask a membrane sized for microbes to handle suspended clay. Settle first, filter second, and one filter lasts the whole trip instead of one afternoon.
Backflushing buys back some of that flow, and it’s worth doing every evening rather than waiting until the thing has stopped. A pump filter handles silt better than a squeeze or a straw filter does, at the cost of weight and a moving part that can fail.
The Sawyer Products SP128 Mini Water Filtration System is the standard backup for good reason: 0.1 micron absolute, 99.99999 percent of bacteria and 99.9999 percent of protozoa, three ounces, lifetime warranty. It handles Giardia and Cryptosporidium without argument. What it does not do is remove viruses, because they’re smaller than the pore size.
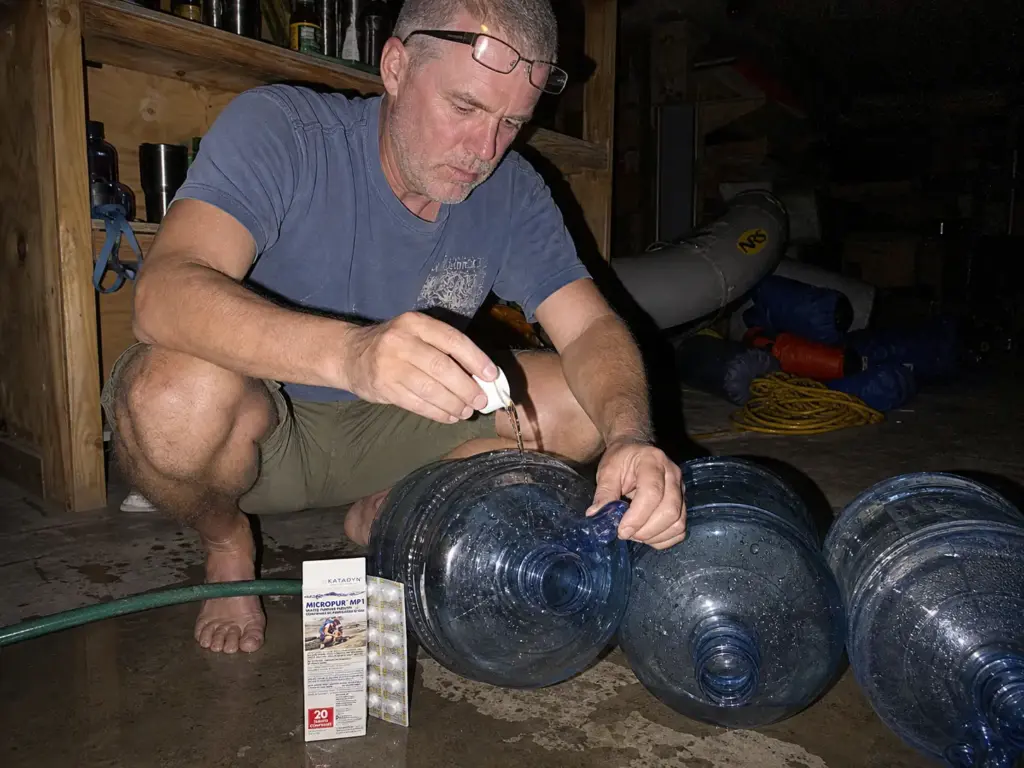
That gap is what tablets close. Katadyn Micropur MP1 Purification Tablets are the only EPA-registered purification tablet, effective against viruses, bacteria, Cryptosporidium, and Giardia. One tablet per quart, 4 ppm chlorine dioxide, and a four-hour reaction time for full effectiveness.
Read that four hours again, because it’s a logistics fact disguised as a spec. You dose water at night for tomorrow. You do not dose it when somebody’s already thirsty. Groups that treat purification as an on-demand step end up drinking under-reacted water or waiting around at a lunch stop.
For group volume, gravity systems change the arithmetic entirely. Flow rates run from roughly 1.75 to 2.75 liters per minute depending on the system, and filling 20 gallons is the difference between about 28 minutes and about 43 minutes. With sixteen people waiting on dinner water, that’s a real gap. The Platypus GravityWorks, the Katadyn BeFree, the MSR AutoFlow, and the Katadyn Expedition filter all live in this category, and choosing between them is its own decision about which filters actually hold up to sediment and group-sized volume.
Refill where the water is already clear
Plan your water stops at clear side creeks and tributaries instead of the main channel. Side canyons run clear when the main stem is loaded with sediment, so your filter flow stays high and one cartridge covers the entire trip. Look at the map before the put-in and mark the tributaries, because the good ones rarely announce themselves from the water.
One more thing that catches people who assume spring means clean water: high water in runoff season carries more sediment, not less. The river is moving material, and the more of it that’s moving, the browner it runs. A June trip on a big snow year needs the settling step more than an October trip does, not less.
Keeping Potable Water Separate From River Water in Camp
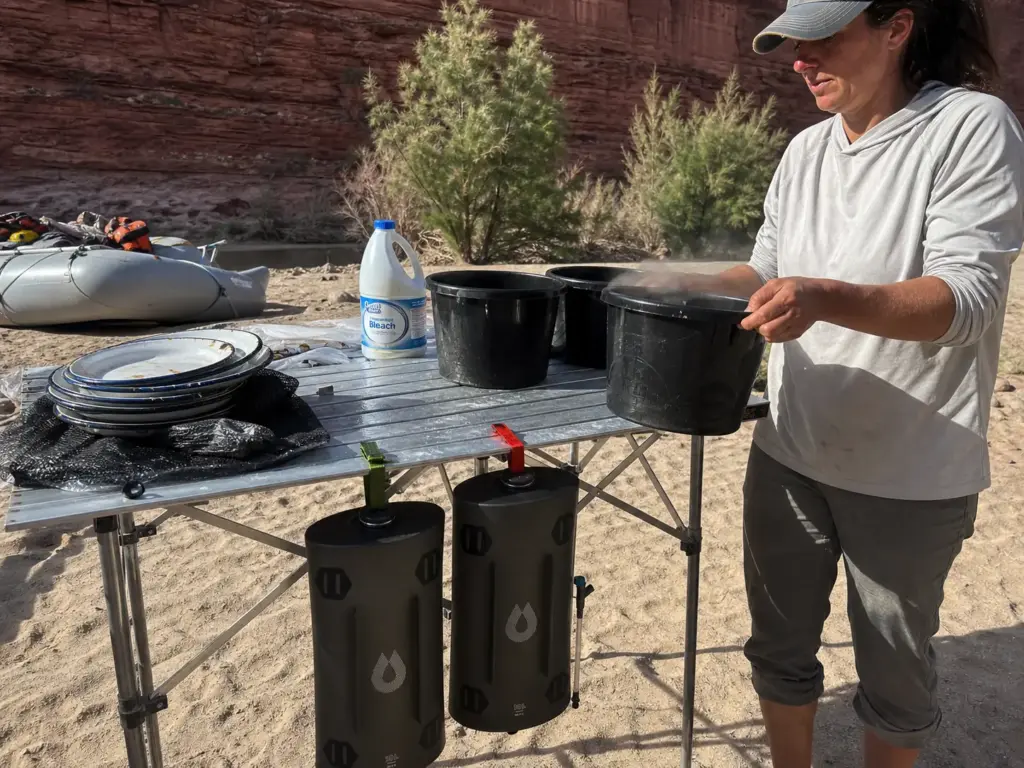
There’s a four-hour window on every trip where a container holds water that looks perfectly drinkable and isn’t. Somebody dosed it with tablets after dinner, it’s sitting by the kitchen, and it won’t be safe until well after midnight. Somebody is going to reach for it.
Tie short cam straps in two different colors to the container handles: red for untreated, green for potable. It costs nothing, it reads from across camp in the dark with a headlamp, and it survives being handled by twelve people who weren’t listening during the water briefing. Every group that adopts this stops having the who-treated-this-one conversation entirely.
Reuse the same cam straps you’re already carrying and the marking system costs you nothing but two spare straps from the bin.
The reason the marking matters so much is the reaction time. Four hours for tablets means a container spends a third of the evening in an ambiguous state. Tape and marker fade and peel; a colored strap on the handle is unmistakable and it doesn’t wash off.
If a container ever ends up genuinely suspect, boiling water is the fallback that needs no gear you didn’t already pack for dinner. One minute at a rolling boil handles it at normal river elevations, three minutes above 6,500 feet. It’s slow and it burns fuel, which is exactly why it’s the backup and not the plan.
Once the potable and river-water containers are separated, the camp system falls into place. The standard four-bucket dish line runs warm soapy, hot soapy, hot rinse, then cold bleach at one to two tablespoons per gallon, and the bleach bucket uses fresh water rather than reused wash water.
The split also decides your purchase volume, which is the connection almost nobody makes. If treated jug water covers drinking and cooking only, and settled river water handles the first wash bucket and hand rinsing, your gallon count drops. If everything comes out of the jugs, it climbs. Decide which system you’re running before you decide how many containers to buy, because those two numbers are the same number.
Hand hygiene is where that shows up daily. The handwash station next to the groover can run on settled river water with a splash of bleach and free up potable capacity for the kitchen. It’s also the station that matters most for keeping a whole group healthy for a week.
Cleaning, Storage, and Making Your Jugs Last a Decade
March afternoon, containers out of the garage, and the first thing you notice is that closed-plastic smell. Five minutes per jug and the season starts without anybody complaining about the taste.
The sanitizing procedure is worth doing right because it’s short. The CDC’s sanitizing procedure for water containers is one teaspoon of unscented liquid household bleach with 5 to 9 percent sodium hypochlorite per quart of water. Cap it, shake so the solution touches every interior surface, wait 30 seconds, pour it out, and let the container air dry completely.
Twice yearly sanitizing is the cadence, and the six month replacement rule applies to any water you leave sitting in a sealed container. On a river schedule that lands naturally at the start and end of the season, which is the easiest way to remember it.
One caution on sanitizing solution choices: vinegar deodorizes but does not sanitize. It’s fine for a musty smell and useless against anything that matters, so it’s a supplement to the bleach step, never a replacement for it.
Narrow-mouth containers are the ones that resist cleaning, and the trick for those is uncooked rice with soapy water. Pour in a cup of rice and a few inches of soapy water, cap it, and shake hard. The grains scour biofilm off the interior corners no brush can reach, then rinse until the water runs clear.
Baking soda handles residual plastic taste. A few tablespoons in a gallon, let it sit overnight, rinse. It won’t fix a container that’s genuinely degraded, but it resets one that just smells like storage.
How you put them away matters more than how you wash them. Dry completely, store with the cap loose so air moves through, and keep them out of the sun. The jug that smells in March is the jug that got put away damp and sealed in September.
That’s the real argument for spending on a rigid container in the first place. Cleaned and stored properly, one is a ten-year purchase, and ten years of trips makes the per-trip cost of a good container almost nothing next to the cheap jug you replace every other season.
Conclusion
Three things to carry out of this:
Do the arithmetic before you shop. People times days times a weather factor tells you how many containers to buy, and camp water is a separate line item from the drinking gallon.
Match the container to the boat. Frame boats take rigid jugs, small boats take soft ones plus a filter, and anything riding on deck gets a screw cap instead of a spigot.
Strap them like the boat is going over, because eventually one does.
Before your next trip, run the gallon math in the garage with the roster confirmed, and tie two colored straps onto the container handles while you’re at it. Ten minutes of work that changes how camp runs for the whole week.
Frequently Asked Questions
01How long can water sit in a jug before it goes bad?
Treated water in a clean sealed container stays drinkable about six months per CDC guidance, but deck heat and constant opening shorten that fast. A week-long trip is fine. A full container left in the garage all summer gets dumped and refilled.
02How long will water stay good in a 5 gallon jug?
Roughly six months in cool dark storage, far less in direct sun on a raft deck. Size is not the variable that matters. An opaque thick-walled container protects the water, while a translucent jug lets algae grow within days of sun exposure.
03What is the best long-term storage container for water?
A rigid opaque food-grade HDPE container with a sealed screw cap, for the same reasons it wins on a river: thick walls, no light transmission, no loose parts. The difference at home is you can store it at 50 to 70 degrees, which a river trip never allows.
04What is the best water jug to buy for a rafting trip?
A rigid rectangular 5-gallon container with a screw cap. The military-style format is the river standard because it stacks, gets walked on, pours on its side, and has factory rigging accessories. On a tighter budget, the Rhino-Pak brings thicker walls and a 5-year warranty.
05Do you need a water filter if you already carry jugs?
Yes, as redundancy rather than luxury. Running out of water in a canyon with no road access is a serious problem, not an inconvenience. A filter and tablets weigh almost nothing and cover two different failure modes, since filters miss viruses and tablets take four hours.