
In this article
You come up out of the water after a flip, chin already tipped back, and the helmet that felt perfect in the shop is now sitting across your eyebrows with the strap floating somewhere under your jaw. Ask anyone who has swum a real rapid and they will tell you the same thing: the helmet that fits on dry land and the helmet that stays put in moving water are not always the same piece of gear.
The gap between them is almost never the shell. It is the fit test nobody taught you to run, the certification you assumed meant more than it does, and the age of a rafting helmet that still looks brand new. Here is how to choose a whitewater helmet that stays where you put it, and how to check the one already in your gear bag.
What a Helmet Certification Actually Promises You
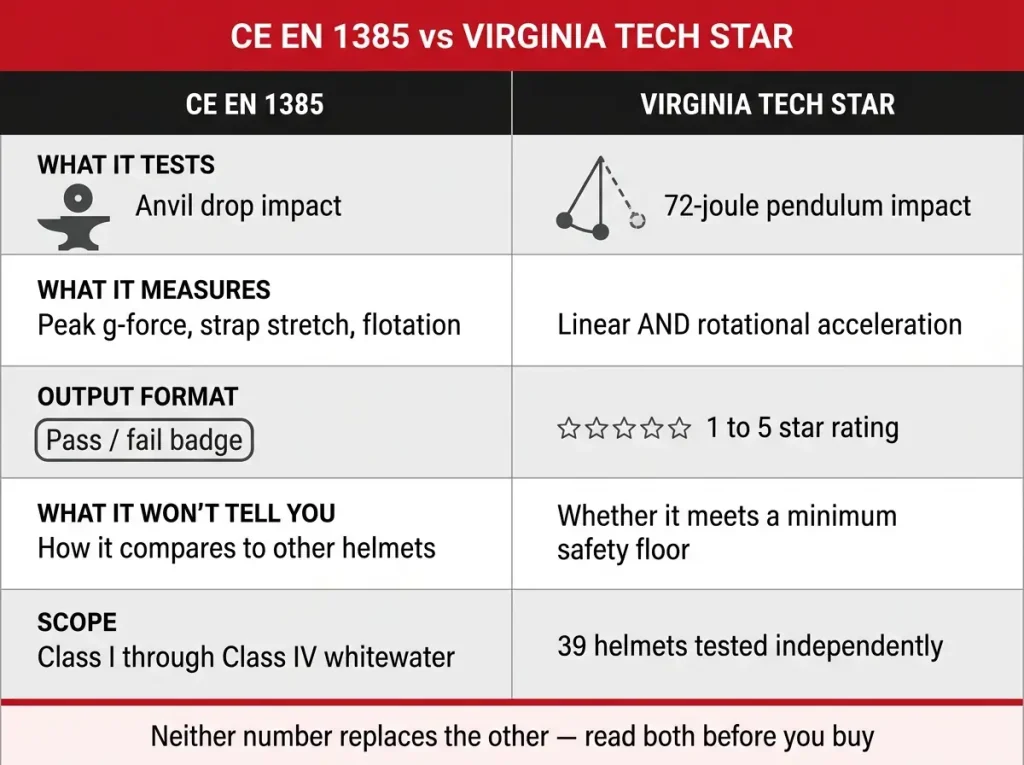
There are two markings worth reading on a whitewater helmet, and they answer completely different questions. A CE EN 1385 stamp is a floor: this helmet passed a standardized test. A Virginia Tech STAR rating is a scale: here is how much better this helmet handled a hit than the one next to it. Most boaters read them as competing grades for the same exam. They are not.
EN 1385 puts a helmet through a 2.5 m/s drop onto an anvil and caps peak deceleration at 250g. It also caps retention system stretch at 25mm and head movement at 8cm, and it requires the helmet to still float after four hours submerged. That last requirement is why a bike helmet is not simply a cheaper version of the same thing.
The part almost nobody mentions is scope. EN 1385 explicitly writes itself for Class I through Class IV whitewater. It is not a standard designed around Class V whitewater, Class VI, or high waterfall drops. A CE stamp is a genuine floor, not a blanket clearance for whatever the river hands you, and that makes it a risk versus consequence question rather than a checkbox, which is why how consequence scales with river class is worth understanding before you shop.
The star rating fills the gap the certification leaves. Virginia Tech’s independent whitewater helmet lab has now rated 39 whitewater helmets on a 72-joule pendulum impact test that measures linear acceleration and rotational acceleration together, and the rotational number is the one that tracks with concussion risk.
Sweet Protection’s Wanderer II and Rocker both earned five stars, and the Wanderer II reportedly matches the protection of helmets close to twice its price. Spending more does not reliably buy you a better score.
Half-Cut, Full-Cut, or Full-Face
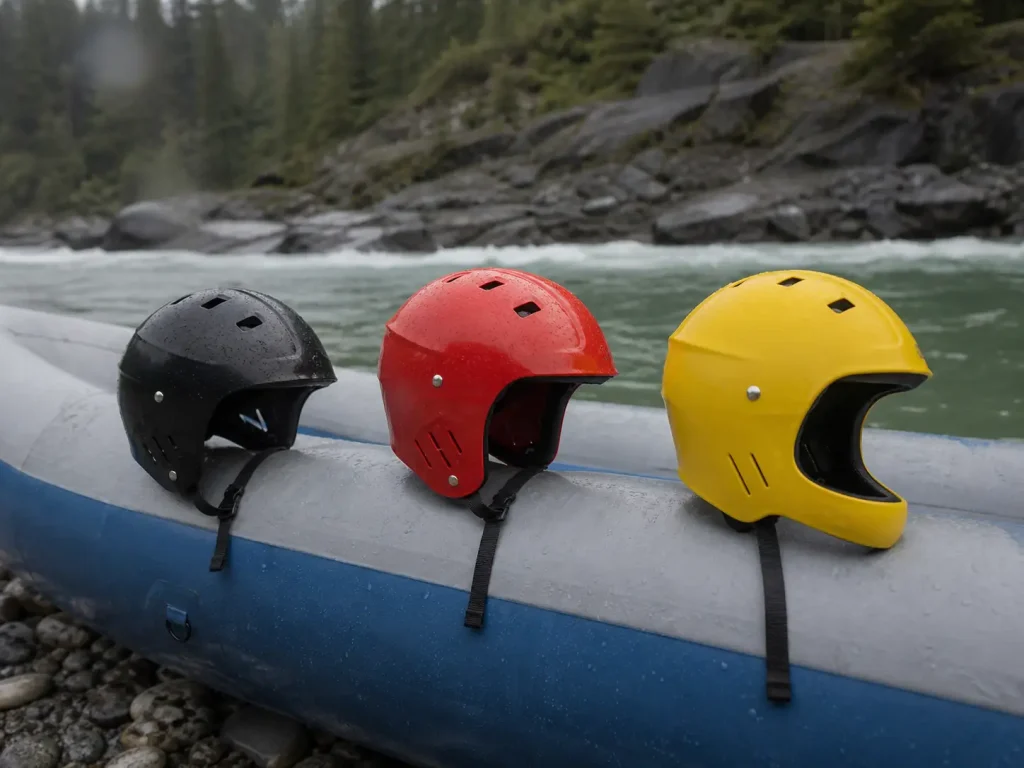
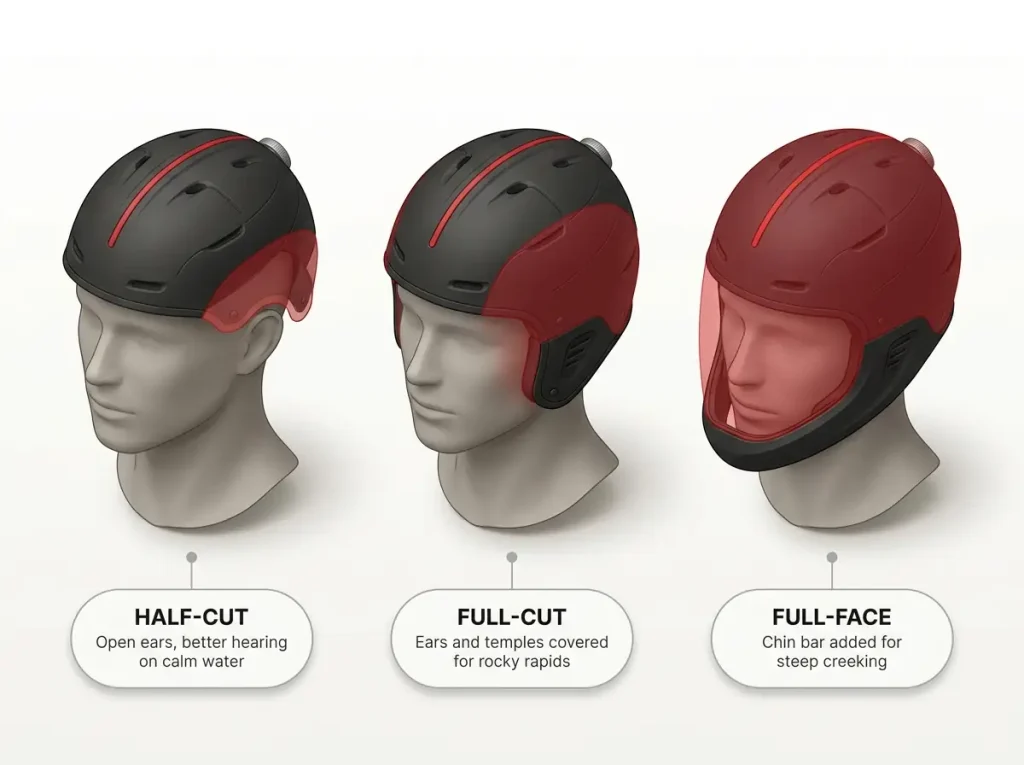
The ear question is the whole question. A half-cut helmet leaves your ears open, which means better ventilation and much better hearing when your guide is calling a command over the noise of a rapid. A full-cut helmet wraps the ear and the temple, which is exactly where a rock finds you when you are upside down and sideways in shallow water.
That is the real trade, and it is not a status ladder. More rock and shallower water pushes coverage up, which is why Class III whitewater with exposed ledges argues for more ear coverage than a big open summer float does. A full-face helmet adds a chin bar for steep creeking and creekboating, and on a standard raft trip it is usually a heat problem in search of a hazard that is not there.
Boaters crossing over from whitewater kayaking often arrive with strong opinions here, and brands like Sweet Protection, NRS, WRSI, Pro-Tec and Shred Ready all build across the coverage range. Try the type you are considering with your crew talking nearby before you commit. A paddler who cannot hear “high side” is a liability in the boat no matter how well protected their temples are.
Stand in the shop with a full-cut on and have someone talk to you from six feet away at normal volume. If you are already asking them to repeat themselves in a quiet room, you will not hear a single command in a wave train.
Once you know which coverage type belongs on your head, the next question is which specific helmet to buy, and that is a different article: our breakdown of which helmets are worth owning for the class you actually run sorts the current picks by water class and price tier.
Shell and Liner Materials, and Why Your Bike Helmet Doesn’t Count
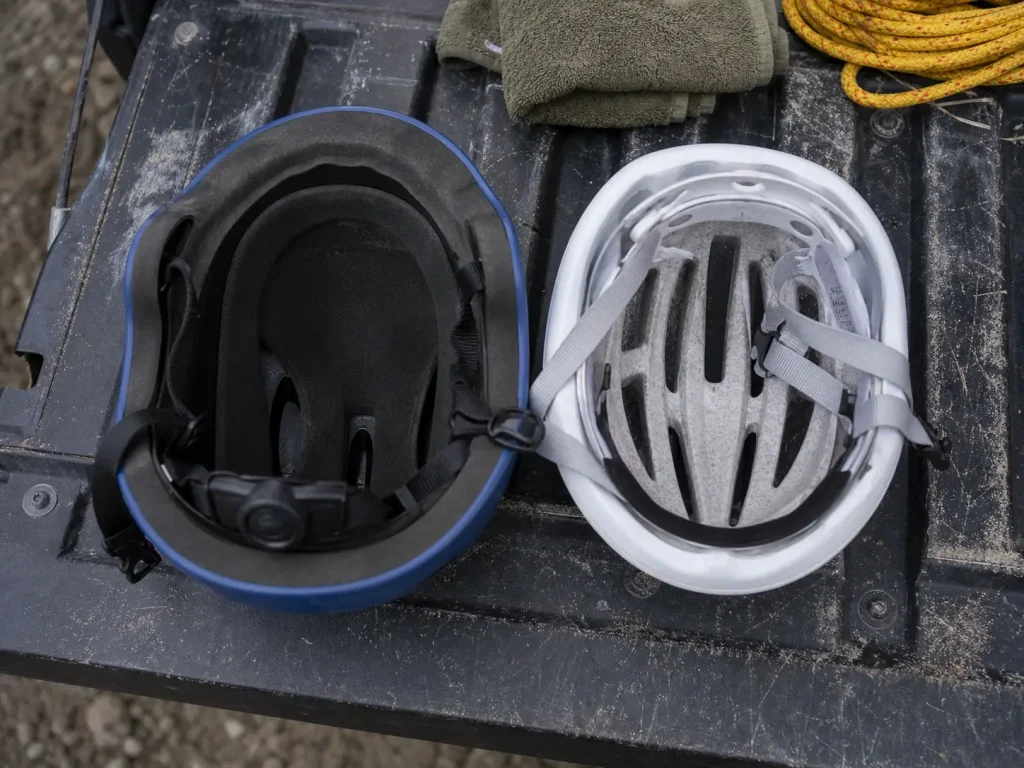
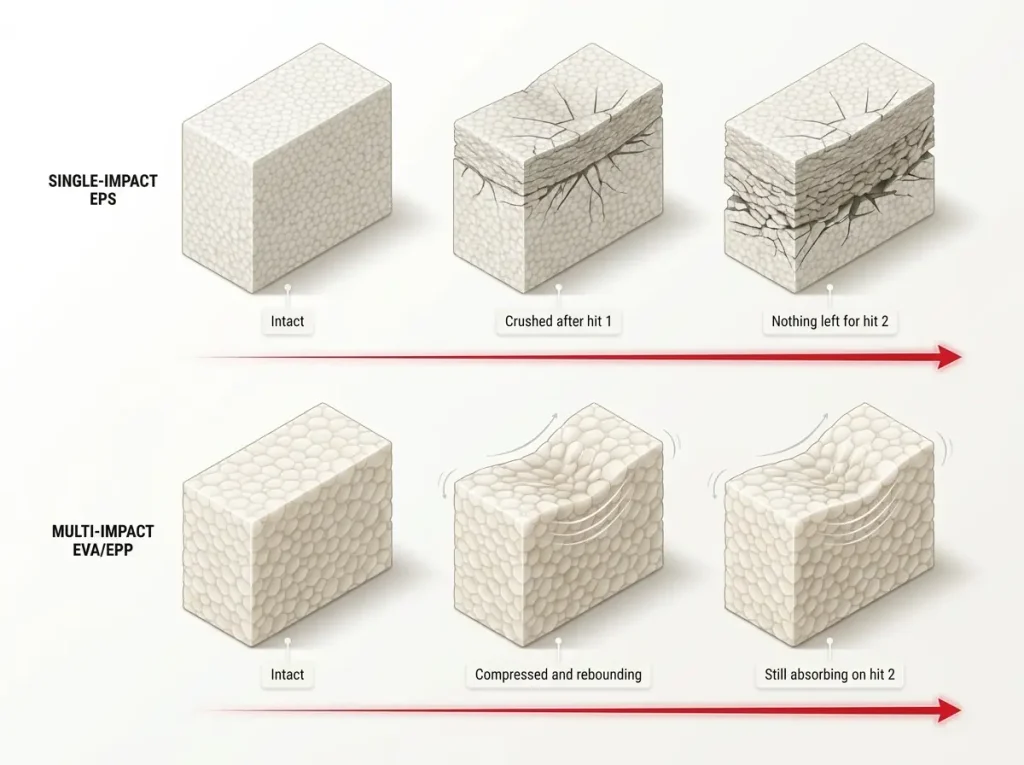
This is where the “I will just use my bike helmet” plan falls apart, and the reason has nothing to do with price. Bike and climbing helmets use EPS foam, engineered to crush once, absorb one impact and then be replaced. Whitewater helmets use multi-impact EVA foam or EPP foam, built to keep absorbing impact energy across repeated hits.
That difference is the entire argument. A whitewater swim does not hand you one clean impact. It hands you a rock, then a shelf, then a boulder, in the space of twenty seconds while you are trying to get your feet downstream.
Single-impact foam is spent after the first one and has nothing left for the second. And a head impact that leaves no mark on you at all still jolts the brain, which is how the CDC defines a concussion within the broader category of traumatic brain injury.
Shell material is the second half of the build. Molded ABS plastic is tough, heavier and easier on the wallet. A carbon fiber shell, or one built from fiberglass or Kevlar, is lighter, stiffer, more expensive, and holds up over a longer service life.
You can see both approaches in the same coverage type. The Sweet Protection Rocker Full-Cut Helmet is the composite example, from the same line whose Wanderer II and Rocker both scored five stars in the Virginia Tech testing. The NRS Chaos Full-Cut Kayak Helmet covers the same ear and temple real estate with a molded ABS shell at a friendlier price, with the shorter replacement window that comes with it.
The Retention System Is What Keeps It on Your Head
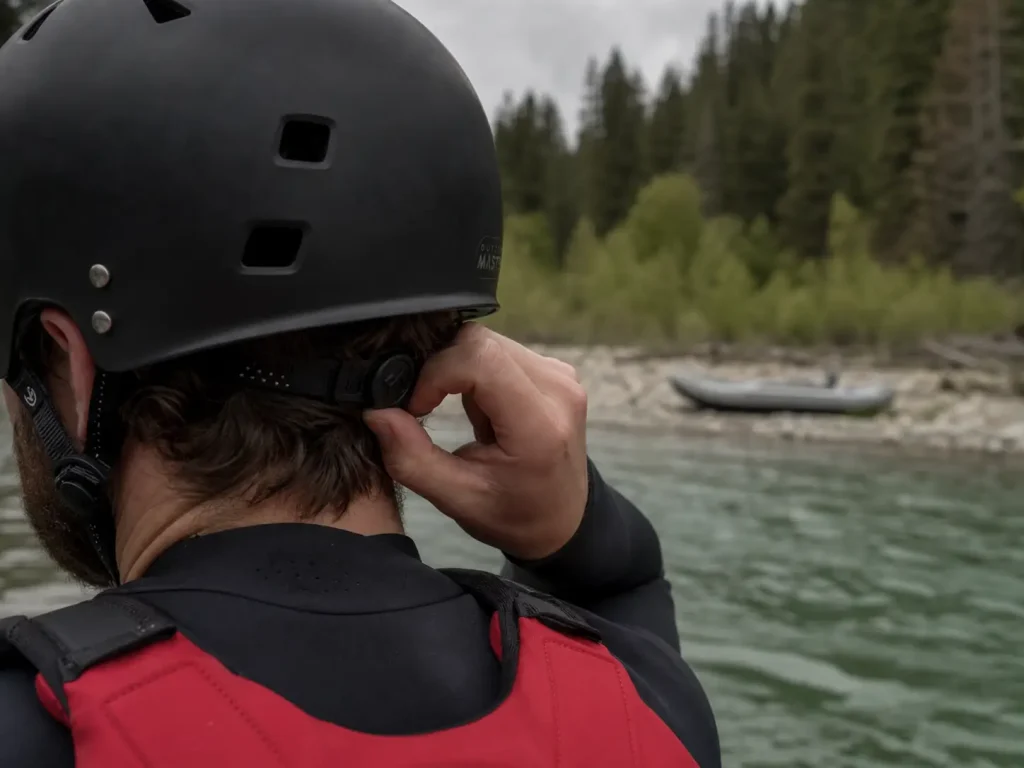
Coverage decides what the helmet protects. Retention decides whether it is still there to do the protecting. Every “my helmet spun sideways” story in a paddling forum is a retention failure story, not a shell story.
Dial, Ratchet, and Proprietary Retention
A dial-adjust cradle, a ratchet, a BOA system or a proprietary design like Occigrip all do the same job: they pull the helmet down onto the occipital bone at the back of your skull. That is the mechanism that stops the shell from rotating forward over your eyes.
Most whitewater helmets also ship with a bag of foam shims that lets you tune for a head shape the cradle alone cannot handle, and most people never open that bag. It is the cheapest fit upgrade you already own.
You do not have to spend premium money to get an adjustable cradle. The OutdoorMaster Kayak Helmet puts a dial system and ear pads in the budget-friendly tier, which makes it a reasonable place to learn what a properly retained helmet feels like before you commit to a premium shell.
Chinstrap and Buckle
The chinstrap should sit flat against your jaw, not float loose under your chin. Webbing stretches across a season of wet and dry cycles, and buckles wear at the seat where they latch. Neither one announces itself.
Retention hardware is also a recall item, and it can look completely normal while being compromised. A CPSC recall notice for a whitewater helmet’s chinstrap hardware is worth reading once, because it makes the point better than any inspection checklist: check your specific model and serial against the manufacturer’s recall page, not just the shell for cracks.
Warmth, Ventilation, and Being Seen
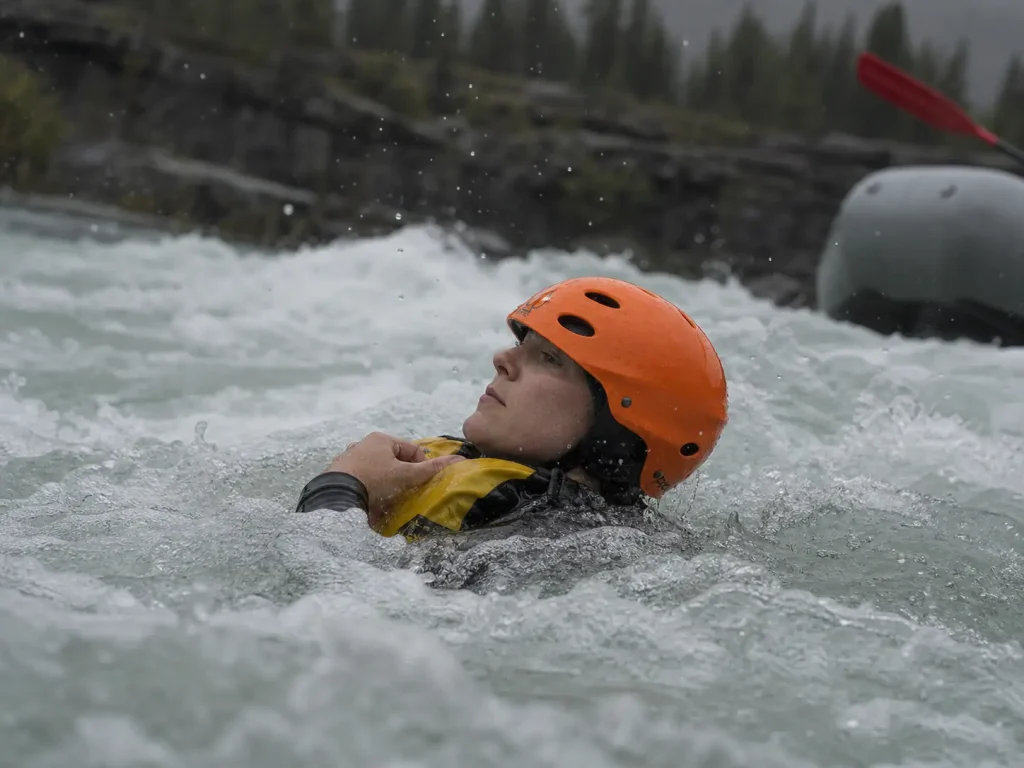
Comfort features are not soft concerns. A helmet you take off at lunch because it is cooking you is a helmet that is not on your head when the boat flips at two in the afternoon.
Drainage holes matter more than vent count. A shell that holds water yanks on your neck every single time you surface, and you find out how well yours drains the first time you come up in a wave train with it still full. Ventilation holes solve the heat problem on hot days, but they only help if the water leaving the helmet has somewhere to go.
Ear coverage is the same trade in a different season: warmth and protection on one side, hearing your guide on the other. Cold water pushes the answer one direction and a hot August float pushes it the other.
A bright color helmet is a rescue feature, not a styling choice. Swim visibility is the whole reason it matters, because during a swim rescue your crew is scanning a field of white foam looking for a head, and the same logic applies to the PFD that has to work alongside it. A visor or brim is genuine sun relief on flat mellow water and a sight-line problem in technical whitewater.
If ear coverage is what you are after without the premium price, the Pro-Tec Ace Water Helmet covers the ears on a vented shell in the budget tier.
The Fit Test You Run Before the Put-In
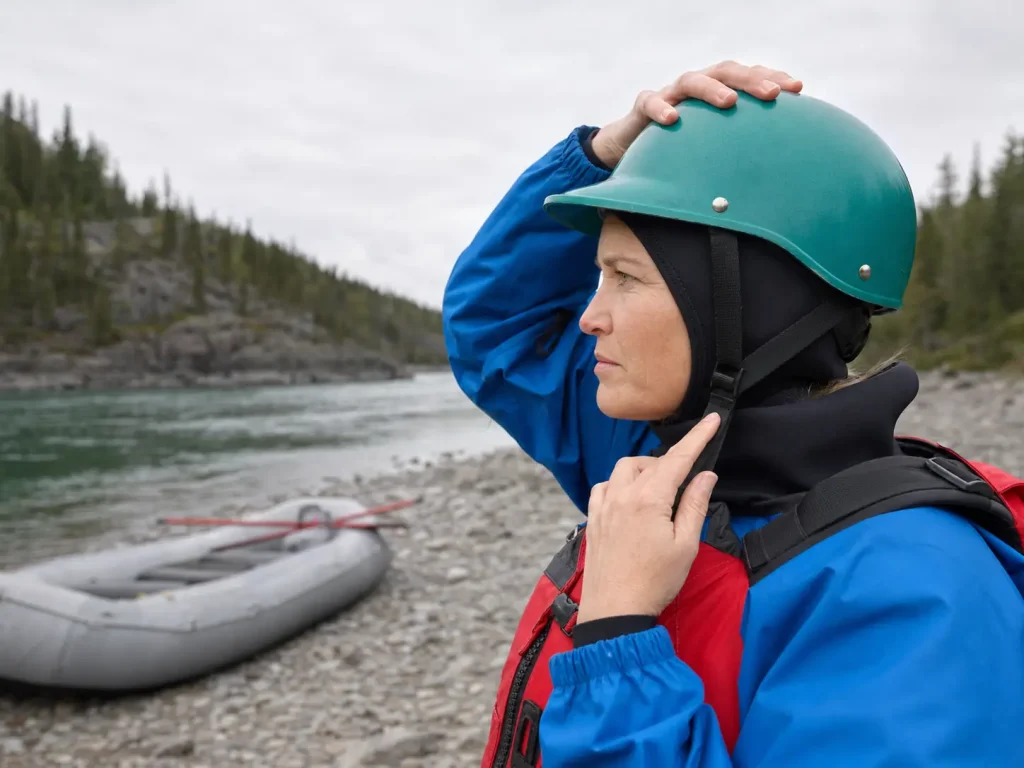
Every product page tells you a helmet should have a snug fit. Almost none of them tell you how to prove it. This is a thirty-second procedure you run in the parking lot, and it is the single biggest difference between a helmet that stays put and one that ends up across your eyes at the worst possible moment.
The Shake Test and the Two-Finger Rule
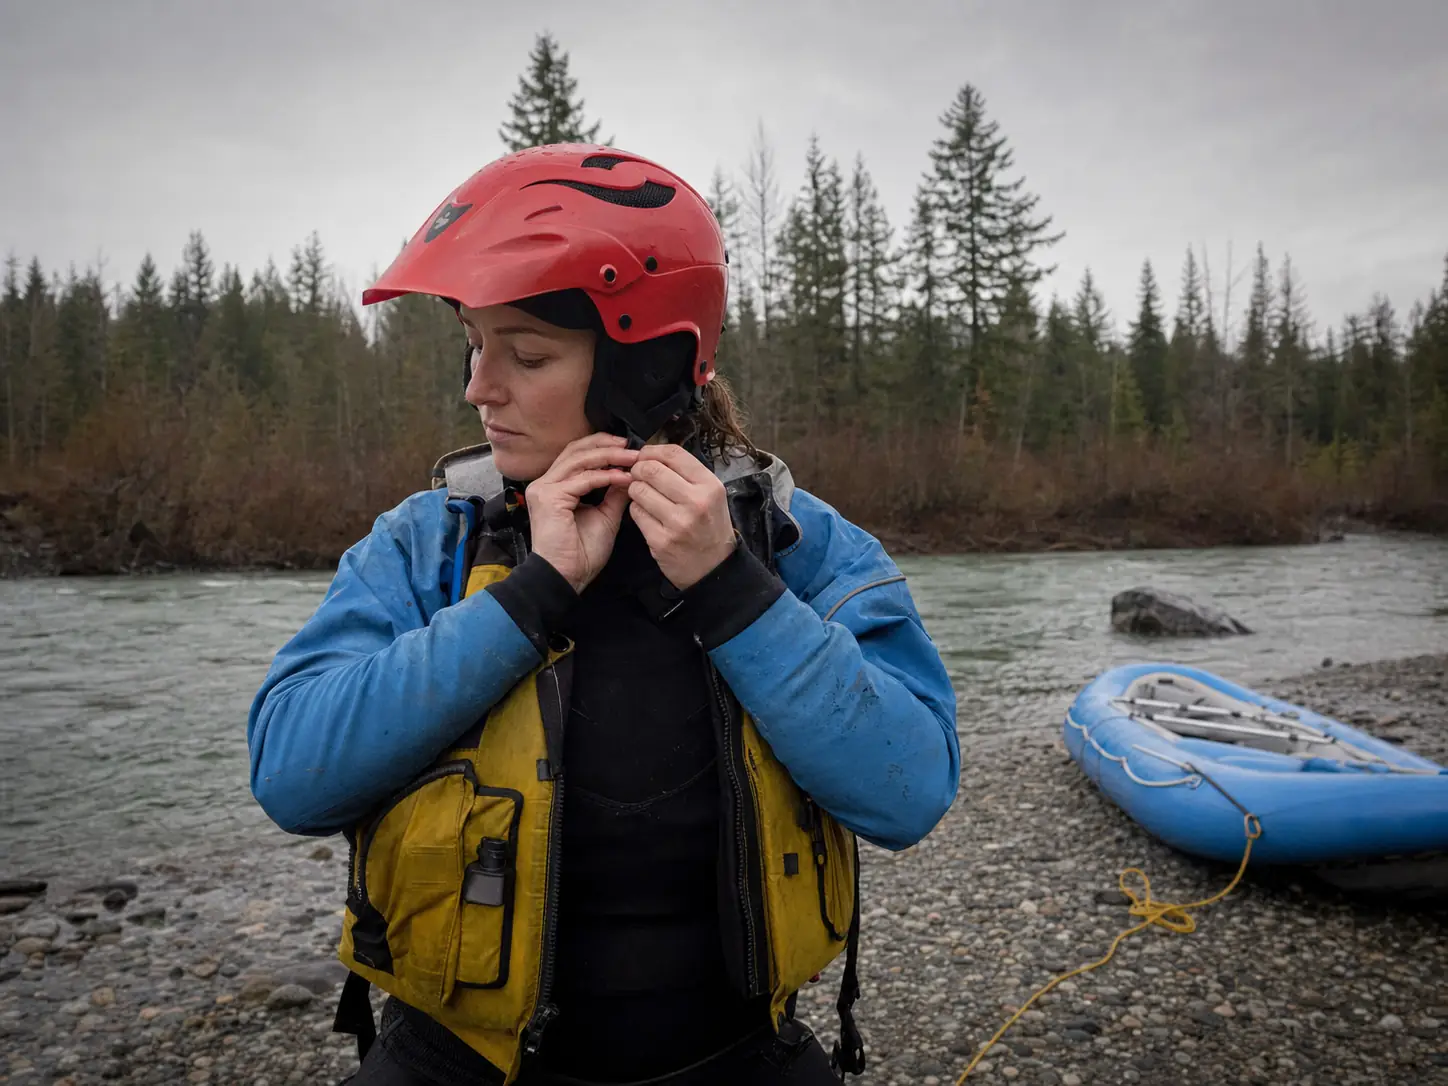
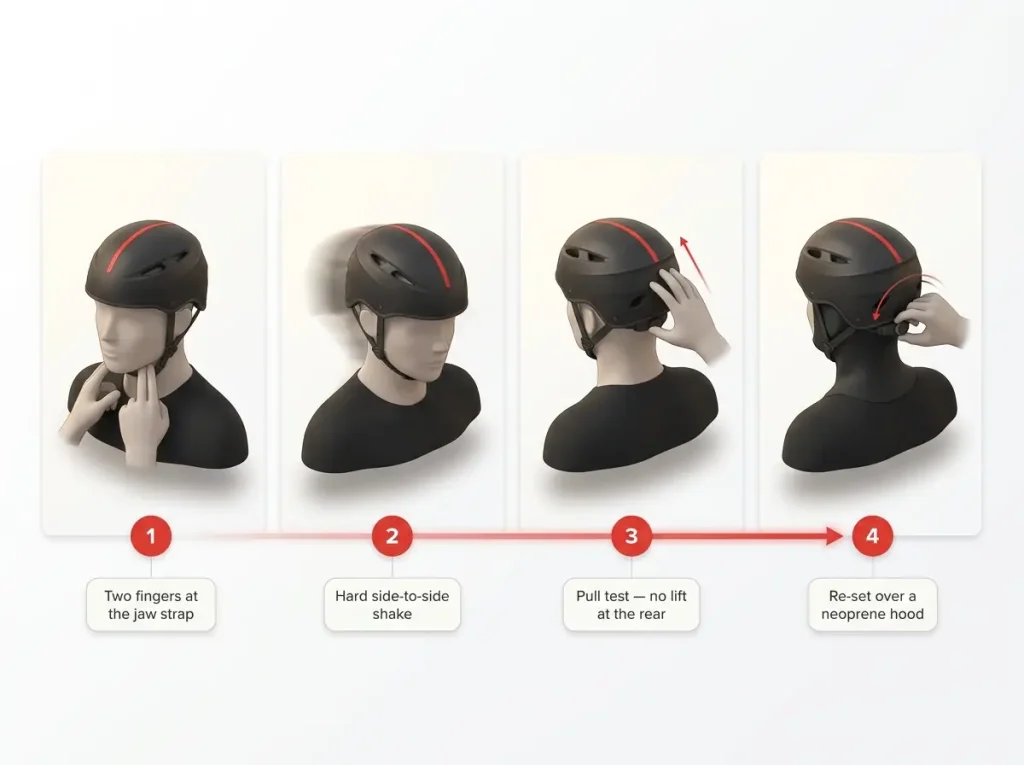
Fasten the chinstrap. Shake your head hard side to side, then nod front to back. The helmet either moves with your head as one unit or it does not fit, and there is no middle answer.
Next, reach behind you and pull firmly upward on the back edge of the shell. A properly retained helmet will not lift off the back of your skull. If it peels up even an inch, the cradle is not seated on the occipital bone and no amount of chinstrap tension will fix that.
Then run the two-finger rule on the chinstrap: exactly enough room for two fingers between the webbing and your jaw, and no more. Looser than that and the strap can slip under load, which is how a helmet ends up hanging off the back of a neck.
Run this at every put-in, not just at purchase. It is the same measure-then-verify approach that gets a PFD sized right, and for the same reason: webbing stretches and hardware wears while nothing about the gear looks any different.
Fit It Over the Layers You Actually Paddle In
A helmet fitted bare-headed in a shop is a different helmet over a few millimeters of neoprene. The hood raises the shell, the cradle runs out of adjustment range, and the whole thing perches on top of your head instead of seating around it. That is the classic ride-up failure, and it happens the first cold morning of the season to people who did everything else right.
The reverse is just as real. Dial a helmet in over a hood in April and it will be loose and spinning over bare hair in July, which is a different problem with the same root cause. Whenever your cold water layering changes, the fit test resets to zero and you run it again, and how to build that layering system determines how much bulk you are actually fitting around.
The practical version of this rule is hood compatibility: bring the hood or skull cap to the shop, try the helmet on over it, then take the hood off and check that the cradle still has adjustment left in the other direction. A helmet that only works in one season is a helmet that rides up in the other.
Mark your dial setting for hood and no-hood with a dot of nail polish on the adjustment wheel. Two dots, two seasons, no guessing in the parking lot at 6 a.m. with cold hands.
The Damage You Can’t See From the Outside
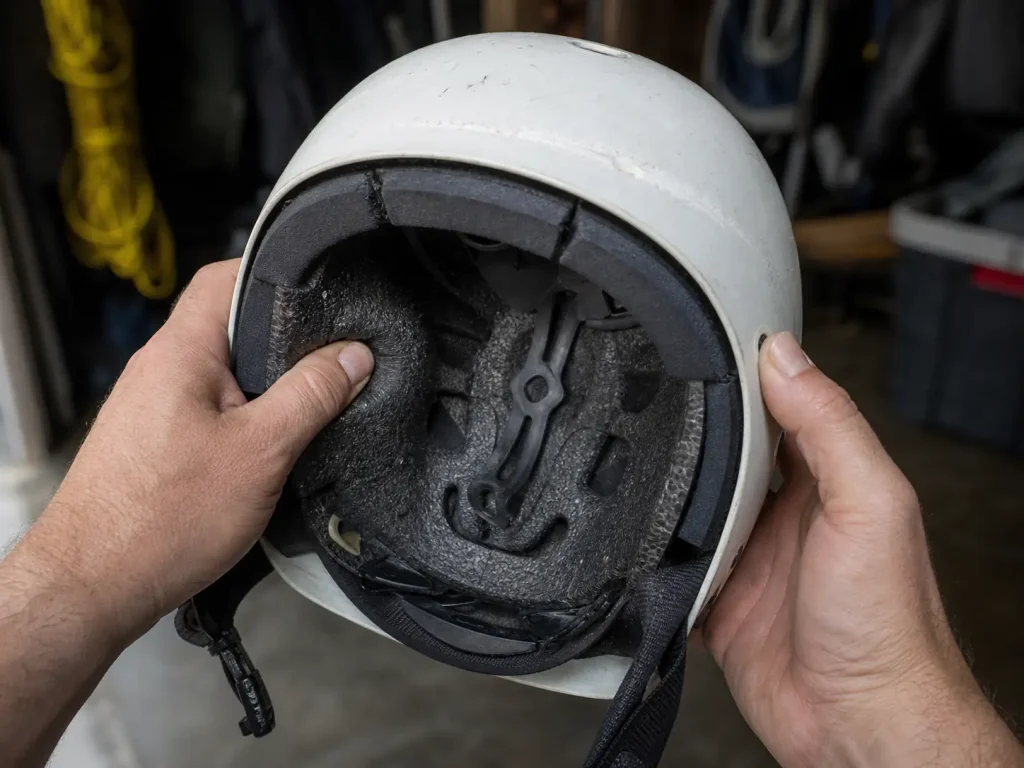
A whitewater helmet takes its hits underwater, upside down, in a place where nobody watched it happen. “It still looks fine” is the least reliable inspection in the sport, and hidden damage is the normal case rather than the exception.
Start with the foam, because foam is a one-time-use energy absorber at the point of impact. Press firmly into the liner where you think a hit landed, then press an untouched area a few inches away and compare.
Healthy foam gives and springs back with a consistent feel. Foam compression from a real impact feels dead under the thumb, stays slightly dented, and does not recover. That difference is the whole test, and it takes about ten seconds once you know what you are comparing against.
On composite shells, look for hairline cracks in the gel coat radiating out from any scuff, especially around the retention anchors and the ear cutouts. Those anchor points concentrate load, so they give up structural integrity before the rest of the shell does. A visible impact mark or measurably crushed foam retires the helmet even if there is no crack anywhere on it.
Give the retention hardware its own pass while you are in there. Fraying at the strap anchors, a buckle that seats loosely, webbing that has gone stiff and glazed: all three fail under load without looking wrong in your hands. The pattern that comes up over and over in paddling forums is someone who kept boating after “just a bump,” then found a dented patch of foam months later while cleaning the helmet, right under where the hit landed.
While you have everything out of the bag, it is a reasonable moment to look at the rest of the kit that quietly degrades between trips, because none of it announces its own retirement either.
When a Helmet Is Finished
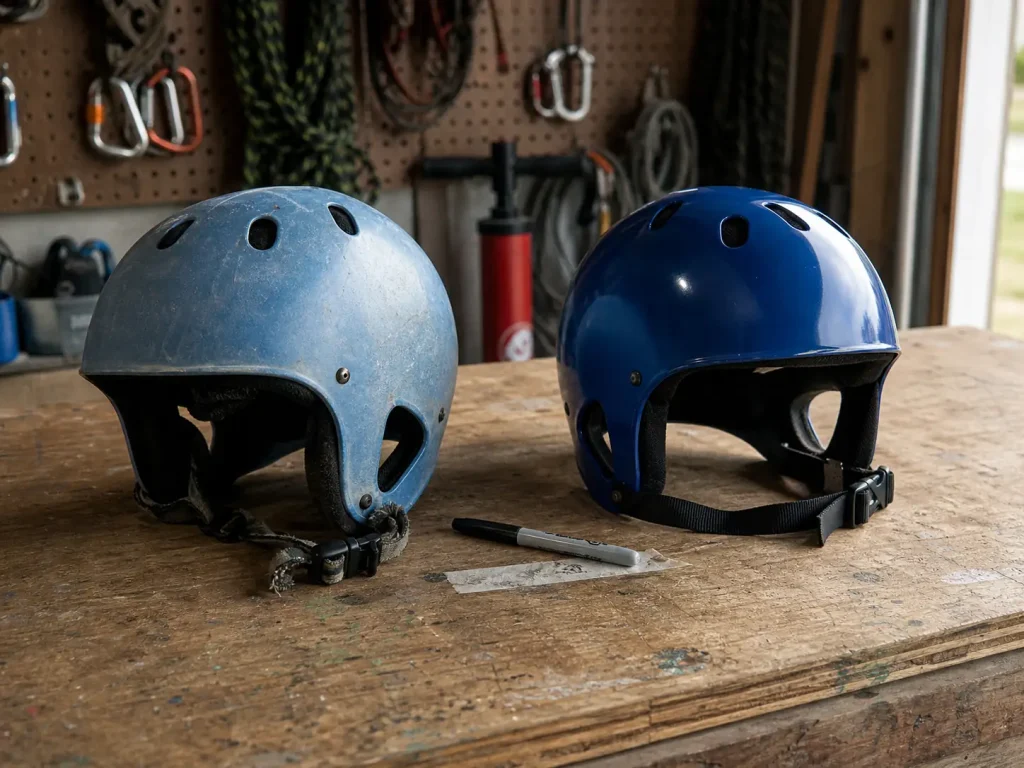
The calendar retires helmets that never took a hit. UV degradation from sun exposure, repeated wet and dry cycles, and sweat all work on plastics and foam whether or not you ever met a rock, and the helmet gives you no signal at all that it is happening.
Most manufacturers recommend replacement at 3 to 5 years even with zero visible damage. Construction changes that helmet lifespan: carbon fiber and fiberglass shells paired with premium foam commonly run 5 to 10 years, while fused foam-and-shell builds sit at the shorter end. It is the same retire-it-on-the-calendar logic that governs carabiners, pulleys and rescue hardware, where nylon and aluminum age on their own schedule regardless of use.
One rule overrides the calendar in both directions: any hard hit retires the helmet, full stop. Not “inspect it and decide.” The foam did its job once at that spot, and there is nothing left there for the next time.
Two details people miss when they think about helmet retirement. The clock starts at the manufacturer retirement date calculated from date of manufacture, not the date you bought it, and shop stock sits for a long time. And storage drives foam degradation faster than most boaters think, because a helmet baked on a rear windshield or strapped to a hot roof rack all summer ages faster than the identical helmet in a gear tote in the garage.
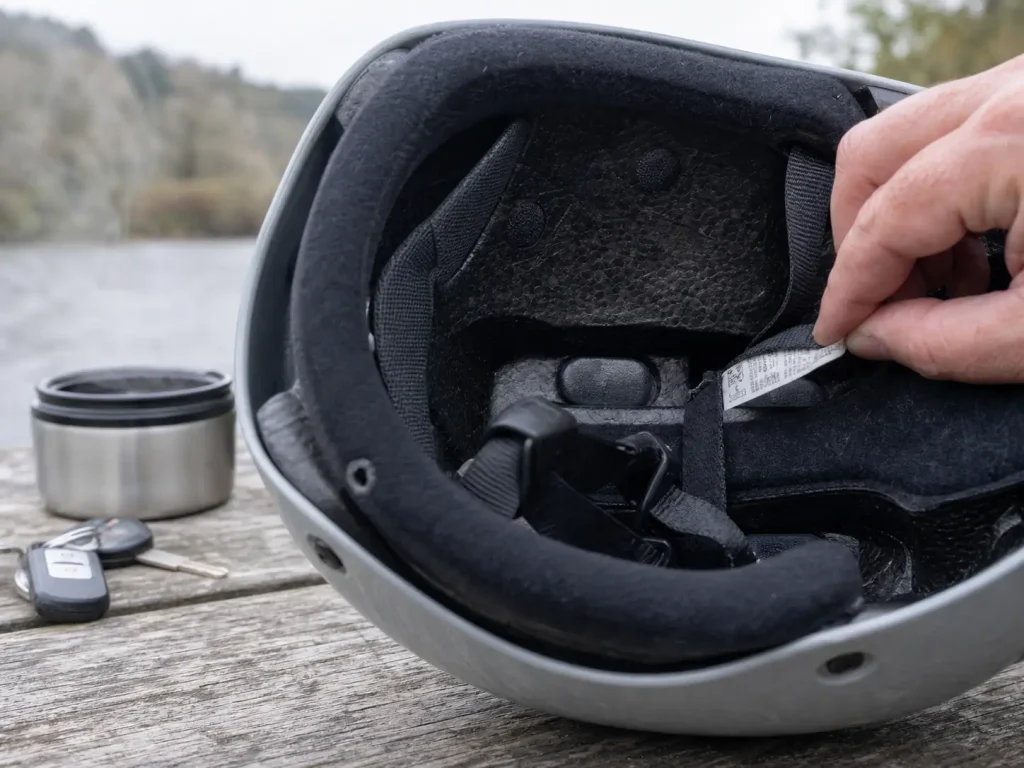
Write the manufacture date inside the shell in permanent marker the day you buy the helmet. Every boater who has tried to reconstruct a helmet’s age three seasons later wishes they had done it.
Putting It Together, Start to Finish
Everything above collapses into one short sequence you can run in an afternoon.
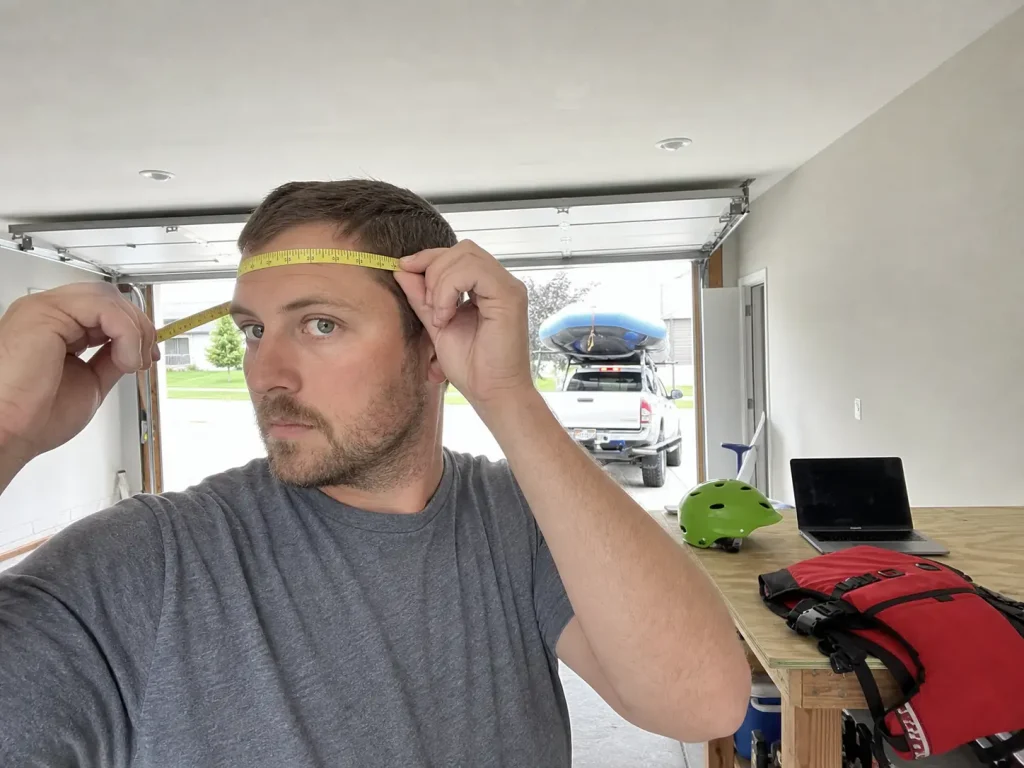
- Measure your head circumference just above the brow and use the manufacturer’s own size chart, because sizing is not standardized across brands any more than PFD sizing is.
- Pick the coverage type from the water you actually run most weekends, not the water you are working toward.
- Try it on with your real head layers, in the season you paddle most, and confirm the cradle still has range in the other direction.
- Run the shake test and the two-finger check before you pay, and again at every put-in after that.
- Confirm the certification, then find the manufacture date so you know where you sit in the replacement window from day one.
If you are still assembling the rest of the kit around it, where the helmet sits in a full setup by river class puts it in context with the other pieces that have to be in the boat before you push off.
The Bottom Line
Certification is a floor, not a grade. A CE stamp tells you the helmet passed; the star rating tells you how well it did compared to everything else on the shelf.
A helmet that fits bare-headed in a shop is not the same helmet over a cold-water hood. Test it over what you actually wear, in both directions, and retest whenever those layers change.
Age and impact history retire helmets that still look brand new. Know the date, and replace it after any hard hit whether or not you can see a mark.
Go pull the helmet you already own out of the bag this week and run the shake test, the two-finger check and the foam press. Then find its manufacture date. That is twenty minutes, and it tells you whether you need a new helmet before the river does.
Frequently Asked Questions
01Can I use a bike or climbing helmet for whitewater rafting?
No. Bike and climbing helmets use single-impact EPS foam built to crush once and be replaced, while a whitewater swim routinely delivers several separate hits in the same twenty seconds. Water helmets also have to float and drain, which bike helmets are not built to do.
02How do I know if my whitewater helmet fits correctly?
Fasten the chinstrap, shake your head hard, and pull upward on the back of the shell. It should move as one unit with your head and refuse to lift off, with room for exactly two fingers between the strap and your jaw.
03How often should I replace a whitewater helmet?
Most manufacturers recommend replacement every 3 to 5 years, stretching to 5 to 10 for composite shells with premium foam. Replace it immediately after any hard impact regardless of age, since the foam is spent at that spot even with no visible crack.
04What does the Virginia Tech helmet rating mean?
It is a one-to-five star comparative score from a 72-joule pendulum test that measures both linear and rotational head acceleration. Unlike a pass or fail certification, it tells you how much better one helmet performs than another.
05Does a helmet still fit if I wear a neoprene hood under it?
Often not. A hood or skull cap raises the shell and eats the retention system adjustment range, so a helmet dialed in bare-headed can ride up over cold-water layers. Fit it over the hood you actually wear, then confirm it still tightens down without one.