
In this article
You hear it before you see it: that thin hiss at the put-in that wasn’t there yesterday. Air leaving a tube you were about to trust for the next three days on the water. I’ve patched boats on sandy bars with the light going, and I’ve watched a buddy’s camp patch peel off mid-trip because he grabbed the wrong glue and skipped the one part that actually makes a Hypalon bond hold.
A repair that holds air isn’t hard, but almost every step has a quiet way to fail. Done right, from confirming your material to hitting the cure window, the boat itself is worth fixing rather than replacing, and these seven steps walk you through all of it.
Is It Actually Hypalon? The Material ID Test
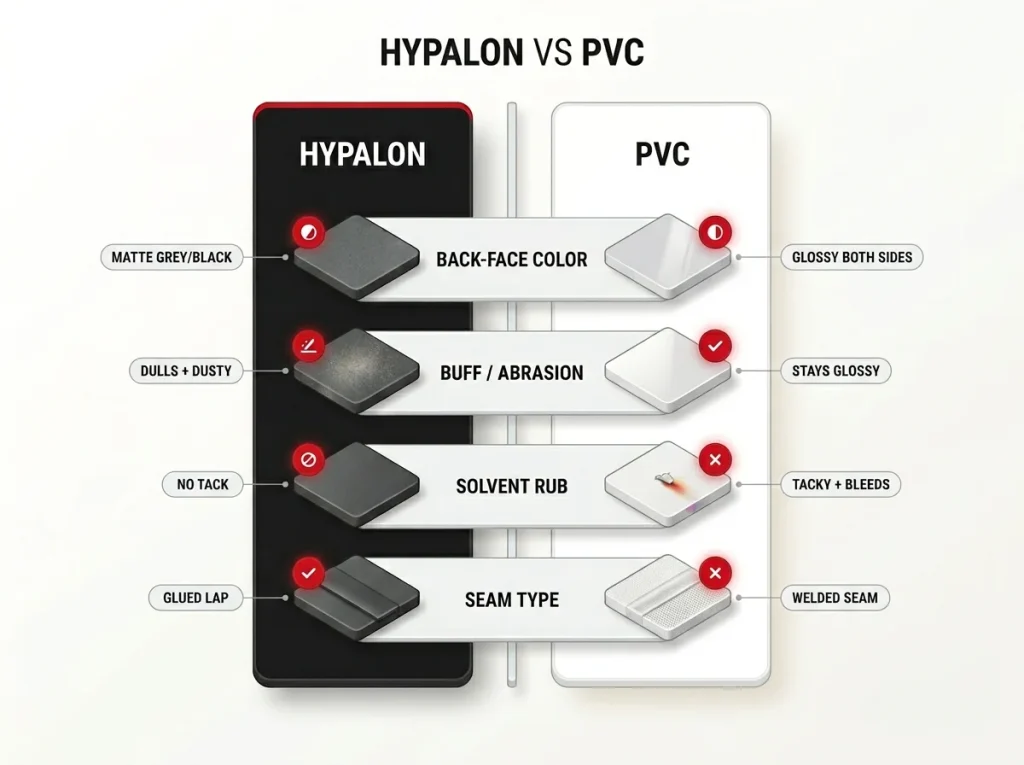
Here’s where boats die before step one: someone slaps Hypalon glue on a PVC tube, or the other way around, and wonders why the patch slid off in a week. The two materials don’t bond the same way and don’t take the same glue. A guide can tell them apart in about thirty seconds, and so can you once you know what you’re looking at.
The Back-Face and Seam Check
Flip a flap of your tube material and look at the underside. Hypalon (and the modern rubber that replaced it, Pennel Orca) has a matte, suede-like grey or black back face, while the outer skin can look glossy. PVC and polyurethane are the same shiny color on both sides. Then read the seams: Hypalon boats are built with a wide glued material overlap, and PVC shows a narrow welded, heat-pressed impression with the fabric weave printing through.
None of this takes tools. It’s just knowing the tells.
The Buff and Solvent Tests
If the back-face look isn’t conclusive, sand a hidden spot with 180-grit. Hypalon goes dull and throws a fine dust; PVC scratches but stays glossy. The single most reliable field test is a solvent rub: dab a little MEK or acetone on a rag and rub a tucked-away patch of material.
PVC turns tacky and bleeds color onto the rag. Hypalon dulls but never gets sticky. If you want a second opinion straight from a manufacturer, Polymarine’s guide to telling PVC from Hypalon walks the same tests with photos.
The buff you do to prep the patch is also your ID test, so you get two answers for one piece of sandpaper. If that first hidden scuff goes dull and dusty, you’ve confirmed Hypalon and roughed your surface in the same motion. If it stays glossy, stop — you’re holding the wrong glue.
When You Genuinely Can’t Tell
Some older boats and patched-over Frankenstein rigs refuse to give you a clean answer. When you’ve run all four tests and still aren’t sure, reach for a universal adhesive like Stabond that bonds both Hypalon and PVC. It’s the “when in doubt” glue, and it’s saved more than one repair where the material history was a mystery. If you’re weighing the two materials for your next boat rather than just patching this one, the real trade-offs between PVC and Hypalon as boat materials go deeper than repair glue.
What You Need — Glue, Solvent, and Patch Material
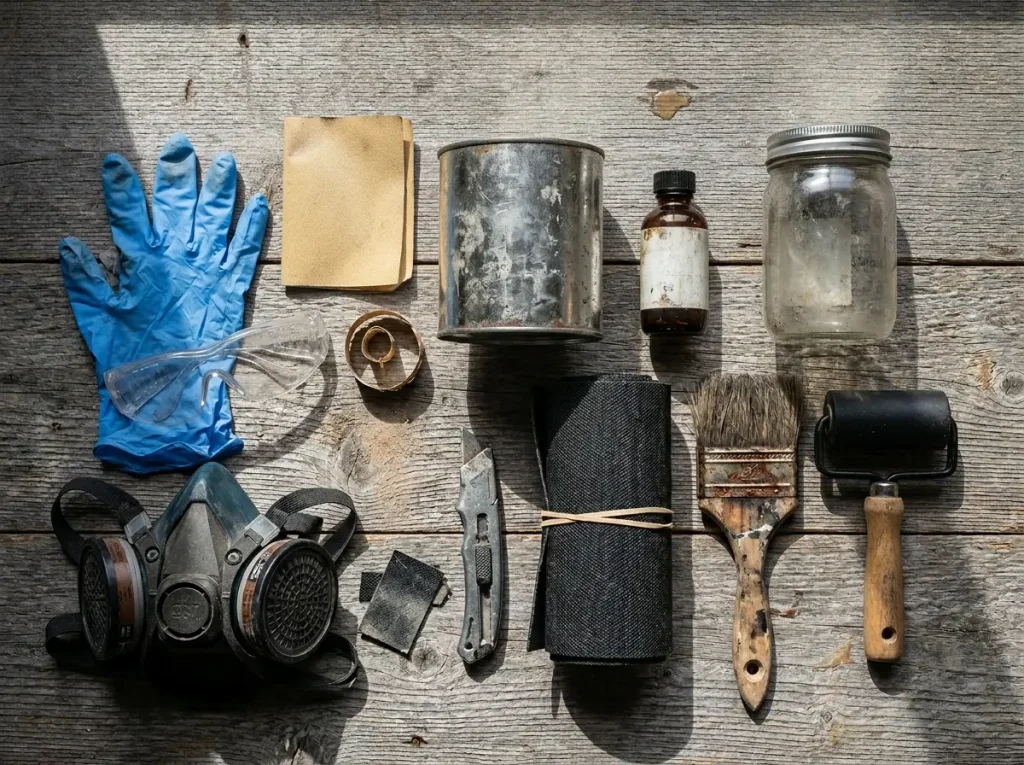
Most repair guides scatter this list across a dozen different articles. Here’s the whole thing in one place, plus the honest version of what you actually need versus what the boutique “repair kit” upsell wants you to buy.
The Glue Decision
For a permanent, air-holding repair you want a two-part Hypalon adhesive with its accelerator. The guide-standard is Clifton FA-4844, the glue NRS and Polymarine both point to. The catch: Clifton’s glue isn’t sold on Amazon — you’ll find it through river retailers like NRS and the specialty shops. If you’d rather buy one box and skip sourcing components separately, the Seamax 2-Part Hypalon Kit bundles the adhesive, accelerator, and patch material together, which is the simplest path to a real repair for a first-timer.
And when you’re not 100% sure of your material, Stabond is the pick that bonds both Hypalon and PVC. Skip the overpriced branded “kit” with a logo on it; the components on their own usually cost less and work the same.
Solvent, Patch Material, and Tools
Round out the kit with toluene as your cleaning solvent, patch material that matches your boat (Pennel Orca for rubber tubes), 180-grit sandpaper or a small rasp, a stiff glue brush, and a hand roller. A coin works in a pinch for the rolling, but a real roller earns its spot. A repair kit earns its place on your river gear checklist too, because the leak never shows up in the garage where the glue lives.
Safety Gear You Don’t Skip
Toluene and two-part adhesives off-gas, and you’ll be working close to them for a while. Wear a respirator rated for organic vapor, nitrile gloves, and eye protection, and do the gluing somewhere with real airflow — an open garage with a box fan, not a closed shed. This isn’t a lecture; it’s the difference between a pleasant afternoon and a headache that ends the project early.
Find the Leak Before You Patch
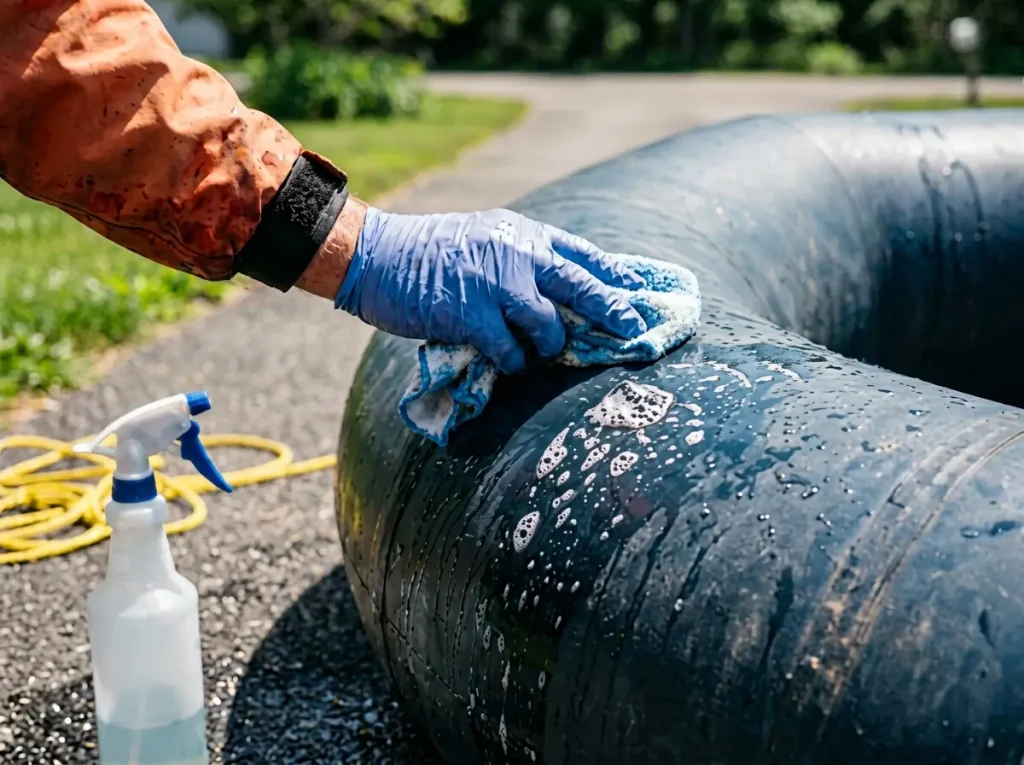
Cutting a patch before you’ve found the actual leak is how people end up patching the wrong spot twice. There’s a whole genre of “leaky raft but I can’t find the hole” nights, chasing a faint hiss with a spray bottle until the bubbles finally give it up. Do the diagnosis first.
The Soapy-Water and Glycerin Tests
Inflate the tube firm, then paint soapy water in and around every valve and over the suspect area. A leak foams up a cluster of bubbles right where the air is escaping. For the slow seeps that soap misses, mix in a little glycerin — the tougher bubbles it forms will pinpoint a pinhole soap walks right over. Work methodically along the tube instead of guessing; the leak is rarely where you assumed it was.
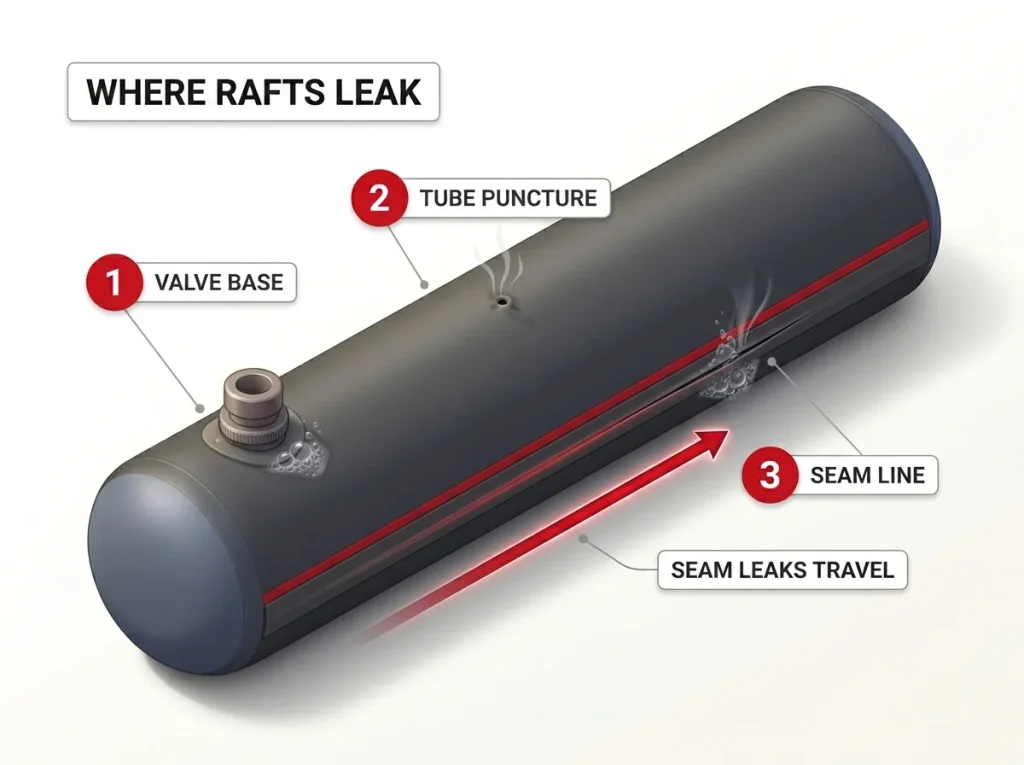
Check the valve before you blame the tube. A surprising number of “tube leaks” are just a loose valve or a bit of grit on the valve seat, which is a two-minute fix with a valve wrench instead of a full glue-up. Soap the valve base and the valve face first — if that’s where the bubbles are, you just saved yourself an afternoon.
Mark It Before You Deflate
The instant you find a leak, mark it. A paint pen or a wrap of tape that survives deflation works; a mental note does not. Mark every leak you find, not just the first, because boats that spring one often have a second nearby.
Then deflate. Trying to relocate a pinhole on a slack, folded tube is a special kind of frustration you don’t need.
When It’s the Seam or the Valve
A leaking seam is a different animal than a clean tube puncture. Air in a seam tends to travel along the reinforcing strip and surface somewhere else entirely, so the bubbles you see may be inches from the real failure. A garage patch over a traveling seam leak rarely holds; that’s usually a shop-level job. Knowing when to stop and send it out is its own skill, and it saves you from gluing the same spot three times.
Match the Patch to the Damage
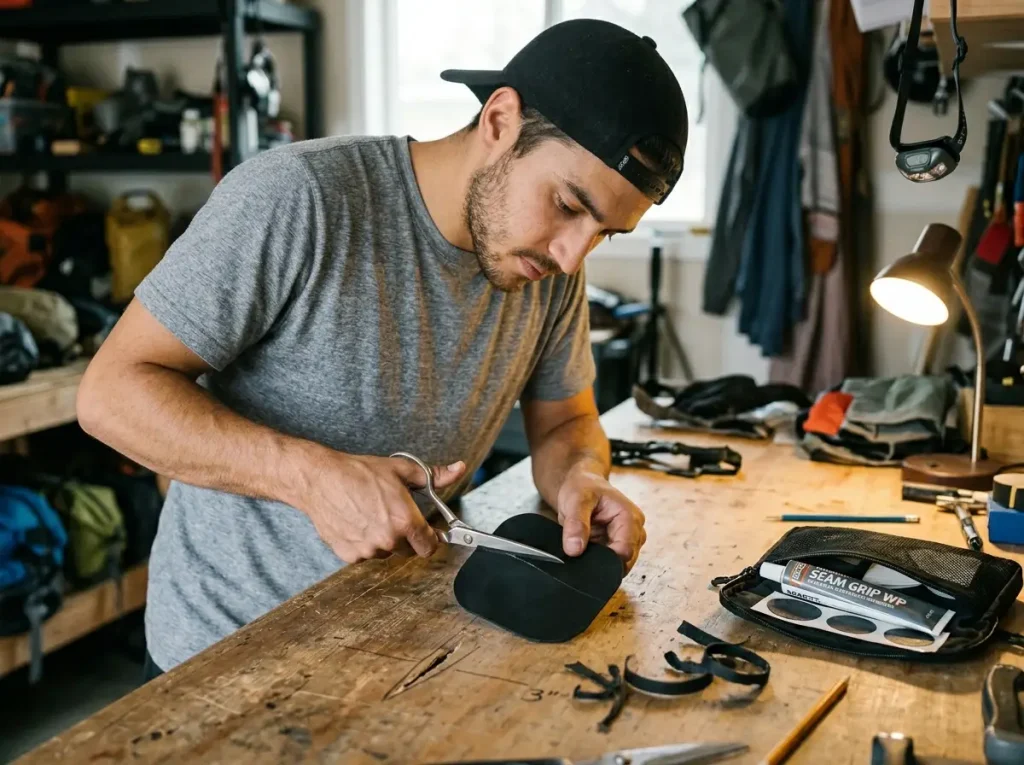
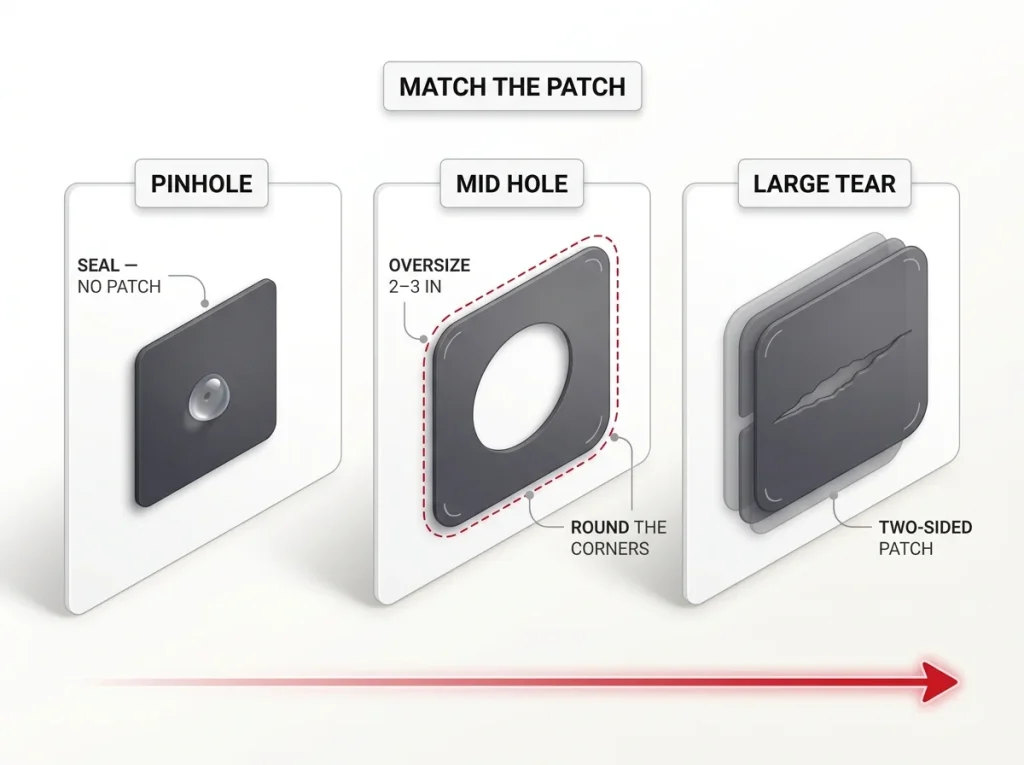
A pinhole and a six-inch gash are not the same repair, and treating them the same is how you either overbuild a tiny seep or underbuild a real tear. Size the fix to the damage.
Pinholes and Seeps: The No-Patch Fix
For a true pinhole or a slow seep, you often don’t need a patch at all. A flexible urethane adhesive like Aquaseal FD cures clear, stays flexible, and seals the hole on its own — it’s the do-everything tube for small stuff when you don’t feel like mixing two-part glue. Clean, dab, let it cure, done.
Holes and Tears: Sizing and Corners
For a hole roughly two to six inches, cut an exterior patch and oversize it two to three inches past the damage in every direction. Then round every corner. Square corners catch on rocks and gear and peel back over time; rounded corners have nothing to grab. This single habit prevents more slow-motion failures than any glue upgrade.
Match the patch material to your boat — and if you run a packraft, remember the thinner-denier fabric on most packrafts behaves differently under a stiff patch than a heavy raft tube does.
Big Structural Tears
Once a tear runs past six inches or sits in a high-stress zone, one patch won’t carry the load. Go two-sided: an interior patch and an exterior patch, so the repair takes tension from both faces. It’s more work and more cure time, but a structural tear with a single outside patch is a repair waiting to reopen on the next big wave train.
Prep Is Everything — Buff, Then Solvent
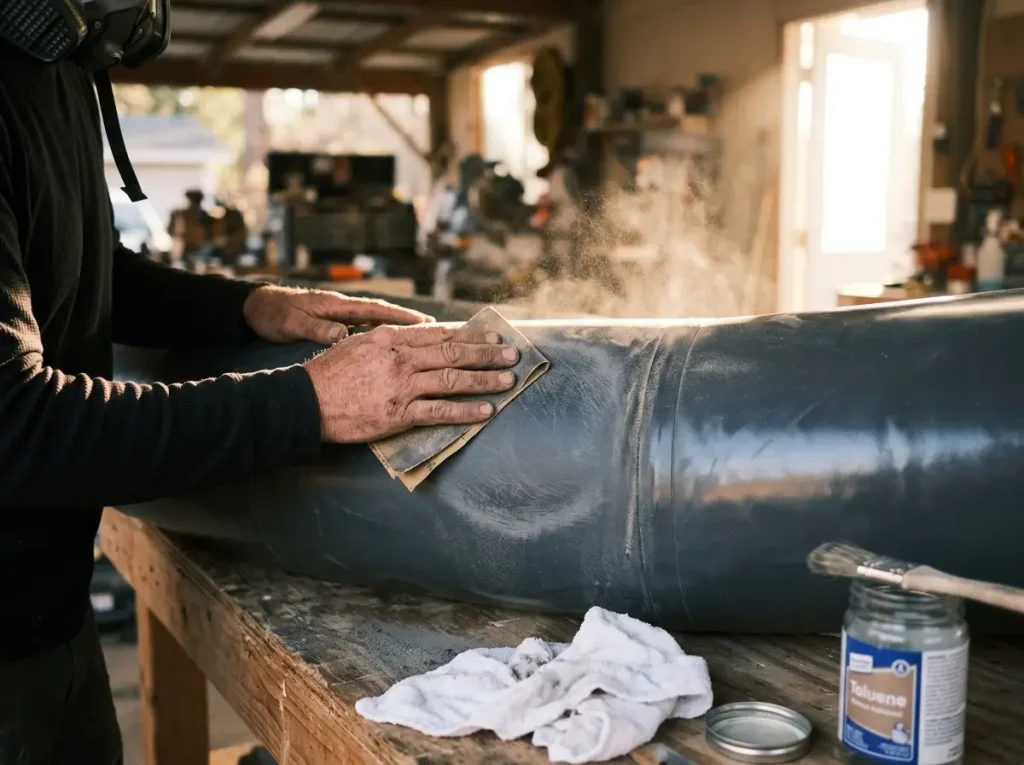
Most failed patches don’t fail because of the glue. They fail right here, in prep, and then the owner blames the adhesive. The bond is only as good as the surface under it, and that surface needs two things: a mechanical key and a chemical clean, in that order.
Buffing to a Mechanical Key
Buff both the patch and the boat with 180-grit until the surface goes evenly dull. You’re creating a mechanical key — microscopic tooth for the glue to grab — not grinding through the material. Go light enough that you never expose the reinforcing threads. A glossy, un-buffed surface gives the glue nothing to hold, and that’s a patch that lifts at the edges within a season.
The Toluene Clean
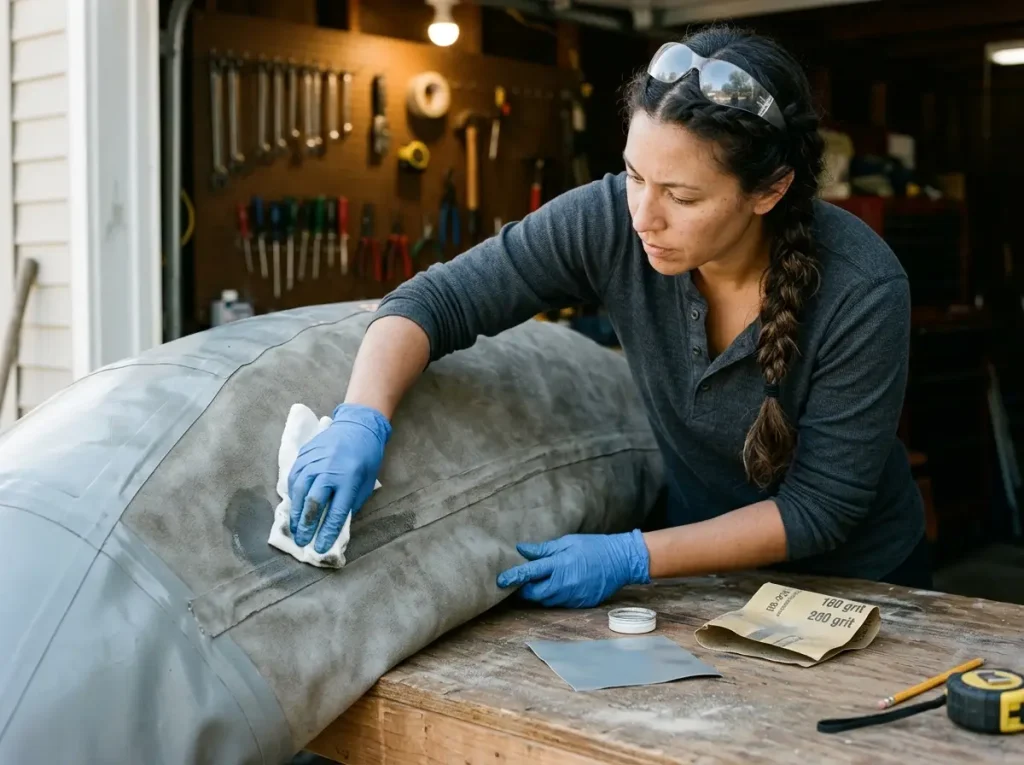
After buffing, wipe the area with toluene on a lint-free towel. This strips the oils, mold-release glaze, sanding dust, and — critically — any old UV protectant off the surface. That last one matters: a tube that’s been treated with a protectant over the years has a film the glue cannot key into, and gluing over it is a top cause of mystery failures. Let the solvent flash off completely before any glue touches the surface.
Mask and Mark the Patch Footprint
Trace the patch footprint with a pencil before you glue so you know exactly where the adhesive goes. Buff a hair past that line so no glossy edge sits under the bond. It’s a small step that keeps your three coats inside the lines and your edges fully supported, which is exactly where peel starts when prep gets sloppy.
Gluing It Right — Three Thin Coats and the Accelerator Truth
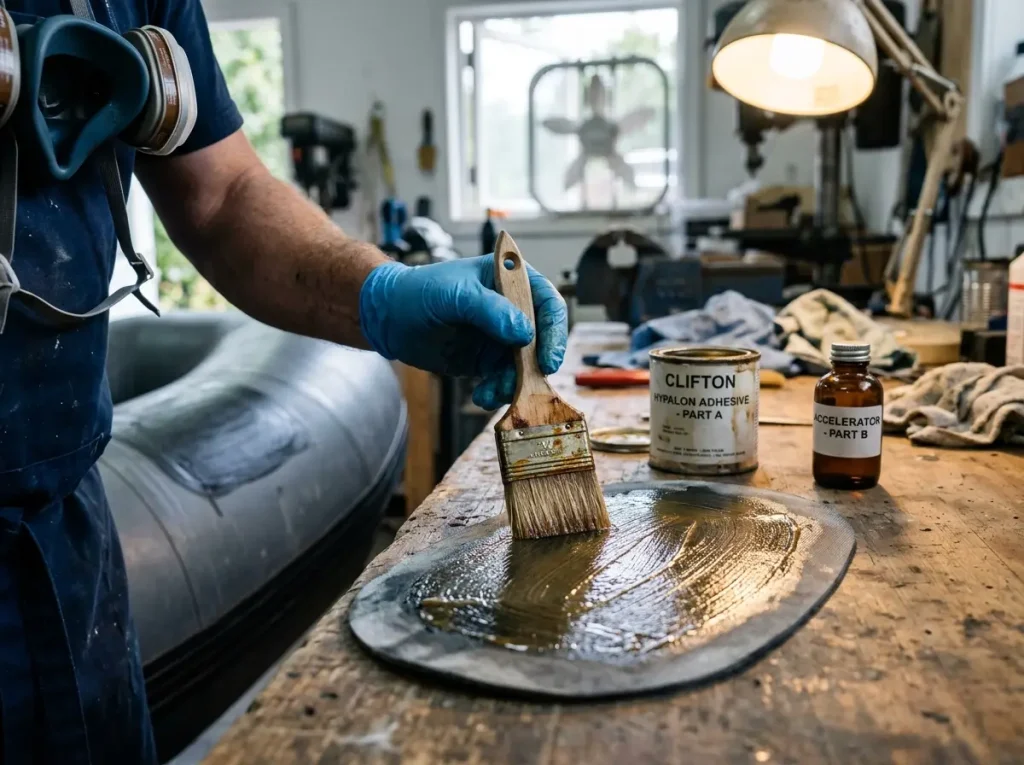
This is the part most repair guides gloss over, and it’s the single biggest reason DIY Hypalon patches peel. Two things separate a repair that holds air for years from one that lifts in a month: the accelerator, and thin coats. Get these right and the rest is just patience.
Why the Accelerator Is Non-Negotiable
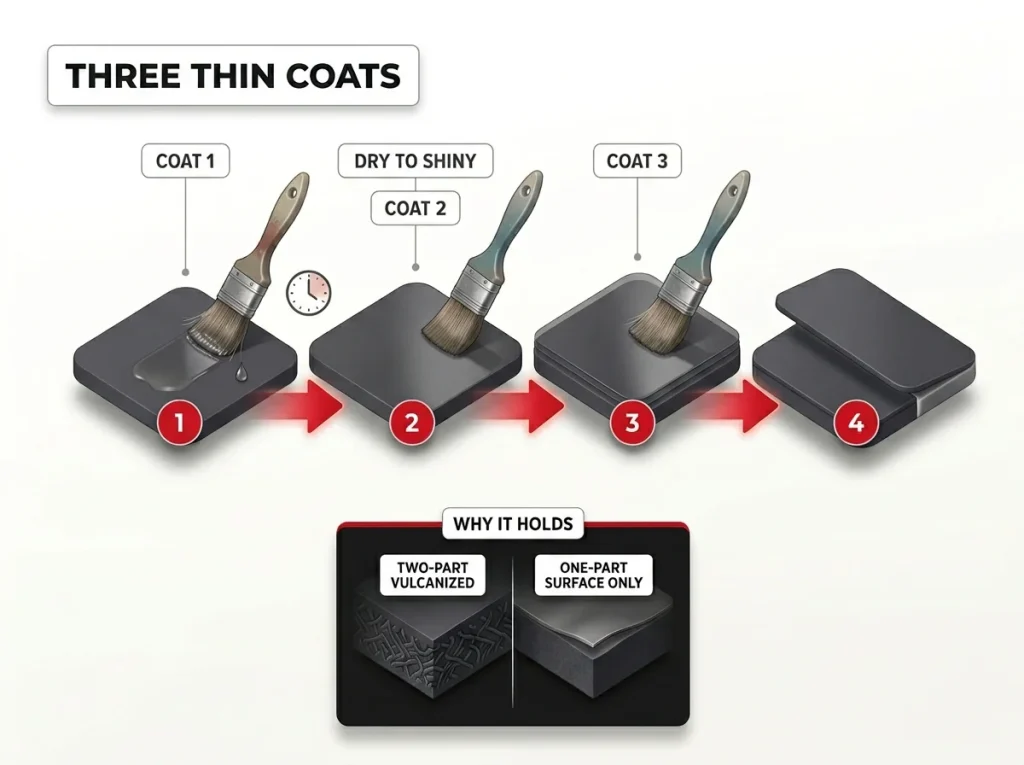
The accelerator is the second part of a two-part system, and it’s doing the real work. It vulcanizes the rubber, raising the bond’s strength and its resistance to heat and chemicals, while speeding the tack between coats and shortening the full cure. Skip it and you’ve got a surface-level stick that cracks the first hot day on the trailer. The dose is tiny — on the order of 0.8 oz per gallon of glue — but it’s the whole difference.
If you’re running Clifton’s glue, Clifton’s accelerator is the matched second half; the Seamax kit includes its own. This is the part the beginner whose patch peeled mid-trip left out, and it’s the most common single mistake in rubber-boat repair.
Thinner is better than thick, every time. Run a minimum of three thin coats for a normal patch, and up to five very thin ones for a high-stress, no-do-over repair like a D-ring. A single heavy coat stays gummy in the middle and never builds real strength — you can feel the difference when you press it, because a properly thin coat goes shiny-dry and a thick one stays soft.
Three Thin Coats, Dried to Shiny
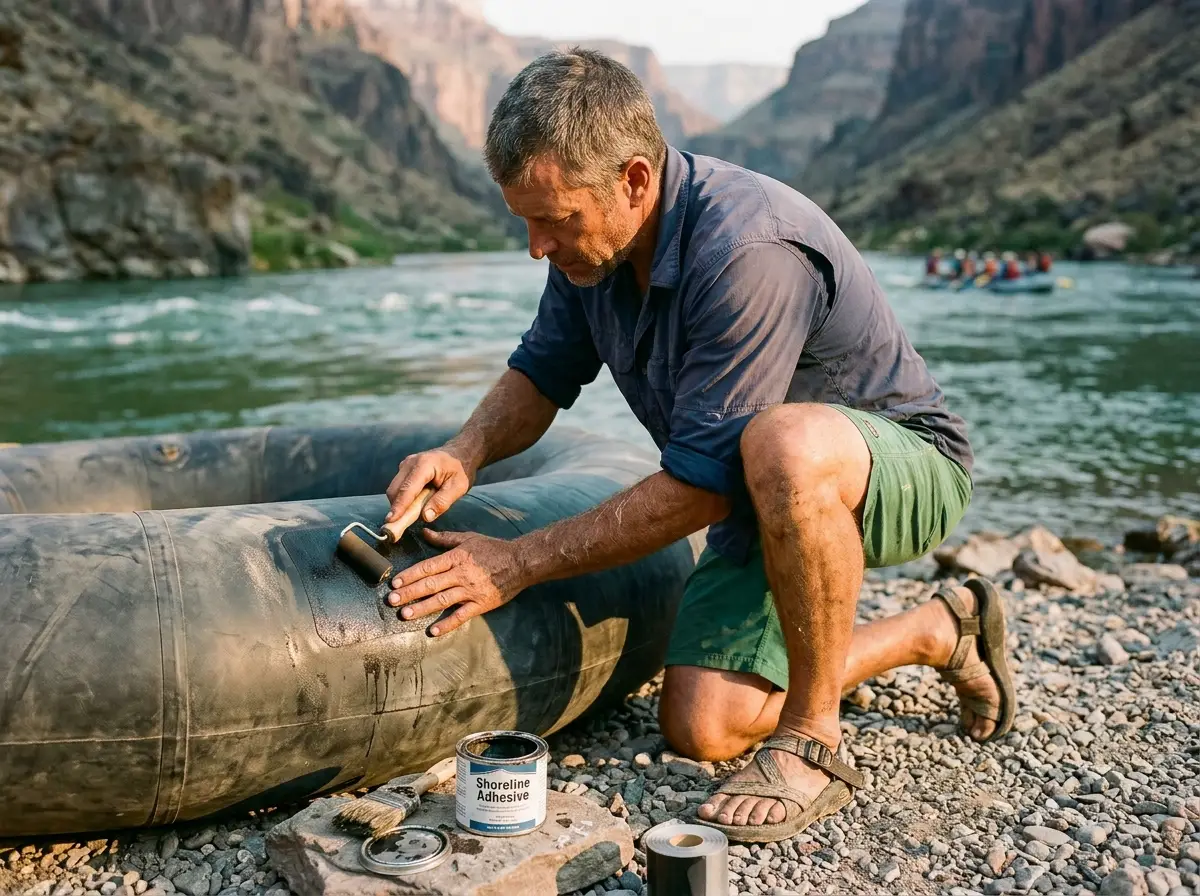
Coat both the patch and the boat. Brush on a thin, even layer, then wait until it dries to a shiny, no-longer-wet finish — usually around ten to fifteen minutes. Add the next coat, wait again, then the third. A small tin goes a long way; Clifton coverage runs about 3.5 oz per square foot across those three coats, so you’re using less than you think.
The waiting feels slow, but rushing a coat that’s still wet underneath is how you trap solvent and weaken the whole stack. Patience here is just one of the same care habits that keep a boat off the repair bench in the first place.
The Orange-Tube Trap
The one-part “orange tube” Hypalon glue has its place, and it’s a small one: an above-water pinhole stopgap to get you home. It is not a permanent repair. Without the accelerator it never fully vulcanizes, so it cracks under heat and pressure and peels.
If a repair needs to hold air and take a beating, it needs the two-part system. Reach for the one-part tube only when you understand you’ll be redoing it properly later.
Bond, Roll, and Cure Without Wrecking It
There are no do-overs in this step. The patch grabs on contact, so the bonding moment and the cure are where the repair is won or lost. This is also where watching it done once is worth a thousand words.
Joining at the Tacky Stage
After the final coat, let it reach the “just tacky” stage — gummy to the touch but no longer transferring to a glove. That’s the bonding window. Line the patch up exactly, because the moment it touches, it’s set; there’s no sliding it a quarter inch to fix your aim. Commit to the placement before you make contact.
Rolling Out the Air
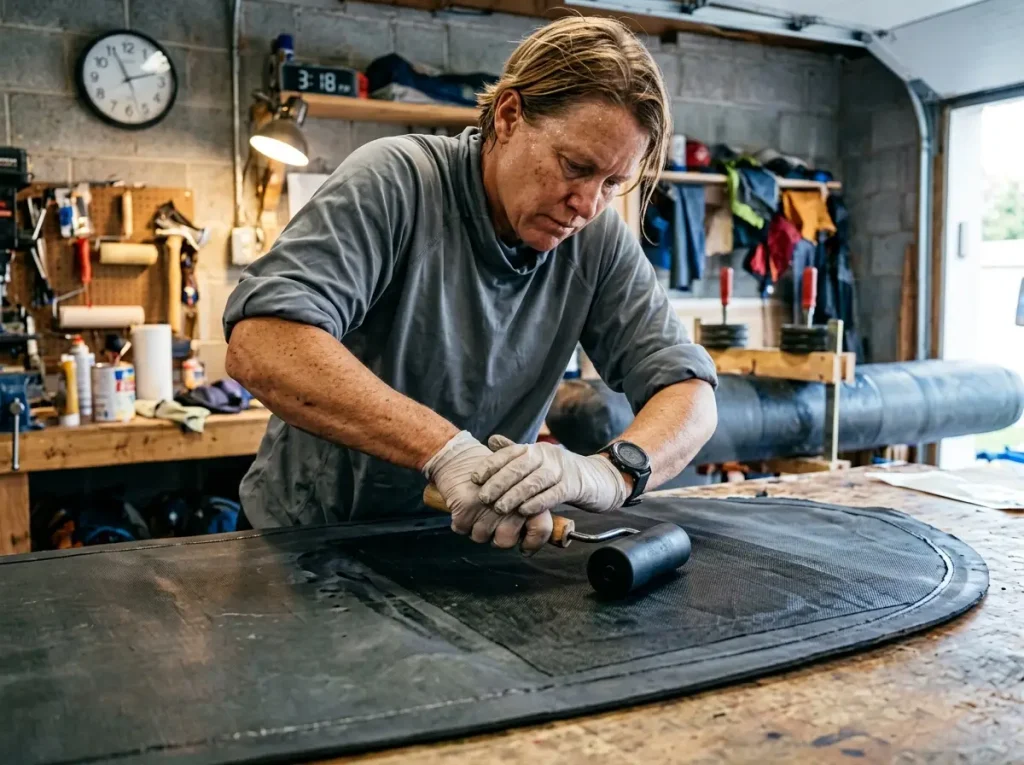
Press the patch down and roll hard from the center outward, chasing every air bubble to the rounded edges and out. Lean into it — weak pressure leaves voids, and voids become lift points. A trapped bubble under a patch is a guaranteed future leak, so this is not the moment to be gentle. Work the whole footprint, then work the edges again.
This NRS video shows the two judgment calls text can’t quite teach — what “just tacky” actually looks like, and how hard the roll really is:
The Cure Window
Cure the repair 8 to 12 hours above 60°F and below 50% humidity, and never apply glue above 70% relative humidity. This is the spec people ignore and then can’t explain the failure. A humid August camp sitting at 85% will wreck the cure, because trapped moisture stalls the polymer cross-linking and the bond never reaches full strength.
Full strength keeps building for days after, so don’t air the boat up hard the moment the clock says it’s done. Give it time.
Field Fixes and Why Repairs Fail

Sometimes the river doesn’t care about your cure window. You’re at a sandy camp, it’s 90°F or it’s cold and 85% humidity, and a textbook repair is flat-out impossible. Here’s what actually gets you back on the water, and the honest diagnostic of why patches fail so yours doesn’t join the list.
Field Triage When You Can’t Cure
For a field bridge, your workhorse is a peel-and-stick patch on a dry, cleaned surface. Tear-Aid Type A bonds Hypalon and Pennel Orca and goes on dry — wipe the area with a 50/50 isopropyl-and-water mix, round the corners, lay it down, and squeegee out the air. Type A is the rubber-boat letter; grab Type B by mistake (that’s the PVC one) and it won’t hold, so it’s worth checking the manufacturer’s own Type A vs Type B guidance before you stock your kit.
Tenacious Tape Flex patches are another no-mix option for small tears, and Aquaseal FD bridges a pinhole in the field without two-part glue. Then redo it properly at home. A field patch is a bridge, not a finish line — be honest with yourself about that.
Pre-cut and pre-round a couple of patches at home and keep them in the kit. When you’re fixing a tube on a sandbar with cold hands and the light fading, you do not want to be measuring and cutting rounded corners freehand. If you’re truly stuck with only one-part glue, a tacky coat with duct tape pressed firmly over it will limp you to the takeout — just plan on redoing the whole thing properly.
Why Most DIY Patches Fail
Almost every failed repair traces back to the same short list: coats too thick, gluing above 70% humidity or below 60°F, a glazed or un-buffed surface, repositioning a patch after it touched at the tacky stage, trapped air bubbles, or square corners that lifted. Notice that only one of those is about the product — the rest are technique and conditions. Fix the technique and the cheap glue holds; skip the technique and the premium glue still peels. Because a deflating tube on the water is a real hazard, not just an inconvenience, your multi-day trip plan should assume something will fail and pack accordingly.
Make It Last
UV is what quietly ages Hypalon, so keeping the tube out of direct sun and treating it with a protectant like 303 Marine Aerospace Protectant slows the degradation that leads to the next repair. One catch worth remembering: that protectant has to be cleaned off completely before any future glue-up, because the same film that shields the rubber from sun also blocks adhesive from keying in. Protect the tube, but strip it before you ever patch it.
Putting It All Together
Three things carry a Hypalon repair: confirm the material before you ever open the glue, treat the accelerator and three thin coats and real prep as the non-negotiables that make a bond hold air, and respect a field patch for what it is — a bridge you’ll redo at home. Get those right and the boat outlives the tear.
The best time to learn the material ID test and stock a real repair kit is now, on the bench, not at the put-in with a hiss in your ear and a shuttle waiting. Practice the tests on a scrap, build the kit, and the day you actually need it becomes a forty-minute job instead of a ruined trip.
Frequently Asked Questions
01What is the best glue for Hypalon raft repair?
A two-part Hypalon adhesive with accelerator is the only glue that makes an air-holding, permanent repair. Clifton FA-4844 is the guide standard, and an all-in-one Seamax kit is the simplest option. One-part glue is only a temporary stopgap.
02Can you use a PVC repair kit on a Hypalon boat?
No. PVC glue will not properly bond Hypalon, and the patch peels. Confirm your material first, then use a Hypalon-specific two-part adhesive. If you are unsure which material you have, a universal glue like Stabond bonds both.
03How long does Hypalon glue take to cure?
A two-part Hypalon repair cures in 8 to 12 hours above 60°F and below 50% humidity. Full strength keeps building for several days after. Never apply or cure glue above 70% humidity, or the bond will not fully set.
04How do you patch a Hypalon raft in the field?
Use a Tear-Aid Type A patch on a dry, isopropyl-cleaned surface, round the corners, and squeegee out the air. It is a bridge to get you off the water, not a permanent fix. Redo the repair properly with two-part glue at home.
05How can I tell if my raft is Hypalon or PVC?
Check the back face: Hypalon is matte grey or black underneath, while PVC is glossy on both sides. Confirm with a solvent rub — PVC turns tacky and bleeds color, Hypalon just dulls. Glued lap seams mean Hypalon; welded seams mean PVC.