
In this article
The first time you stare at a rafting gear list before a Class III trip, it reads exactly the same as the list for a lazy Class II float, and that is the problem. I’ve run both: summer Class II laps with first-timers in board shorts, and Class IV in February with a drysuit zipped to my chin, and the gear conversation is not remotely the same. A generic checklist either scares a guided-trip guest into buying a rescue kit they’ll never touch, or it lets a private boater step onto Class IV with a foam vest and no rope.
This checklist sorts the gear the way the river actually sorts it: by class. By the time you finish, a Class I–II guest will know exactly what to throw in a dry bag, and a Class IV–V boater will know the three places where going cheap is the one mistake you don’t get to walk back.
Class I–II — The Minimal but Not Stupid Kit
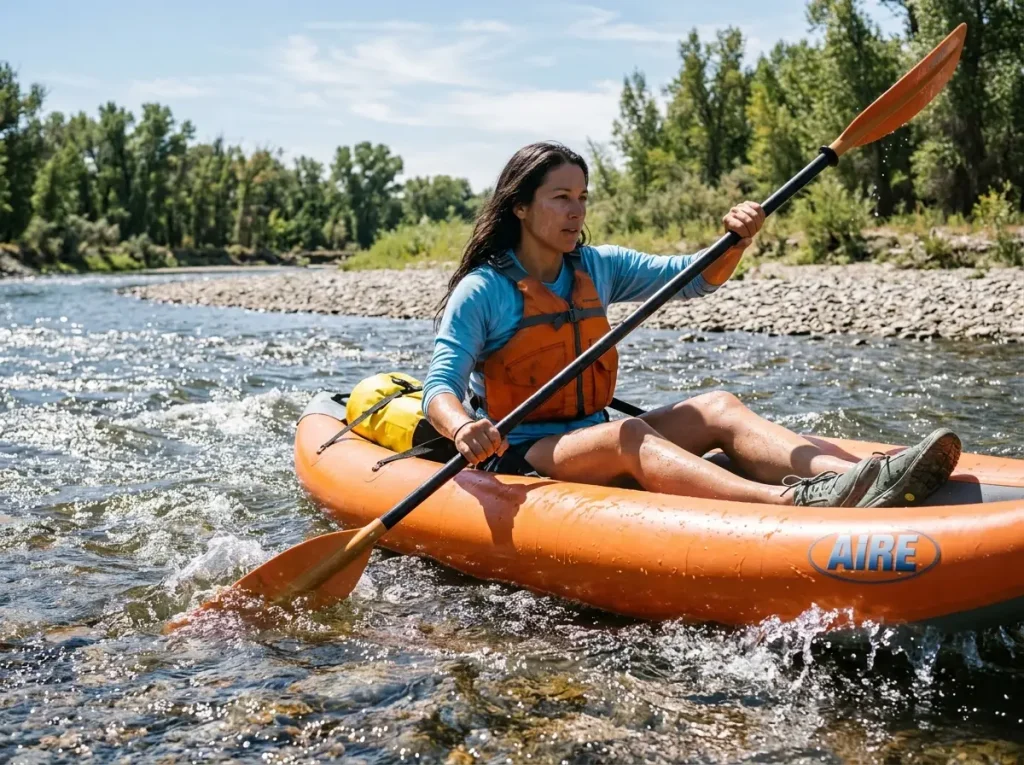
Class I–II is where most people start, and where most gear lists overshoot. You do not need a drysuit for a sun-warmed Class II float. You do need a few things the calm water hides until the one wave that swamps the boat. Here’s the kit that earns its place, and the two mistakes that show up at every put-in.
PFD and Helmet — What’s Required vs. What’s Optional
Your PFD is the one item you wear the entire trip, so fit beats everything else. A USCG Type III vest is the floor for Class I–II, snug at the chest, with no riding up past your ears when you raise your arms. On a guided trip the outfitter hands you one and checks the fit; floating self-guided, that part is on you.
A simpler Type III like the NRS Ninja is plenty here. You don’t need a rescue vest for water that barely riffles.
Helmets are where this class surprises people. On self-guided flat water, a helmet is optional. On any commercial guided trip it’s mandatory regardless of class, because that’s a liability standard the outfitter sets, not a reading of the river.
Don’t argue it at the ramp, just bring a hair tie. When you’re sizing up a calm run, it helps to understand the raft you’re getting on and what makes it right for the river, because a wide, stable floor changes how little can go wrong on Class II.
The No-Cotton Rule and Footwear
Every guide repeats it because it’s true: cotton is rotten. A cotton shirt soaks up river water and holds it against your core, pulling heat out of you on a 75°F day until you’re shivering by the second hour. Quick-dry synthetic or wool, head to toe. That’s the rule, not the brand, and any synthetic does the job.
Footwear is the single most common mistake on this class. Flip-flops and Crocs come off in the first riffle, and then you’re scouting a rocky bank barefoot. You want closed-toe water shoes or neoprene booties that strap on and stay on.
The Astral Brewer 2.0 (men’s · women’s) is the shoe guides actually wear, with sticky rubber that grips wet rock, drain holes, and a closed toe that survives a bank scramble. Budget closed-toe aqua shoes from ALEADER and similar brands work fine for Class I–II too, since closed-toe and strapped is the real requirement, not the logo.
Soak-test new water shoes in the bathtub before the trip. Stand up wet, shift your weight, walk a few steps. If your heel lifts or the shoe slides, it’ll come off in current. Better to learn that on the tile than on a gravel bar a mile from the take-out.
The Small Stuff That Trips People Up
A dry bag earns its keep on Class I–II precisely because nothing feels risky. Phone, keys, ID, tip cash, all of it goes in, because one unlucky wave over the tube swamps a footwell and your phone doesn’t rate rivers. A cheap roll-top is fine here. This is not where the money goes.
Sun protection is the injury nobody plans for. River glare doubles your UV exposure, and an overcast April afternoon burns guides who skipped the hat. SPF 50+, a brimmed hat, and a UPF sun shirt cover it. Bring water and a snack, and confirm the trip length before you launch, because outfitters don’t always feed you and a half-day that runs long gets miserable on an empty stomach.
Class III — Where the Gear Gets Serious
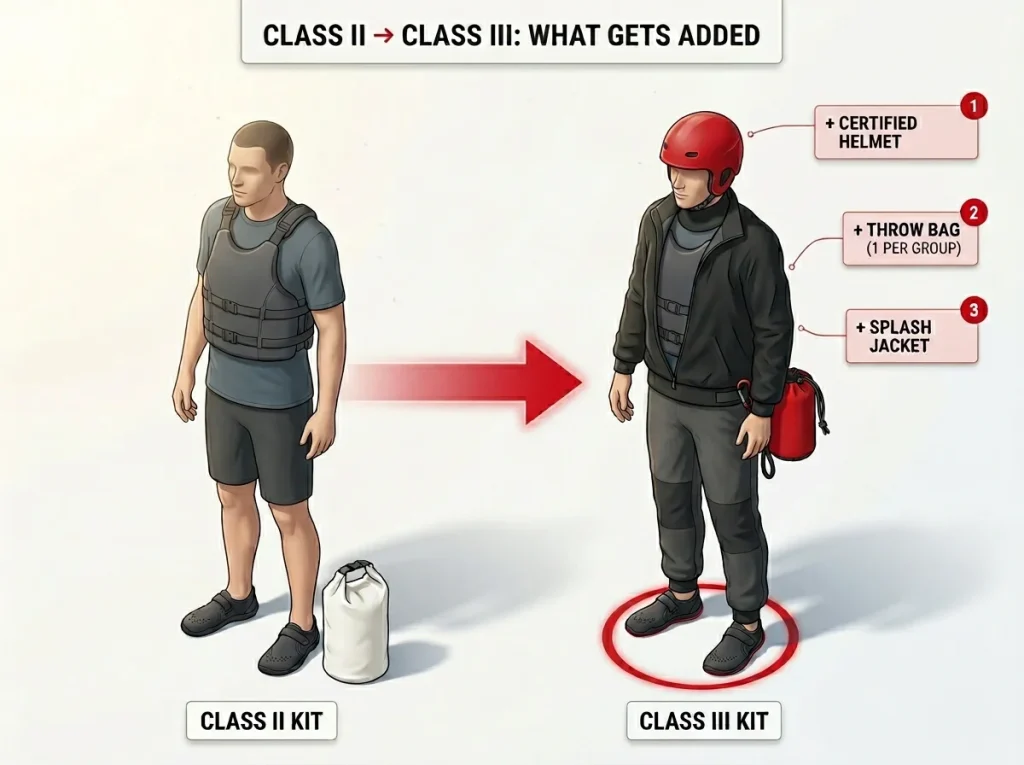
Class III is the step where “do I really need that?” stops being a fair question. The water now has enough push to flip a boat and hold a swimmer, and three items that were optional on Class II become the price of admission. If you ran Class II last summer and you’re eyeing a Class III trip, this is what changes.
The Helmet Is Now Mandatory
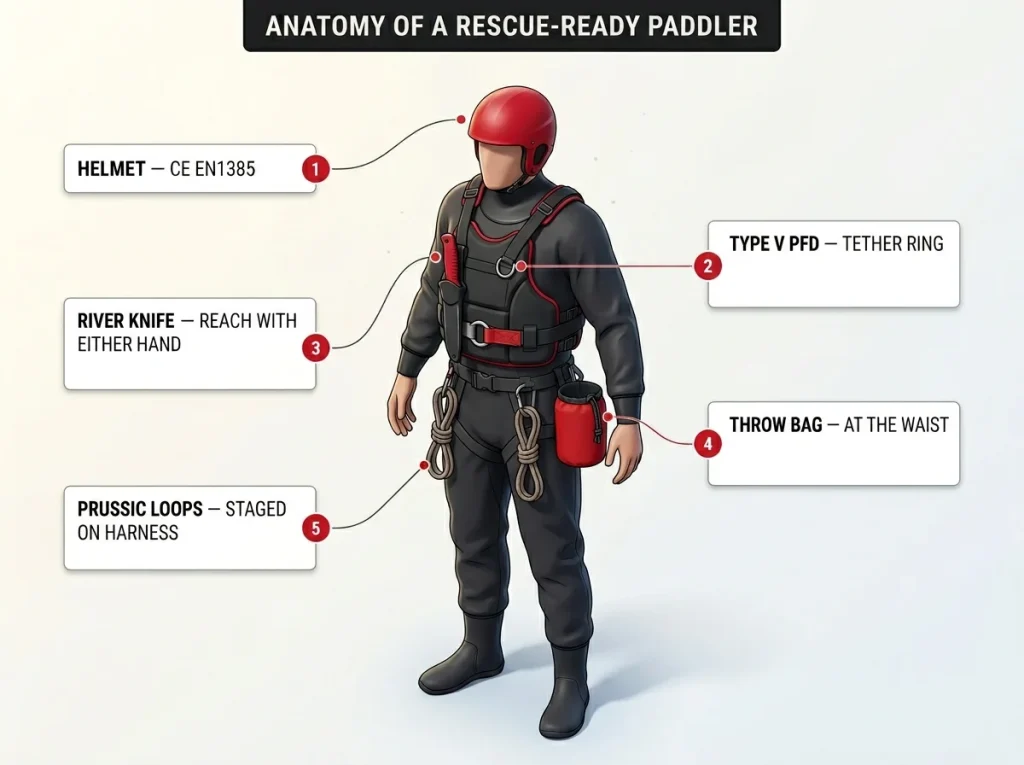
At Class III a helmet is non-negotiable, and not just any helmet. You want one certified to CE EN1385, the whitewater standard built for submerged impact and fast drainage, not a bike or hockey lid that fills with water and holds it.
Fit is the whole game. Shake your head hard, and if the helmet rotates or slides over your eyes it’s too big, because a helmet that moves on impact protects nothing. Standard rim coverage handles Class III; save the full-face for steep Class IV–V lines. Ear coverage matters more than people expect, since a Class III swim past a wall can put your head into rock sideways. To get the fit and certification right, our breakdown of the helmet that meets CE EN1385 certification for Class III walks through the spin test in detail.
The Throw Bag Enters the Kit
Class III is where the throw bag stops being optional. Minimum one per group, because if nobody’s carrying rope you have no way to reach a swimmer flushing downstream. A bag buried in a dry box is not a rescue, though.
The person carrying it has to know how to throw and repack it, since a 70-foot bag packed wrong is just a tangled rope, and most real river throws are 15 to 20 feet anyway. Accuracy beats distance every time.
Under federal rules, boats over 16 feet must carry a throwable flotation device, and many states accept a throw bag with at least 40 feet of line as the equivalent on a private raft. American Whitewater’s safety guidelines on throw bag requirements lay out how that applies to private boats. When you’re ready to pick one, our roundup of throw bags rated for Class III river rescue compares lengths and rope diameters.
Class III is also where a basic foam vest starts to feel like the wrong tool. The water creates real swims, and a rescue-capable Type V PFD gives you a tether pocket and attachment points a Type III simply doesn’t have.
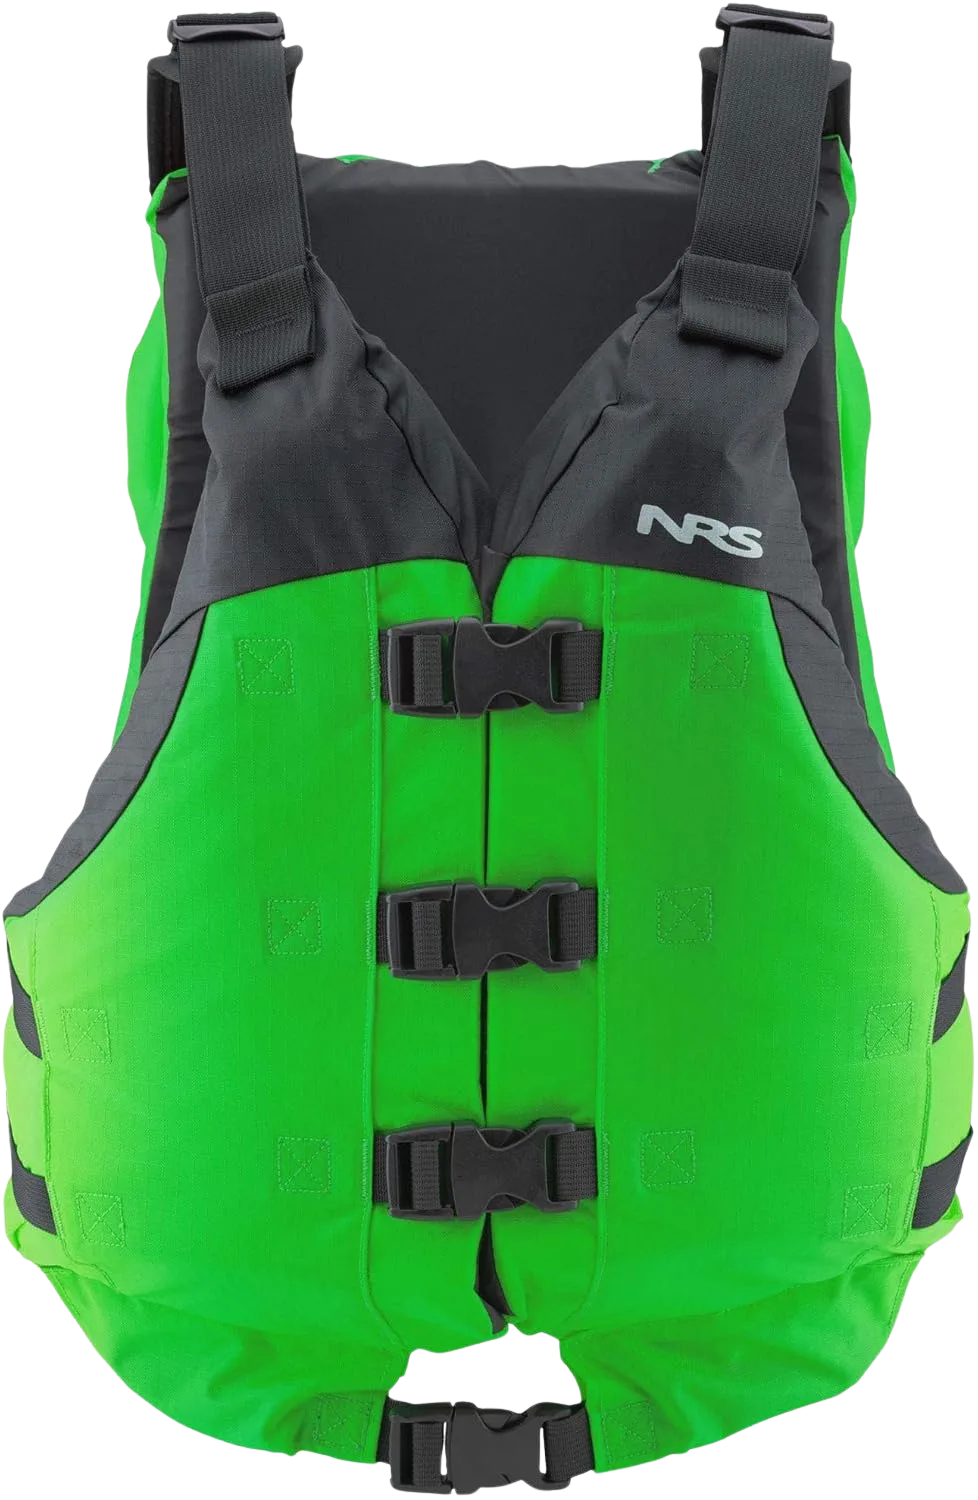
The difference between a Type III and a Type V isn’t buoyancy, it’s what happens when you’re the one doing the rescuing. A Type V rescue vest has a releasable tether pocket so you can clip into a tensioned line without wrapping rope around your core. For Class III you can still run a quality Type III, but the Big Water V is the vest you grow into the day you start taking swiftwater rescue seriously.
The Thermal Layer for Class III
If the water is below 70°F, and most spring rivers are even under a warm sun, you need a thermal layer at Class III. The Ocoee runs around 52°F in April under 75°F air, and “it’s warm out” is the single most common reason paddlers are hypothermic before lunch. A splash jacket over a synthetic layer is the minimum, and a 3mm wetsuit is better the moment swim odds climb. Neoprene booties pull double duty here, adding warmth and grip on rocky scouts. The full wetsuit-versus-drysuit call gets its own section below, because it’s a water-temperature decision, not a class decision.
Class IV–V — The Full Private Boater Kit
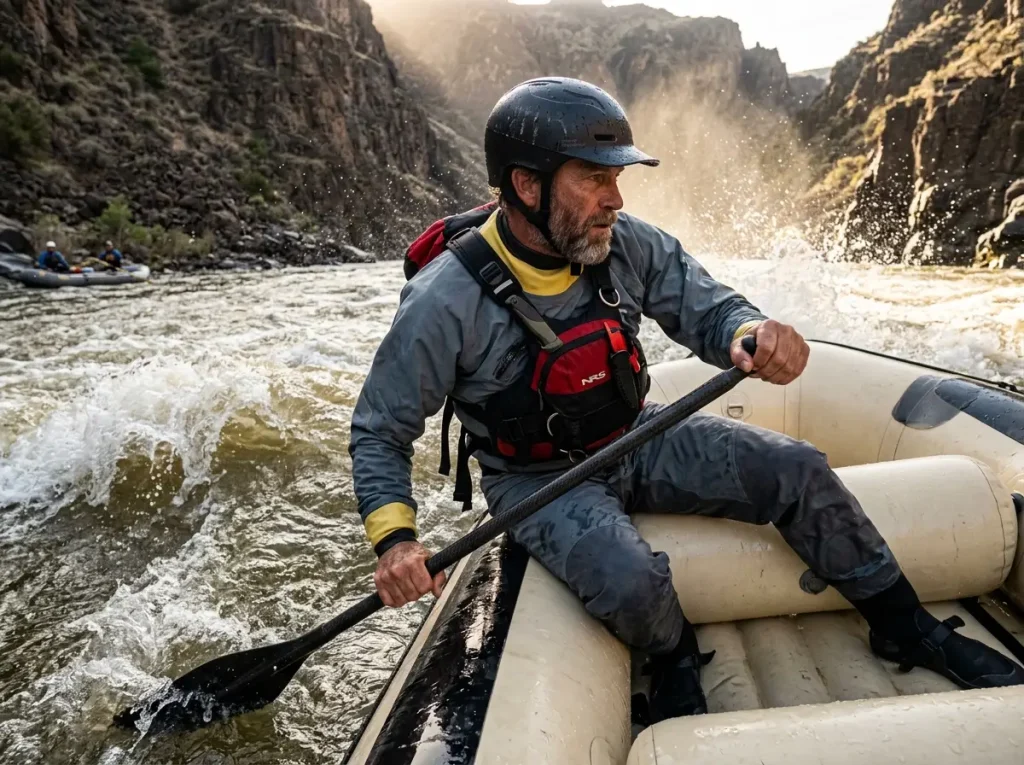
Class IV–V is where the gear list stops being about comfort and starts being about getting everyone home. The swims are longer, the hydraulics hold you, and the margin for a gear failure shrinks to nothing. This is also where most boaters cross from guided trips into private boating, which means every item a guide used to hand you is now yours to own, inspect, and know how to use. Here’s the kit, and the three places where a budget choice is the one that costs you.
A Drysuit or the Correct Wetsuit
At this class, immersion time goes up and the water is often cold, so thermal protection moves from comfort to hard gear. A drysuit is the guide standard for serious cold water. The Kokatat Meridian (men’s) and the Kokatat Legacy (women’s) are the suits you see on professional water, because the latex gaskets that seal your neck and wrists are the part cheap suits get wrong. A drysuit that leaks at the gasket is worse than no drysuit, since it fills and holds cold water against you.
That’s the first of the three places not to cut the budget. The exact temperature thresholds for choosing a drysuit over a wetsuit are in the thermal section below.
Your Own Throw Bag and a Rescue PFD
On Class IV–V, throw bags go from group-carry to individual-carry. “One per group” works on Class III, but it breaks down the moment a Class IV rapid produces two swimmers at once. Everyone carries their own.
The Type V rescue PFD becomes the standard here, not the upgrade. The tether pocket, the rescue-ring attachment, and the drainage port exist because this water creates rescues a basic vest never planned for. Pair it with a fixed-blade river knife mounted on the chest strap, reachable with either hand, because the one time you need to cut a wrapped line or free an entrapment, your hands will be cold and numb. A knife you can’t reach is a knife you don’t have, and our guide to river knife placement and accessibility testing covers where to mount it and how to test the draw. For matching a private boat to this water, the raft matters as much as the kit, and matching raft length and capacity to Class IV water is its own decision.
The 4:3:2:1:1 Rescue Kit
Here’s the system most private boaters have never heard of. Guide and instructor Mark Hirst boiled the minimum personal rescue kit down to a number you can remember at the ramp: 4:3:2:1:1. Four locking carabiners, three compact pulleys, two prussic loops, one flip line, one throw bag. That’s what it takes to build a Z-drag, the 3:1 mechanical-advantage system that lets a crew multiply their pull and free a raft pinned against a rock. A pre-rigged option like the NRS Z-Drag Kit takes the field-assembly guesswork out of it, which matters when not everyone in the group has built one from loose hardware before.
On a three-boat private trip, you pool the kit across boats. One boat carries the Z-drag hardware, every boat carries a throw bag, and you sort out who has what before the put-in, not mid-rescue. And once you leave cell coverage, which is exactly where the good Class IV–V runs start, a satellite communicator like a Garmin inReach is the only two-way line you’ve got.
The full component-by-component build is worth studying first, and our full guide to building a private boater rescue kit breaks down every piece. Gear is only half of it, and American Whitewater’s rescue and risk management guidelines make the case that the training behind the kit matters more than the kit itself.
Before any Class IV launch, run a five-minute hardware huddle. Everyone lays their rescue gear on a tube, carabiners, pulleys, prussics, knives, and you physically point at who carries the Z-drag setup. Gates get checked, silt gets flushed, and nobody discovers a seized carabiner while a boat is wrapping. It feels like overkill right up until the one day it isn’t.
Thermal Protection by Water Temperature
The most common thermal mistake on the river has nothing to do with class. It’s dressing for the weather you can see instead of the water you’ll swim in. A 75°F sunny morning on a 52°F river feels like board-shorts weather right up until you’re in the water, and then the clock starts. This is the section that keeps people out of trouble, so it’s built around water temperature, not difficulty.
The Rule of 120 and the 1-10-1 Framework
There’s a field calculation you can run at the put-in with no tools: the Rule of 120. Add the air temperature and the water temperature, and if the sum is under 120°F, wear thermal protection. 65°F water plus a 54°F morning is 119, so you suit up. The National Center for Cold Water Safety publishes the rule for exactly this reason, because people are bad at estimating cold-water risk by feel.
Then there’s the 1-10-1 rule, which describes what cold water does to you on a swim. One minute to get your breathing under control as the cold-shock gasp reflex hits. Ten minutes of meaningful arm and leg movement before they stop answering. Then incapacitation.
In 55°F water you have about ten minutes to self-rescue before your limbs quit, and coldwatersafety.org’s breakdown of the 1-10-1 rule for cold water immersion is worth reading before your first cold run. Cold shock takes hold long before hypothermia does, and the involuntary gasp when your head goes under in 50–60°F water is the part that puts water in your lungs in the first few seconds.
Don’t trust the air temperature on the drive in. Stick your hand in the river at the put-in and actually do the Rule of 120 math out loud with your group. The number talks people out of the “I’ll just send it in shorts” call better than any lecture. If it’s under 120, the wetsuit goes on before the boat goes in, not after the first swim.
The Water Temperature Decision Matrix
Strip the river class out of it and the thermal call comes down to four water-temperature bands:
- Above 70°F with warm air: a splash jacket or swimsuit covers Class I–II, and a 3mm wetsuit is smart for Class III and up.
- 60–70°F: a 3mm wetsuit minimum, any class. This band catches most western spring rivers, where the Ocoee, the Arkansas, and the Rogue in April and May routinely run 52–62°F.
- 50–60°F: a drysuit is strongly recommended, and a 3mm wetsuit is only marginally acceptable for a short, low-swim Class II–III float on a warm, clear day.
- Below 50°F: drysuit only, no exceptions. A Class II float at 45°F carries the same thermal risk as a Class V run.
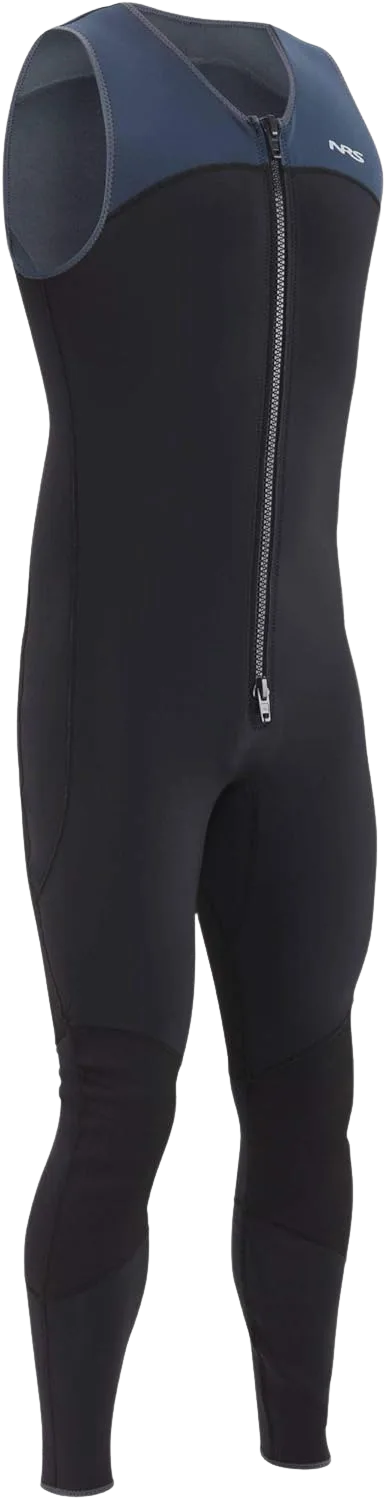
The insight every competitor misses is that river class does not set your immersion risk. Water temperature does. A Class II drift on 55°F spring melt is a thermal emergency waiting for a swim, while a Class IV in 75°F summer water is far more forgiving. For most cold-but-not-frigid days, the rafting-specific answer is a Farmer John cut, with neoprene over your torso and legs and the arms left bare for paddling mobility.
Layer a splash jacket over that wetsuit and you buy the warmth equivalent of another 5–10°F of water protection, which is the standard shoulder-season setup on guided trips. The NRS Endurance Paddling Jacket (men’s · women’s) is the semi-dry layer most boaters reach for, with latex gaskets at the neck and wrists that keep splash out without the full commitment of a drysuit. For warm water at 65°F and up, the jacket over a swimsuit is often all Class I–II needs.
Wetsuit vs. Drysuit Mechanics
The two systems keep you warm in opposite ways, and knowing the difference tells you where each one fails. A wetsuit traps a thin layer of water against your skin that your core heats to a livable temperature. That layer refreshes a little on every swim, which is why a 3mm suit tops out around 50°F, since past that your core can’t keep up with the flushing. The trade is mobility, and the sleeveless Farmer John cut gives you paddling arm movement a full suit can’t.
A drysuit keeps water off you entirely with latex neck, wrist, and ankle gaskets, so there’s no layer to reheat. You stay dry and regulate with the clothes underneath. Everything rides on those gaskets.
Budget suits blow gaskets on day two; Kokatat gaskets hold, which is the whole reason they cost what they do. If you want the data behind the choice, the full wetsuit vs. drysuit breakdown for river conditions runs the numbers on where each system wins.
Commercial Trip vs. Private Boater — What Changes on Your Checklist
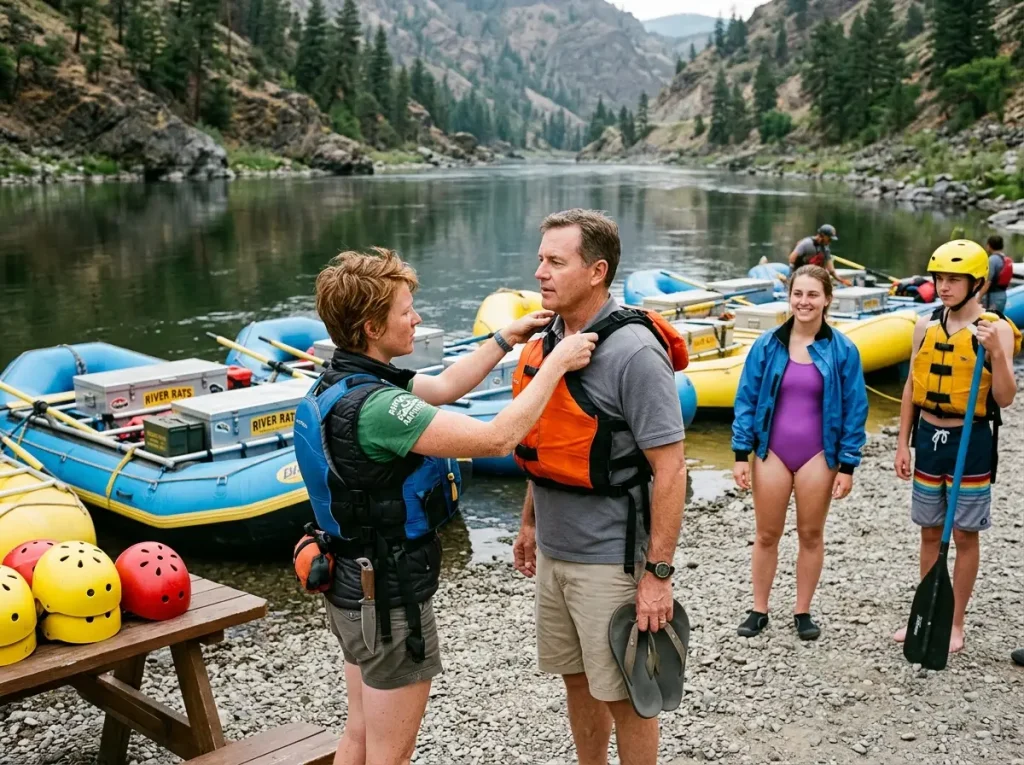
Most people typing “rafting gear checklist” into a search bar are about to go on a guided trip, and the honest news is that their list is far shorter than anything the gear sites are selling them. The other half, the private boaters, inherit every single thing the outfitter used to provide. Which list is yours changes almost everything, so let’s split them cleanly.
The Guided Trip Packing List (Shorter Than You Think)
On a guided trip, the outfitter provides the gear that actually matters: PFD, helmet, paddle, all the safety equipment, and the boat. You do not buy any of it. Seasonally they also hand out the wetsuit, splash jacket, and neoprene booties when the water’s cold, though that varies by company, so read the packing email they sent you.
What you actually bring is almost embarrassingly simple: no-cotton clothing, closed-toe shoes, a small dry bag for your phone and keys, polarized sunglasses on a retainer so a swim doesn’t take them, sunscreen, and tip cash. That’s the list. Our complete breakdown of what a commercial outfitter provides spells out exactly what shows up in the gear shed. The reliable arrival mistakes are flip-flops, jeans, and no hat, and every commercial put-in has at least one guest swapping footwear at the last second.
The Private Boater Kit — Everything the Outfitter Provided, Now on You
Go private and the list inverts. Every item the outfitter used to provide is now yours to buy, maintain, and pack: PFD, helmet, paddles or oars, throw bag, the raft, a pump, a repair kit, the whole safety setup.
The part nobody warns you about isn’t gear, it’s the certification gap. Outfitter guides are trained and certified; a private boater can legally put onto Class IV–V with zero training and no one checking. That’s the most hazardous assumption in the sport, and it’s worth knowing the actual risk profile by river class before you pick your line. There’s also no head guide running a PFD-and-chinstrap check before every rapid, so you build that habit yourself.
The One List That Applies to Both
A few things don’t care whether a guide is in the boat. No cotton, closed-toe shoes, sun protection, water. Those are universal, guided or private.
And the most overlooked piece of gear isn’t gear at all, it’s the safety briefing. Whether a guide delivers it or you give it to your own crew, everyone in the boat needs to hear “swim position, high-side, eddy out” before the first rapid and actually mean it. Feet up, nose downstream, breathe in the troughs and not the waves. The boat that runs that briefing every time is the boat that handles a swim without it turning into a story.
The Rescue Kit — From Throw Bag to Z-Drag (Class III+)
Plenty of boaters own a throw bag and a vague memory of a Z-drag from a video. Far fewer have set one up with cold hands while a boat is pinned and the clock is running. A rescue kit you’ve never deployed under stress is a false margin, since it feels like safety without being safety. This section runs from the minimum every Class III+ boater should carry to the full guide-level system, and then to the part that makes any of it work.
The Minimum Individual Kit (Class III+)
Four items, carried on you, not in a dry box. A throw bag with at least 18 meters (about 59 feet) of thick-diameter rope you can grip with wet hands. Two locking carabiners, kwiklock or auto-locking, in an oval or D-shape so they play nice with pulleys.
A river knife you can reach at your chest with either hand. And a pealess whistle, where the Fox 40 Sonic Blast is standard guide issue for any class, because a pea-style whistle clogs and dies the moment it’s wet.
Two checks before every trip. Throw-bag capacity first: the rope should fill the bag without forcing, because overpack it and it won’t feed cleanly on a fast throw. Then the carabiner gates, since water and fine silt jam them and a gate that won’t open is a dead piece of hardware in a rescue. If you’re buying your first throw bag, get one built for grip and clean deployment, not the cheapest rope on the shelf.
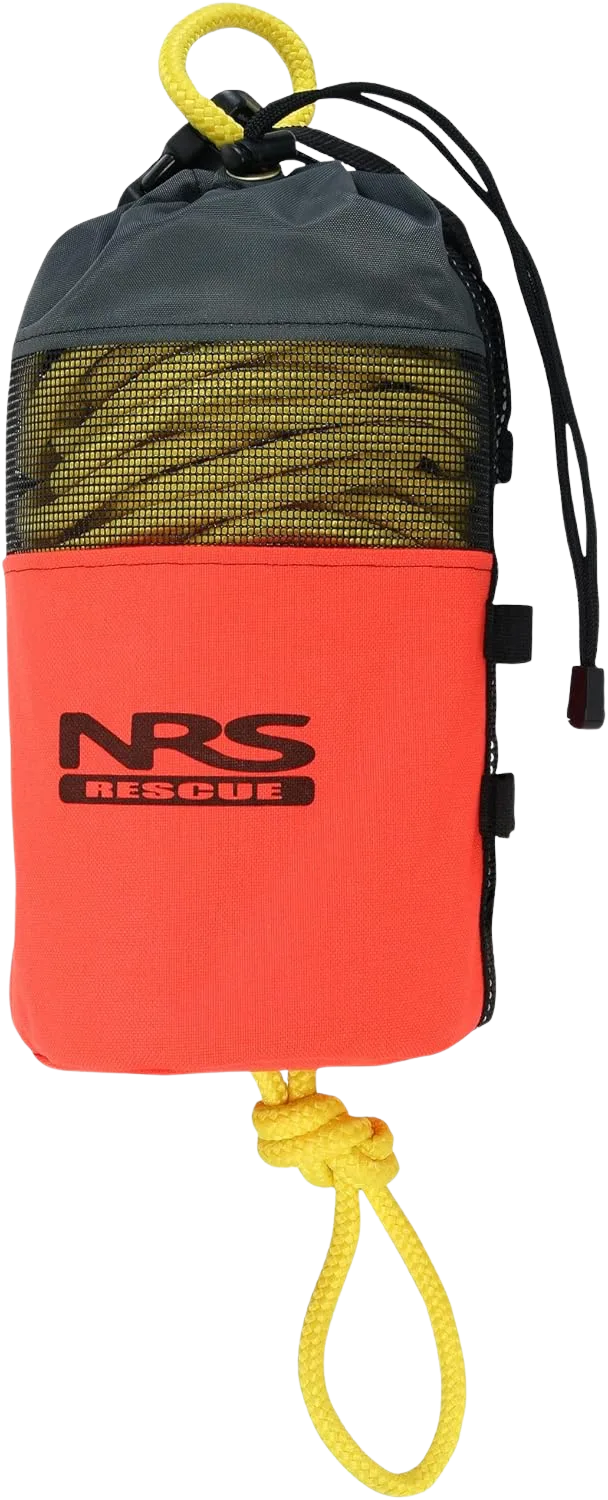
Below the Guardian you’re trusting thin rope that’s hard to grip when it counts, which is exactly the wrong place to save money. For Class IV–V, boaters often add a waist-worn bag like the NRS Pro Guardian Wedge that rides on your hip and frees both hands, so you can reach for rope without dropping your paddle.
The 4:3:2:1:1 Kit (Full Rescue Capability)
Step up to the full kit and the numbers from earlier get specific. Four locking carabiners. Three compact pulleys, where Rock Exotica minis fit inside a PFD pocket and bulky hardware-store pulleys that don’t fit are useless mid-rapid.
Two prussic loops, pre-sewn, in a cord thinner than your mainline so they bite under load, and the old pinch test confirms they’ll grab. One flip line, four meters of tubular webbing that rights a flipped raft, sets a directional anchor, or rigs a quick belay at a portage. One throw bag.
Those three pulleys aren’t arbitrary: two build the 3:1 Z-drag, and the third adds a direction change that keeps the haul team out of the bad water. A pre-matched kit gets you there without sourcing parts that don’t fit together. The PFD itself is part of this system too, and knowing your vest’s tether points and rescue-vest features for Class III+ is what lets you actually clip into a haul.
The Practice Principle (Non-Negotiable)
Here’s the part the gear sites skip. Every piece of this kit has to be practiced with cold, wet hands and gloves on, because fine motor control falls off a cliff inside two minutes in 55°F water. The carabiner gate you flick open warm and dry on the lawn behaves differently when your fingers are numb.
There’s a rule guides drill into new boaters called the Clean Line Principle: no loops or grab points on your body bigger than your hand, except quick-release items, because entanglement in your own rescue gear is a real Class IV hazard. Guide instructor Emily Little puts it bluntly, that it does not matter what rescue gear you carry if you can’t use it. Throw-bag accuracy beats distance, too, since most successful river throws are 15 to 20 feet, so practice hitting a target instead of heaving the whole rope. And none of it replaces formal training, where an ACA Swiftwater Rescue Technician (SRT-1) course is the entry point for anyone serious about private boating.
Once a season, dunk your hands in ice water for two minutes, then go build your Z-drag and repack your throw bag. It’s miserable, and it’s the most honest rehearsal you’ll ever run. The first time you fumble a prussic with dead fingers in your driveway is a lot cheaper than the first time you fumble it on the water.
Pack for the Water, Not the Forecast
Three things to carry off this page. Your kit scales with the water, so what keeps you comfortable on Class II leaves you exposed on Class IV, and the gap is gear you actually need, not gear someone’s upselling. Thermal protection is a water-temperature decision, never a class decision or an air-temperature one, so dress for the swim. And every piece of rescue gear you own is worth exactly as much as the last time you practiced with it.
So do one thing before your next river day. Pull out your throw bag, repack it, and throw it at a target across the yard. Time yourself. If the repack or the throw takes more than 30 seconds, you’ve found the gap, so build that muscle memory now on dry land instead of discovering it with a swimmer in the water.
Frequently Asked Questions
01What gear do you need for Class 3 rapids?
Class III rafting needs a USCG-rated PFD, a CE EN1385 helmet, closed-toe water shoes, and a throw bag carried by at least one person in the group. Add a 3mm wetsuit or splash jacket whenever the water sits below 70°F. The helmet and throw bag are the two items that turn non-negotiable at this class.
02Do I need a wetsuit for whitewater rafting?
You need a wetsuit whenever the water is below about 60°F, no matter how warm the air feels. A 3mm Farmer John cut covers most spring rivers down to roughly 50°F. Below that, a drysuit is the only safe call. Air temperature does not protect you once you are in the water.
03What should I wear whitewater rafting for the first time?
Wear quick-dry synthetic layers, never cotton, with closed-toe water shoes that strap to your feet. On a guided trip the outfitter supplies your PFD, helmet, and any wetsuit. Bring a hat, sunscreen, and polarized sunglasses on a retainer. Skip the flip-flops, since they come off in the first rapid.
04Do outfitters provide all the gear you need for rafting?
Outfitters provide the hard safety gear, including the PFD, helmet, paddle, and raft, plus a wetsuit and splash jacket when the water is cold. You bring personal items: synthetic clothing, secure footwear, a small dry bag, and tip cash. You almost never need to buy safety gear for a guided trip.
05What is the difference between gear needed for Class 2 vs Class 4 rafting?
Class II needs a PFD, secure shoes, and sun protection. Class IV adds mandatory gear: a certified helmet, a drysuit or rated wetsuit, a Type V rescue PFD, your own throw bag, a river knife, and rescue-kit hardware. Class II is comfort gear, while Class IV is survival gear you train with.