

In this article
You push off for a mellow day float and within the first mile the boat already looks like a rummage sale. A water bottle rolls under the seat, the sunscreen is buried in somebody’s dry bag, and a hand pump is wedged against your feet right where you need to brace. Ask anyone who has run a few seasons and they will tell you a tidy boat is not about neatness, it is about not turning your loose gear into a hazard when the water gets pushy. The fix is two kinds of storage doing two different jobs: a thwart bag for the stuff you grab every ten minutes, and under-seat storage for the bulk you only touch at camp. This guide covers what belongs where, how each one mounts, the two ways people rig it wrong, the flip-safety detail every other guide skips, and the budget shortcut that gets a weekend paddler most of the way there.
Thwart Bags, Drop Bags, and the Words That Trip You Up
Half the confusion in any rigging conversation is two people using the same word for different parts of the boat. Before you can decide what goes where, you need a handful of terms straight, because a paddle-raft owner and a frame boater can both say “thwart bag” and be picturing completely different setups.
Thwart, Crossbar, and the Bag That Straps to Both
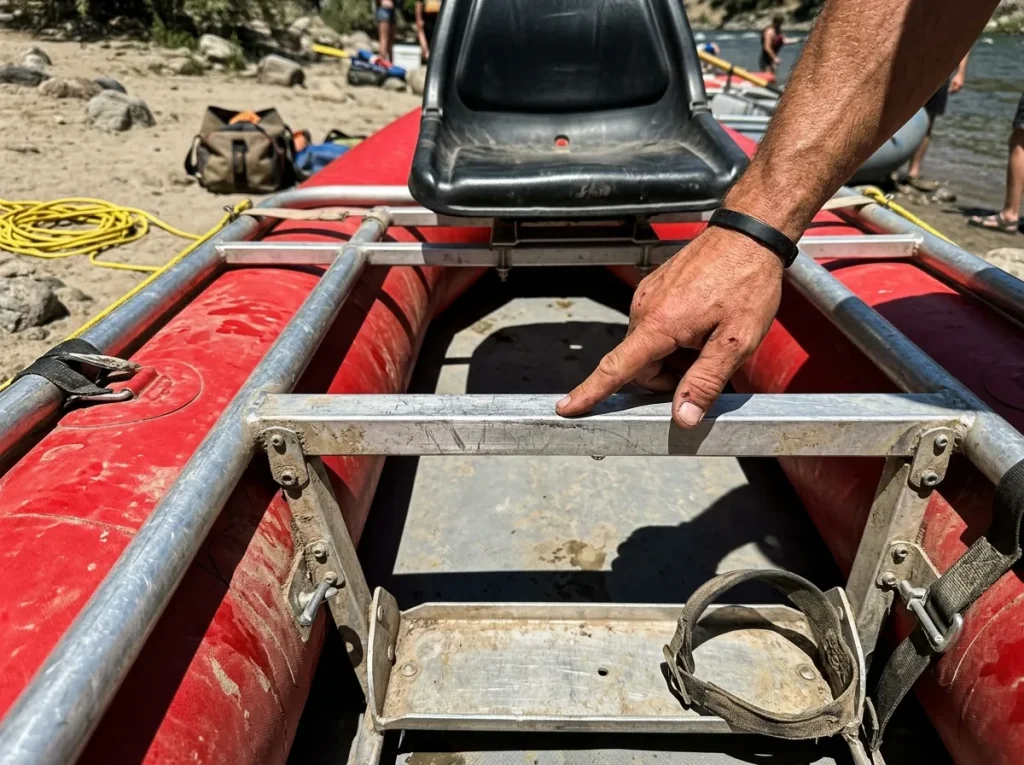
A thwart is the inflatable crossbar tube that runs side to side on a paddle raft, the one you brace your feet against. On an oar rig, the equivalent is a metal crossbar on the frame. A thwart bag straps to either one, which is exactly why the name confuses beginners. It is not named for what it holds, it is named for where it mounts.
A drop bag is different. It hangs down into the open space under a seat, with crescent-shaped zip openings on each end so you can reach in from either side. Picture a hammock for your gear slung below the frame instead of a pouch strapped on top of a tube.
Bay, Bay Width, and the Measuring Trap
The bay is the open span in the frame where a drop bag lives. The number that matters is bay width, and here is the trap that costs people money: bay width is measured crossbar-to-crossbar, not rail-to-rail. Measure the side rails instead and you will overstate how much bag the frame can actually hold, then order a drop bag that does not fit.
Two more words and you are fluent enough for the rest of this. The footwell is the floor space where your feet go, and a hatch is a sealed compartment on some setups. Get these terms down before you shop, because the wrong assumption here follows you all the way to checkout. Get them wrong and you end up with the classic outcome river folks call a “yard sale,” gear scattered downstream after a flip, which is the exact thing all of this is built to prevent.
Thwart Bag or Under-Seat Storage? What Goes Where
Here is the part every competitor describes in isolation and nobody frames as an actual decision. The real question is not “which bag is better.” It is “which gear do I need in five seconds, and which can I forget about until camp.” Sort your load by that single rule and the rest of your gear organization designs itself.
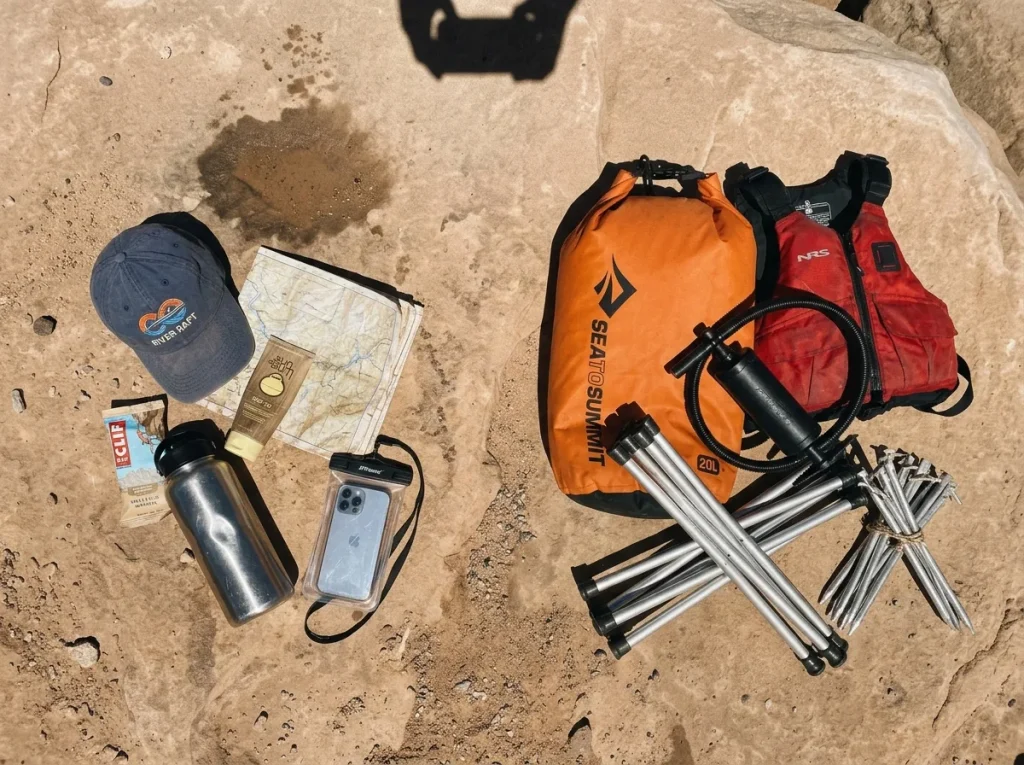
The one-line version: thwart bag holds small stuff you reach for constantly, under-seat storage holds bulky stuff you rarely touch on the water. The gear you need in a hurry while lining up a rapid rides the thwart. That means sunscreen, a water bottle, snacks, a hat, a river map, and your phone in a dry pouch. It is the boat’s glovebox, and the whole point is that you can open it one-handed without breaking your paddle rhythm.
Under the seat goes the opposite category, the bulk-and-forget gear. A spare PFD, the pump, folding camp chairs, sand stakes, extra dry bags. None of it needs to come off the floor for hours, it just needs to be off the floor. A spare PFD worth keeping aboard is the classic example: critical to have, rarely touched mid-run, exactly what under-seat storage exists for.
Why does the split matter beyond tidiness? Because gear loose on the floor slides, traps feet, and cannot flex the way the raft is designed to over waves. This is not just a preference, it is the same rig-to-flip logic that Washington State’s safety requirements for commercial whitewater vessels codify for outfitters. Secured, suspended gear is a safety call first and a neatness call second. The guide reaching into a thwart bag mid-rapid for sunscreen is not being lazy, they sorted their gear so the thing they needed was exactly where their hand expected it.
Thwart Bags — Your Quick-Reach Storage
The thwart bag is the boat’s glovebox, and the mistake almost everyone makes is treating it like a duffel. Load it with the four or five things you actually reach for on the water and stop there. Cram it full and it rides low, sags into the paddler’s knees, and gets in the way of the stroke you are trying to make.
A good thwart bag is built from mesh so water drains straight through and you can see what is inside without digging. The closure matters more than people expect: a drawstring or one-handed slide closure is what lets you get in with a wet hand and a paddle in the other. What does not belong in here is anything heavy, anything you only need at camp, and anything that has to stay bone-dry without its own dry pouch.
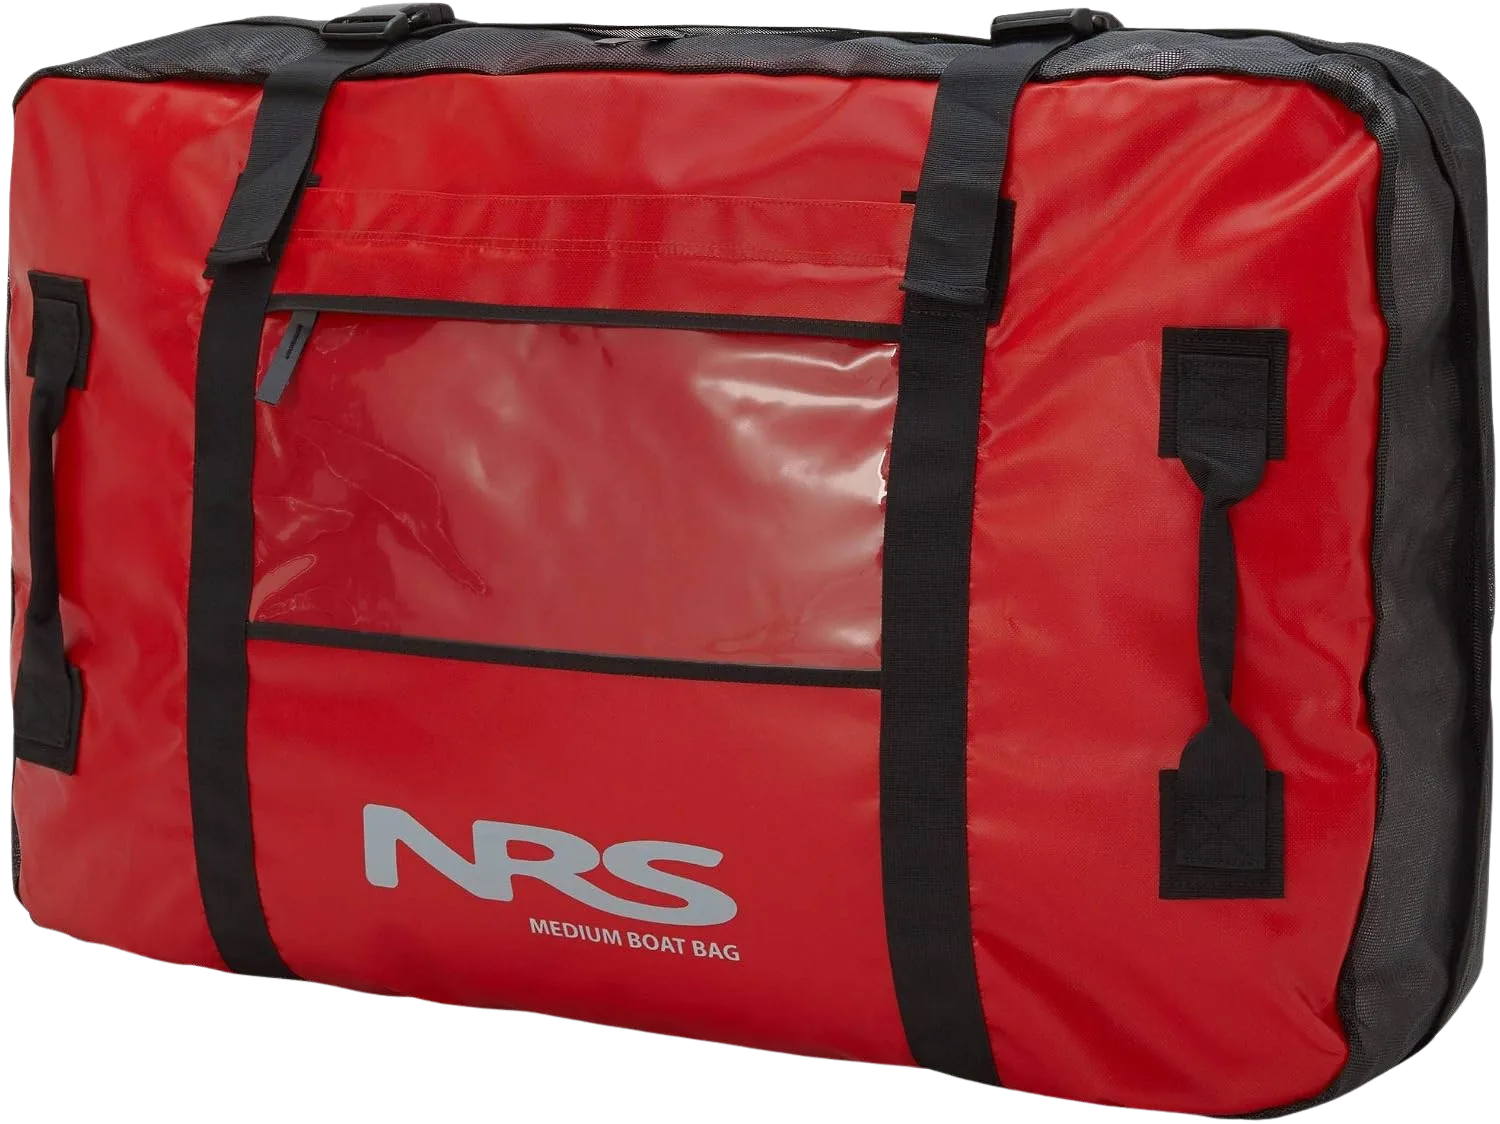
That NRS bag is the pick I would hand a friend rigging their first boat, and it lives on the NRS Raft Thwart Bag listing if you want to look it over. If you want to spend even less, the River Station Dry Thwart Bag covers the same job for a bit cheaper. Either way, resist the urge to size up. A bigger thwart bag is not a better one, it just gets in your way sooner.
Re-tie the drawstring loose at every take-out. The classic mid-rapid fumble is reaching in for sunscreen and finding the cord cinched into a wet knot because nobody loosened it after the last stop. A closure you cannot open one-handed is a closure that fails you exactly when you are busy.
Under-Seat Drop Bags — Bulk Storage for Frame Rigs
A drop bag turns the dead space under your seat into the most useful storage on the boat. But it comes with one hard requirement that trips up paddle-raft owners: it only works on a frame. This is the section where you learn why you cannot just buy one and clip it to a paddle boat.
Drop bags suspend down into the bay with sewn-in cam straps at the crossbars. The clever part is the cam buckle on those straps, which lets you adjust the drop depth after the bag is loaded. Load it heavy, then cinch it up so the bottom still lifts clear of the water once the boat starts bouncing through wave trains. Most manufacturer spec sheets cap drop bags around a 47-inch width, and that number has to match your real bay, not a vague “fits most rafts” claim. Whether you can even run a drop bag comes down to which raft frame type you’re running in the first place, so start there if you are still building out your rig.
What lives down here is the bulk: spare PFDs, the pump you stow down there, folding camp chairs, sand stakes, and extra dry bags. And when the space under a seat is not reachable from the top of the frame, reach for a mesh-panel drop bag specifically. Mesh is not an aesthetic choice here, it is the only material that drains instead of pooling river water against gear you cannot see or reach mid-run.
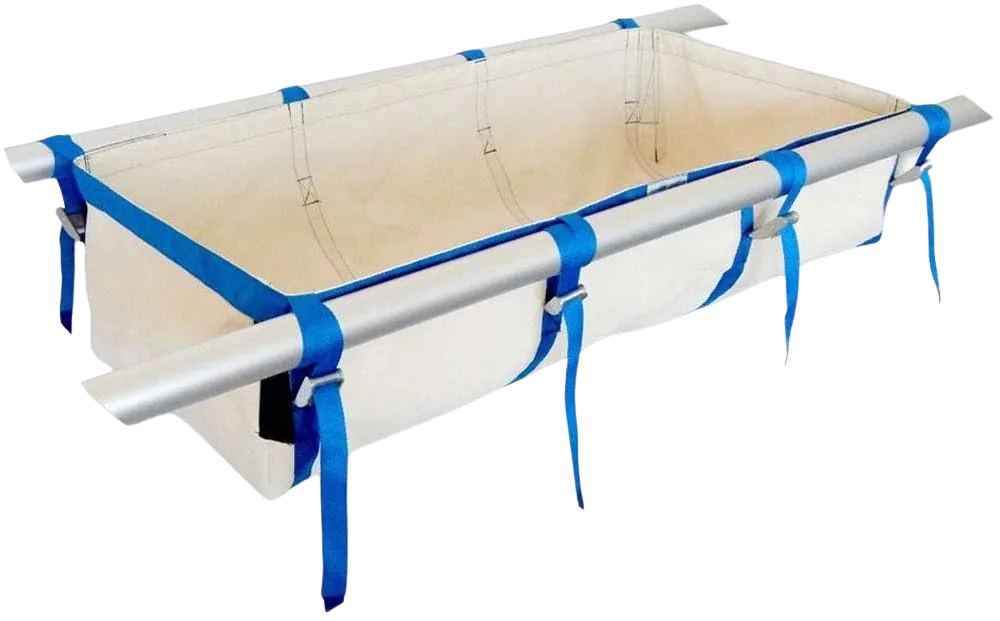
One thing the spec sheet will not tell you comes straight from the field: a rower ran three full seasons never noticing a drop bag’s stitching wearing thin, right up until a seam popped mid-summer. The cause was loading a full water jug onto the same low strap point every single trip. Adjustable depth is great, but weight distribution, where and how you load the bag, is what it actually lives or dies on.
How Thwart Bags and Drop Bags Actually Mount
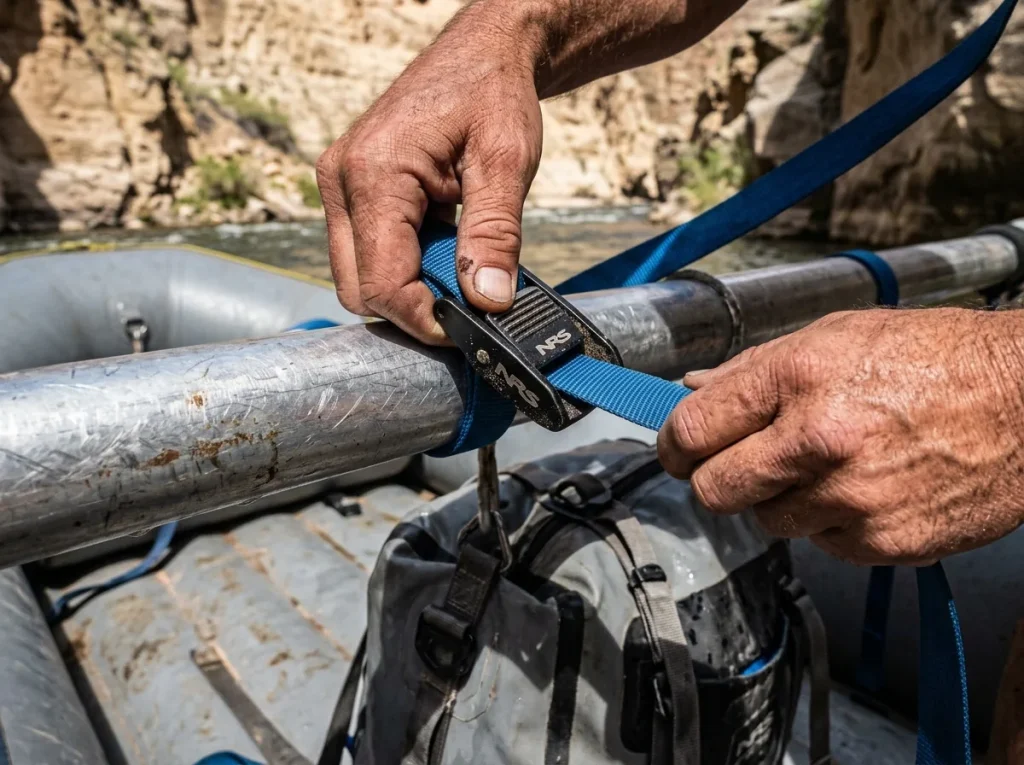
Once you see that both bags come down to the same move, the whole rig stops feeling like a mystery. It is webbing wrapped around a bar, cinched into a cam buckle, oriented so you can tighten it from where you sit. That is it. Get the direction right on dry land and you save yourself a soaked re-rig from the bank.
The Cam-Strap Basics
Thwart bags mount with 1-inch webbing wrapped around the bar and cinched into heavy-duty cam buckles. Some models add grommets so you can thread a separate 5-foot cam strap through. Do not try to make one strap length do every job. Stock a mix: short 1-to-2-foot straps for small rigging like thwart bags, and 6-foot or 9-foot straps as the workhorse length for drop bags and frame gear.
The NRS 1in Loop Strap in the 9-foot length is the one worth standardizing on, because it is the same hardware that mounts both systems and it plays nicely across every other bag on the boat. Cam straps are the shared currency of a rigged raft, which is exactly why boaters learn why four cam straps is never enough the first time they try to lock everything down with a skimpy pile of them.
Buckle Direction and Getting Gear Off the Floor
Orient your cam buckles so the strap tightens from inside the boat. The most common rigging mistake is setting everything up on dry land with the buckles facing out where they are easy to reach, then discovering on the water that every strap has to be re-tightened from the bank instead of from your seat. Rig it once the right way and you never fight it again.
The other principle both systems share: suspend everything off the floor so the self-bailing floor can flex over waves. Mount your drop-bag tie-downs low on the tubes, not straight down into the floor D-rings. Cinching a loaded bag hard into the floor kills that flex and stresses the seam near the drain hole over time. On a permitted trip this is not just good practice either, the National Park Service’s required boating and rafting equipment list makes clear that secured gear is part of the deal, not an optional nicety.
Use at least two straps on anything you’d rather not chase downstream. Kitchen box, dry box, cooler, and a fully loaded drop bag all earn redundant tie-downs. One strap is a single point of failure, and the river finds single points of failure for a living.
Paddle Raft vs Oar Rig — Two Different Mounting Problems
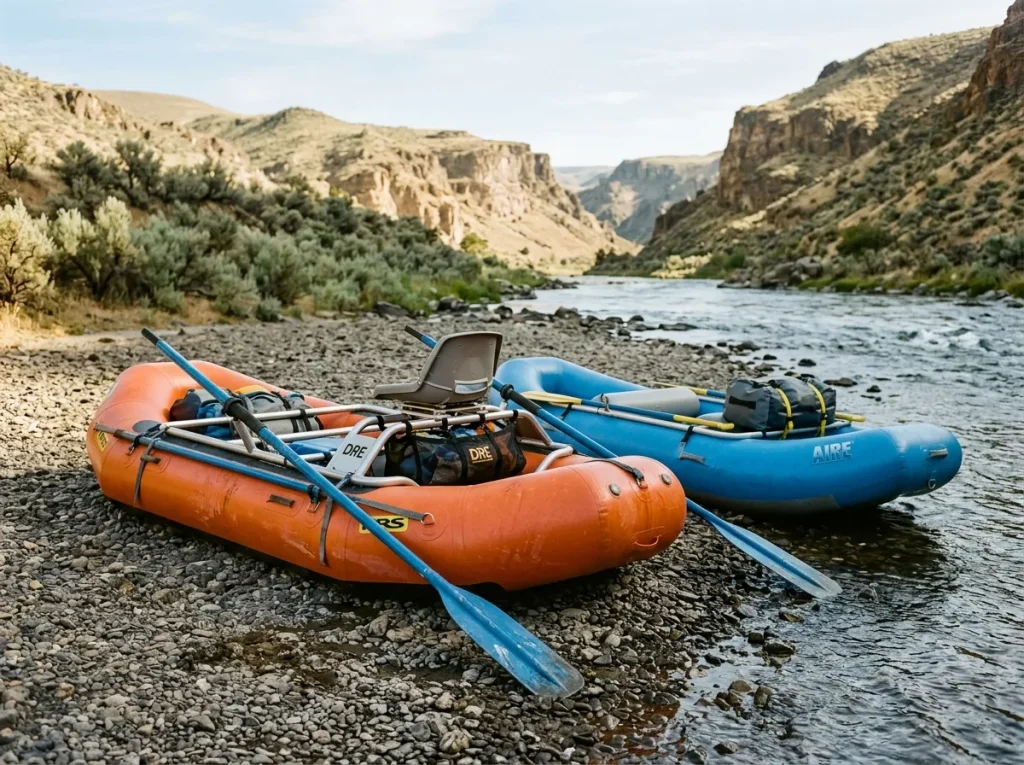
People treat “rigging storage” as one skill. It is two, and mixing them up is where beginners waste money. If you paddle, you will never bolt a drop bag to anything, because there is nothing to bolt it to. If you row a frame, you have crossbars and a bay the paddle crew can only dream about. Knowing which boat you run changes what you should even be shopping for, so it helps to be clear on whether a paddle raft, oar rig, or hybrid fits your river before you spend a dime on storage.
On a paddle raft, there is no metal structure at all. A thwart bag’s webbing wraps directly around the inflatable thwart and cinches into cam buckles. That is the whole storage system. There is no bay underneath, so a drop bag has nowhere to hang. Quick-reach gear on the thwart is basically all you get, and honestly it is enough for most day trips.
An oar rig or cataraft is a different animal. Thwart bags and drop bags both mount to the metal crossbar, and the frame creates the bay that makes under-seat storage possible in the first place. Same vocabulary, completely different hardware. This is why a paddle boater and a frame boater can both talk confidently about “thwart bags” and still leave the conversation confused.
The practical takeaway is simple: match your storage plan to your boat type before you shop, or you will buy a drop bag you cannot hang. There is a private boater who said “we rig to flip” for years without really knowing what it meant, until an actual flip sorted his gear for him. Everything mounted to real structure stayed with the boat. The one bag someone strapped in a hurry did not.
Sizing a Bag to Your Actual Boat
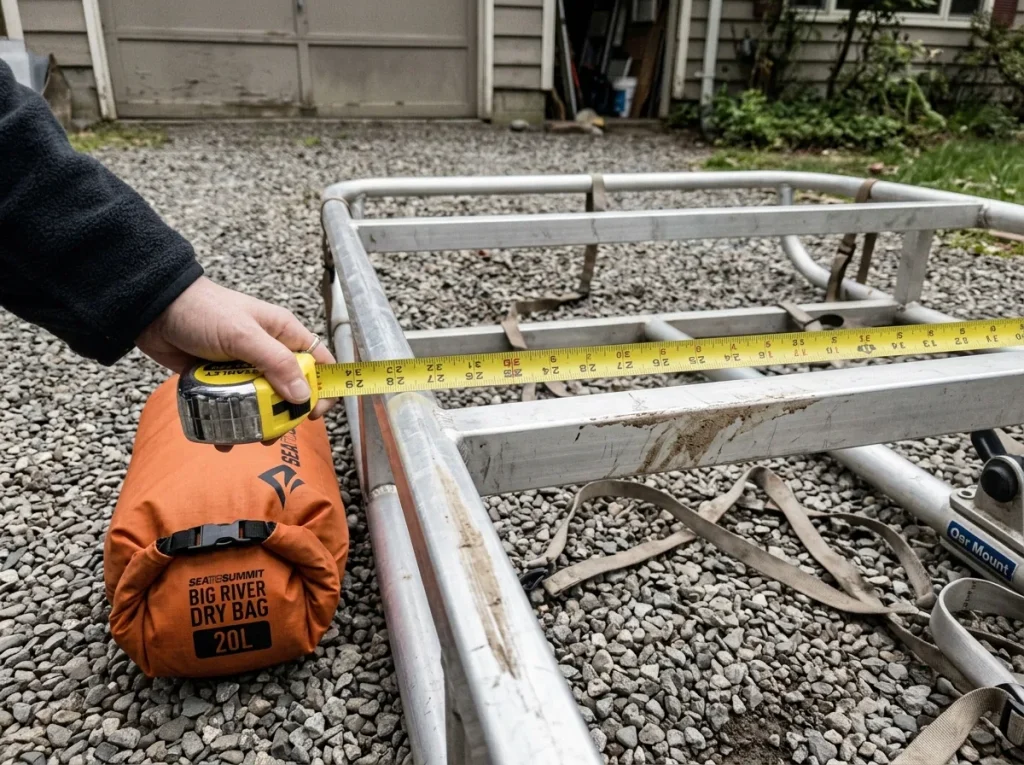
“One size fits all” is the myth that sells the most wrong-sized bags. Two minutes with a tape measure at home beats a bag that sags into the current or leaves half your bay empty. The rule is the same for both systems: measure your boat, then buy the bag, never the other way around.
Thwart Span and Bay Width
For a thwart bag, measure your actual thwart span and pick a bag that fits it. Common dimensions run from a Small around 16 by 13 by 8 inches up to a Large around 24 by 13 by 8, but those numbers only mean something against your specific thwart length. For a drop bag, measure bay width the right way, crossbar-to-crossbar. Measure rail-to-rail and you will overstate the space, then find the bag does not fit the frame you ordered it for. It is the single most common measuring mistake in the sport.
Why Bigger Is Not Safer
Sizing is a Goldilocks problem, not a “more is better” one. An oversized drop bag sags down into the water and drags. An undersized one wastes the bay you paid a frame to have. The same discipline applies if you are fitting a hard box down there, since a dry box runs into the identical crossbar-to-crossbar math. Get the tape out once and you never guess again.
The Flip-Safety Detail Every Other Guide Skips
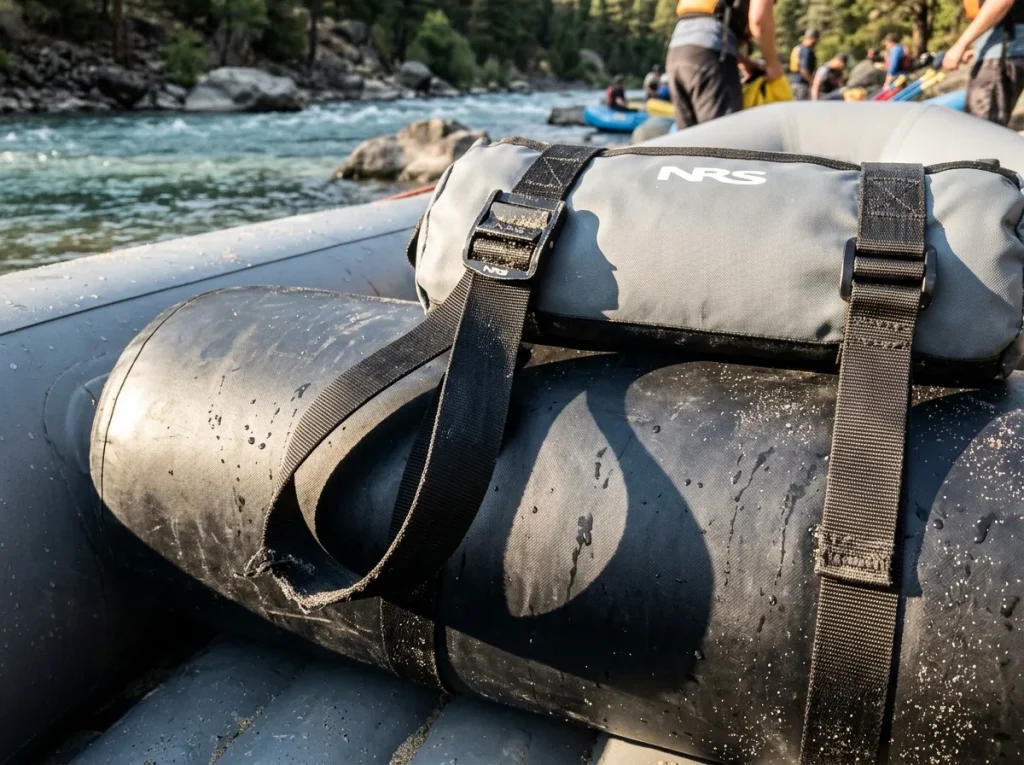
Here is the thing nobody selling you a bag will mention. The strap that holds your gear can also catch a limb when the boat goes over. Every other thwart-bag and drop-bag guide out there talks about capacity and mounting and stops cold before the one detail that actually matters when things go wrong. Two minutes of strap management is the difference between a clean flip and a bad one.
The Loose Tail Is the Whole Problem
The single most common rigging-safety failure is a long, loose cam-strap tail left hanging after you cinch a bag down. That dangling tail is exactly what snags an ankle, a wrist, or a paddle when the boat flips. River folks have a name for it: a “danger rope,” meaning any loop of rope or webbing big enough for a hand, foot, or head to pass through. An unsecured thwart bag strap loop fits that definition perfectly, and a loop buried under other gear where you cannot see it is what boaters call a “tiger trap.”
What makes this worth harping on is where the risk actually comes from. Entanglement and entrapment incidents trace overwhelmingly to strap management at the put-in, not to the whitewater itself. These are preventable mistakes made on dry land before the boat ever sees a rapid. That is the honest, slightly uncomfortable truth: the water rarely creates the hazard, the rushed rig job does. It is the same principle behind the full rig-to-flip approach that experienced boaters apply to every piece of gear on the boat.
The Fix Takes Ten Seconds
Daisy-chain or heat-seal-and-trim the excess webbing the moment a strap is tightened. Every strap, every time, no “I’ll fix it at the next stop.” A daisy-chained tail cannot form a loop, and a trimmed tail cannot form one either. That is the entire fix, and it is free. The same discipline you would use locking down a heavy dry box applies to the smallest thwart bag strap. Nothing on the boat gets a pass.
Do a “loop sweep” as your last step before launch. Walk the boat, grab every strap tail, and confirm not one of them makes a loop your hand can pass through. It takes thirty seconds and it is the cheapest insurance on the river.
Budget and DIY Alternatives That Still Work
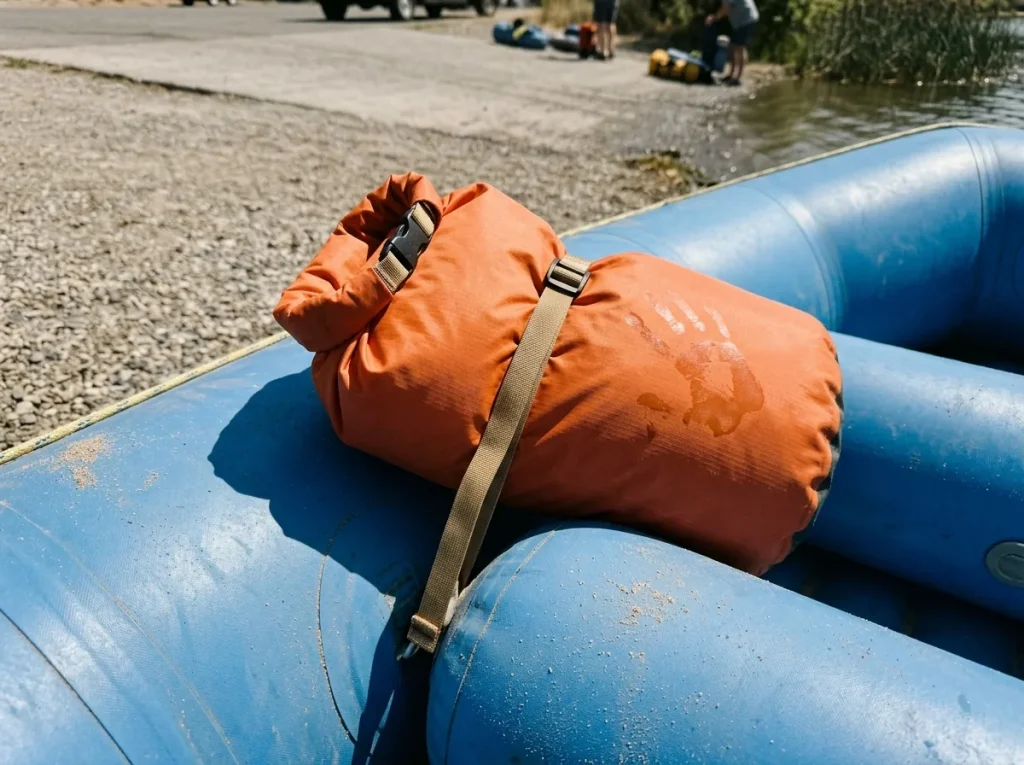
Time for the anti-sell. Plenty of cottage brands make genuinely good bags, but for a handful of casual day trips a cheap cam strap and a dry bag you already own do most of the job. Here is exactly where the shortcut works and exactly where it stops, so you spend real money only when you actually need to.
The Dry Bag and Cam Strap Combo
The DIY move nobody in the industry will tell you about, because they are all selling purpose-built bags, is dead simple. Take a roll-top dry bag, cam-strap it directly to the thwart, and you have a functional quick-reach bag for a fraction of the cost. For a weekend paddler running a mellow river a few times a summer, that gets you most of the way to a dedicated thwart bag. A whitewater-rated roll-top like the Sea to Summit Big River Dry Bag is exactly the kind of bag that already lives in most boaters’ kits, and the same logic behind choosing a whitewater dry bag that survives a flip applies here.
Where does the shortcut fall short? Three places. Durability under daily UV, one-handed access (a roll-top is slower to open than a slide closure with a paddle in your other hand), and non-mesh fabric that traps water instead of draining it. Hit any of those limits often enough and a purpose-built bag earns its price. Until then, do not let anyone tell you the DIY rig is not real rigging.
Mesh, Mildew, and Not Letting Gear Rot
For the space under a seat, reach for mesh specifically. It is the only material that drains instead of holding runoff against gear you cannot see. A budget-friendly general mesh bag like the NRS Mesh Drag Bag gets you that drains-not-pools benefit without paying for a dedicated drop bag.
And here is the maintenance nobody mentions across any competitor page: mesh thwart bags and drop bags grow mildew and take on UV rot if you stash them wet after a trip. Treat them like the rest of your kit and dry them out before they go in the garage. The same habits in drying and storing gear so it doesn’t rot apply straight to your storage bags. The honest bottom line: buy the purpose-built bag when one-handed access or long-term durability becomes your limiting factor, and not one trip before.
Conclusion
Sort your gear by how fast you need it, and the rig designs itself: quick-reach rides the thwart, bulk-and-forget hangs under the seat. Both systems come down to the same handful of moves, webbing around a bar, a cam buckle you can reach from your seat, and a strap tail trimmed so it cannot catch anything. Match the bag to your boat and your bay before you spend, because a dry bag and a cam strap cover a surprising amount of ground until the day they do not.
Before your next trip, spend ten minutes with a tape measure and re-rig one bag the right way, buckles facing in and every tail trimmed. It is the cheapest upgrade to a safer, tidier boat you will ever make, and you will feel the difference the first time you reach for the sunscreen without even looking.
Frequently Asked Questions
01What is the difference between a drop bag and a thwart bag?
A thwart bag straps on top of a thwart or crossbar for small quick-reach items, while a drop bag hangs down into the bay under a seat for bulky gear. Use a thwart bag for sunscreen and snacks, a drop bag for a pump or spare PFD.
02Can you use a regular dry bag instead of a thwart bag?
Yes, for casual day trips you can cam-strap a roll-top dry bag straight to the thwart. The limits are one-handed access and UV durability over time, which is where a purpose-built mesh thwart bag starts to earn its price.
03How do you keep a thwart bag from sliding down the thwart?
Wrap 1-inch webbing snug around the thwart and cinch it into a cam buckle so the bag rides high and firm. Check the tension again after loading, and orient the buckle so you can re-tighten it from inside the boat.
04How big should a thwart bag be?
Size it to your measured thwart span, not to a fits-most-rafts label. Common sizes run from about 16 by 13 by 8 inches up to 24 by 13 by 8, but an overstuffed bag rides low and gets in the paddler’s way.
05Will a thwart bag stay put if the raft flips?
Only if it is cam-strapped to real structure with the tail trimmed. A properly rigged bag stays with the boat, while a loose one becomes a yard sale and its strap loop turns into an entrapment hazard. Put two straps on anything you’d rather not lose.