

In this article
You’re at the put-in, the oar frame is bolted down, and you go to strap in the dry box only to realize the frame kit came with four straps and every one is already holding down a corner. The cooler still needs straps, so does the spare oar, and the nearest place to buy more is two hours back down the highway. Almost every guide online tells you which cam strap to buy and stops there, but the question that leaves people short at the ramp is how many you need and which strap does which job. This guide covers the real strap count for a loaded raft, what separates a river-grade strap from a hardware-store tie-down strap, the specific straps worth buying across budgets, and how to rig them so a loose tail never turns into a swimmer’s problem.
Here’s how the picks stack up before we get into the why behind each one.
| Strap | Best For | Width | Length Range |
|---|---|---|---|
| NRS 1″ HD Tie-Down (4-pack) | Core frame rigging | 1 inch | 6–20 ft options |
| JCHL Heavy-Duty 1″ | Budget frame & cooler duty | 1 inch | Assorted |
| NRS 1″ Loop Strap | Dry box & cooler lids | 1 inch | 9 ft |
| NRS 1.5″ HD Tie-Down (2-pack) | Loaded 14ft+ frames, heavy coolers | 1.5 inch | Multiple |
| Rollercam 1.0″ | Stubborn, hard-to-cinch loads | 1 inch | Assorted |
| NRS 1″ HD (12ft pair) | Perimeter lines, full-frame wraps | 1 inch | 12 ft |
How Many Cam Straps Your Raft Actually Needs
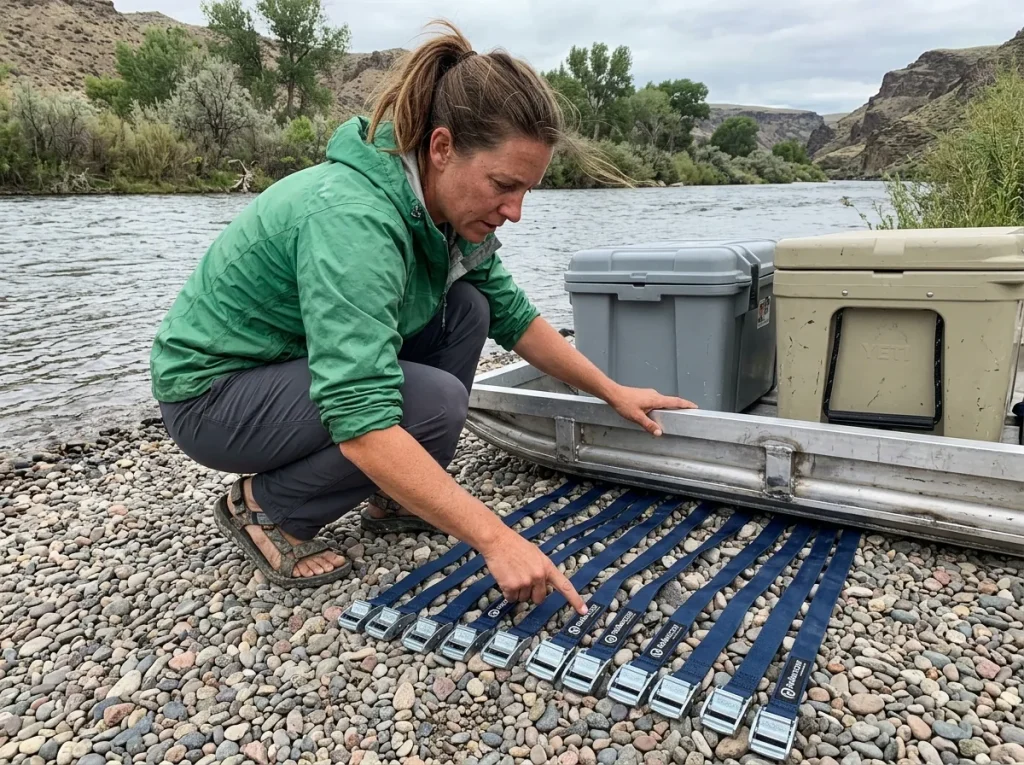
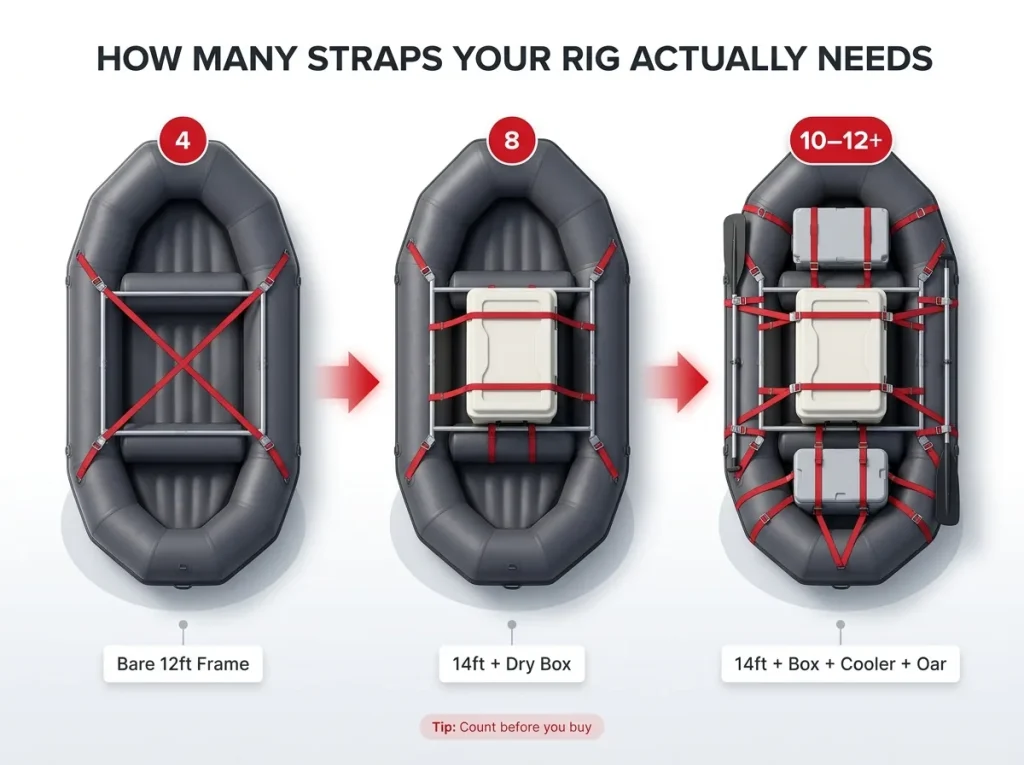
Nobody does this math for you, so here it is. A bare frame rig starts at four straps, one per corner of the main bay, pulled in opposing diagonals so the frame locks to the boat. That’s the floor, before you’ve added a single piece of gear. The raft frame you’re running changes that number too, which is why it helps to know your setup cold, and if you’re still choosing between builds, the honest breakdown of the three raft frame types and what each one actually needs is worth a read before you buy straps for it.
Then the load starts stacking up. A dry box eats about four straps on its own: two to cradle and suspend it in the frame, two more over the top to hold the lid down. A cooler runs the same math, roughly four dedicated straps.
Add a spare oar strapped to the side tube and you’re adding one or two more. None of this is in the frame kit’s four.
Do the honest tally on a fully loaded 14-foot raft and you land somewhere around 10 to 12 straps, sometimes more. That number reframes the whole purchase. You’re not buying “a set of straps,” you’re outfitting a rig, and the count scales with how big your boat is and how much you pile on it, which ties directly to picking the right raft size for your crew and water. A weekend day boat and a multi-day expedition rig are not the same shopping list.
The classic put-in mistake is showing up with exactly the four straps the frame came with, then standing there doing this arithmetic for the first time while your buddies rig around you. Buy enough that you’re never that person.
Buy straps in even sets and throw two spares in the dry box. Straps walk off at the takeout, get borrowed by the boat next to you, and occasionally get cut in a pin. Two extra 9-footers weigh nothing and have saved more trips than any fancy buckle ever will.
What Actually Makes a Cam Strap Good for Rafting
Here’s where the hardware-store bin lets you down. The four-dollar strap that looks identical to a river strap usually isn’t, and the difference is the webbing fiber and how it behaves once it’s soaked. Get this part right and most of the buying decision falls into place.
Webbing That Doesn’t Go Slack When It’s Wet
Nylon webbing can stretch 10 to 15 percent when it gets wet. That sounds academic until your rig, cinched drum-tight in the parking lot, goes soft by the first rapid because the straps drank the river and grew. Polyester webbing and polypropylene webbing resist that wet stretch, which is exactly why they, not nylon, are the rafting standard. If a strap doesn’t say what it’s made of, assume it’s the wrong stuff.
UV Coating and Why It Decides Lifespan
Sun is what quietly kills straps between trips, not the river. UV-protected webbing holds its strength through seasons of sun exposure while untreated webbing goes chalky, stiff, and weak. A strap that lives coiled in a hot truck bed all summer ages faster than one that sees actual water.
The Cam Buckle Itself
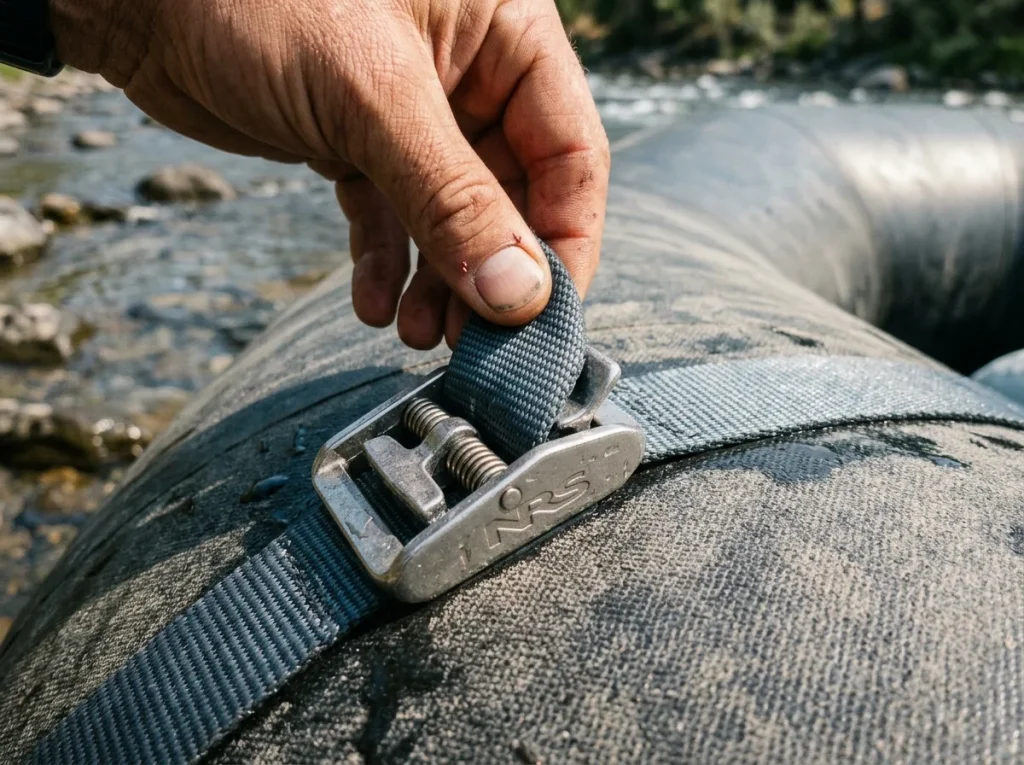
The cam buckle is a hand-tightened mechanism, and that limit is a feature, not a shortcoming. You can only pull it as tight as your grip allows, which protects an inflatable tube from getting crushed. It also gives you two numbers worth understanding: minimum breaking strength (MBS), the headline figure printed on the strap, and working load limit (WLL), the number you actually plan around.
Divide the breaking strength by a 3-to-1 safety factor to get the WLL, then rig with margin above that. A 1-inch strap rated around 1,500 pounds MBS gives you roughly 500 pounds of working load. If you want the deeper dive on those ratings, the full breakdown of WLL, breaking strength, and webbing specs lays out the math without the marketing.
Cam Straps vs Ratchet Straps on a Raft
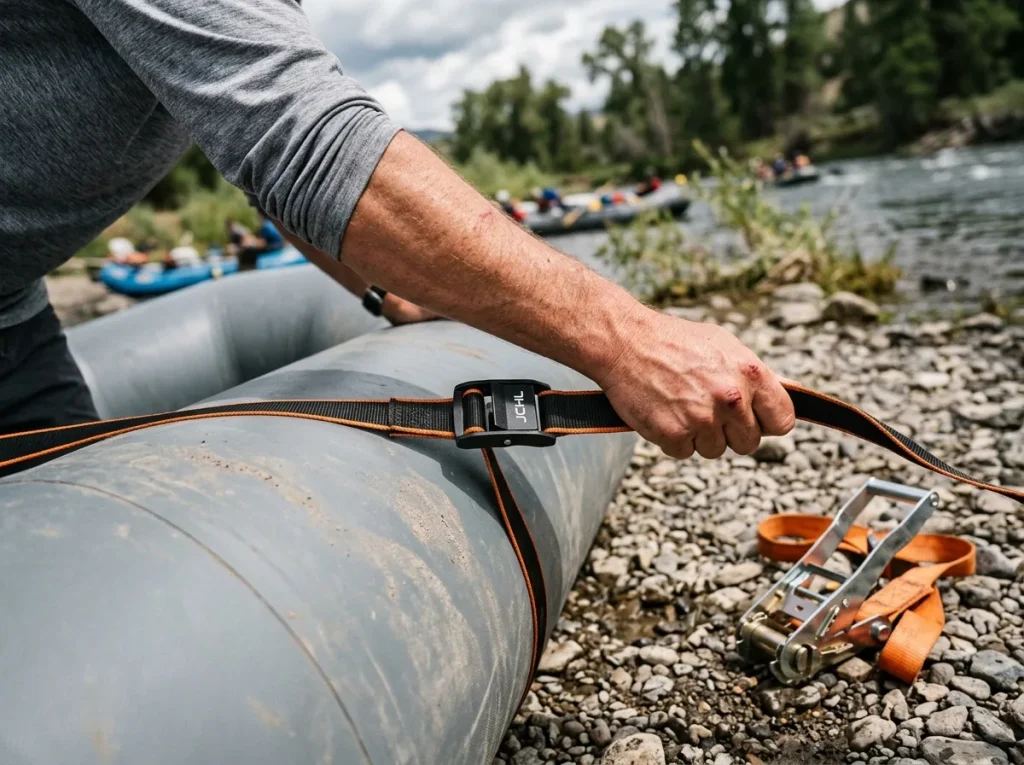
The instinct makes sense: a ratchet strap cranks tighter than you can pull by hand, so it must be safer. On an inflatable, that instinct is backwards, and it’s worth understanding why before you strap a ratchet across a tube.
A ratchet multiplies force through a gear. That’s perfect on a steel trailer that can’t be over-tightened, and it’s exactly wrong on an air-filled tube that can. Crank a ratchet down on a raft tube and you can deform it, over-stress the seams, or dig the webbing into the material.
Cam straps cap out at hand strength on purpose, which is the tension a tube actually wants. They also release faster mid-trip and are far less likely to seize up once they’re wet and full of grit.
Ratchets still earn a place in the kit, just not on the frame. Strapping the whole boat to a trailer or a roof rack is their job, where the load is rigid and the extra bite helps. On the raft itself, and especially on the tubes, hand-tight and checked beats cranked and forgotten every time. The oar frame brand you run shapes how you tension the whole system, and comparing the Cataract, NRS, and DRE frame systems is a useful next step if you’re still building out your setup.
Standard vs Roller Cam Buckles and Which Is Worth It
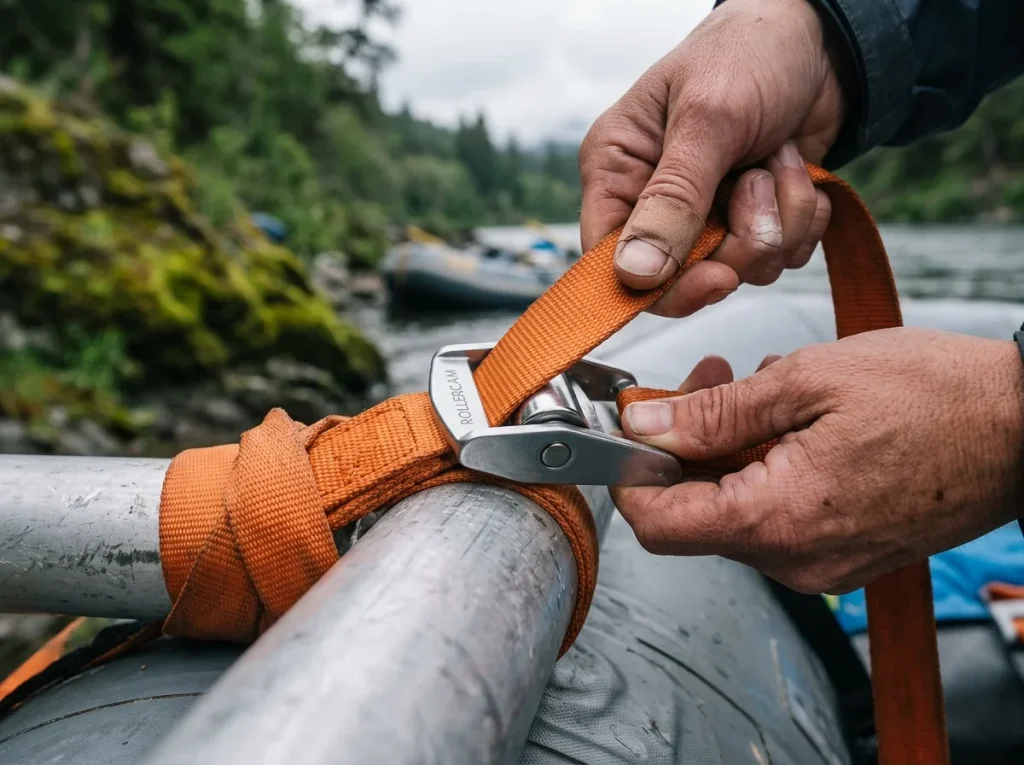
The gear-shop upsell frames roller cam buckle straps as the pro choice and standard cams as the beginner stuff. The honest answer is narrower than that, and it saves you money. A roller cam is worth it for a couple of specific jobs and overkill for most of the boat.
Mechanically, the upgrade is real. A roller cam buckle adds a small roller at the buckle’s friction point, so the webbing feeds over a rolling surface instead of dragging across a fixed bar. That lets you cinch measurably tighter by hand than a standard cam buckle, which genuinely helps on stubborn loads: thick polyester webbing that won’t quite bite, or a heavy dry box you’re trying to snug down solo.
The trade-off is where the honesty comes in. Some boaters report the roller can slip on very thick webbing, so it isn’t a strict upgrade for every strap on the boat. The Rollercam 1.0″ Cam Buckle Tie-Down Straps are the ones to reach for when you’ve got a load that fights you, and they’re a premium buy that pays off on exactly those jobs.
For your frame corners, standard cams are fine and cost less. Buy a few rollers for the stubborn spots, not a whole boat’s worth.
Sizing Straps by Width and Length
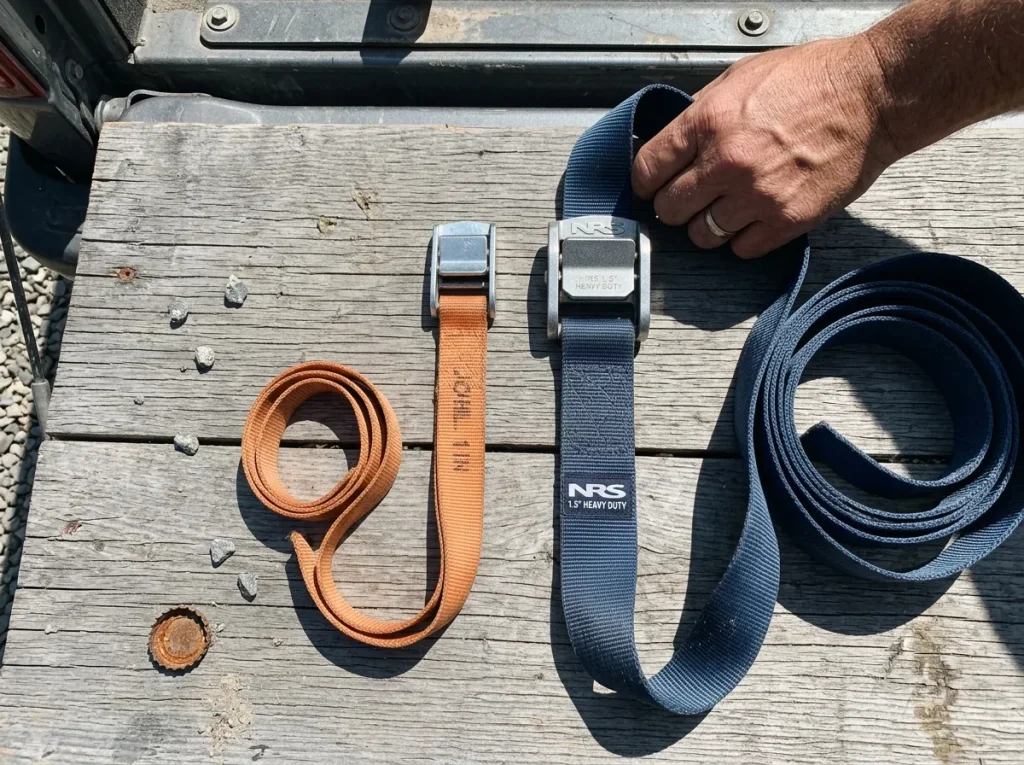
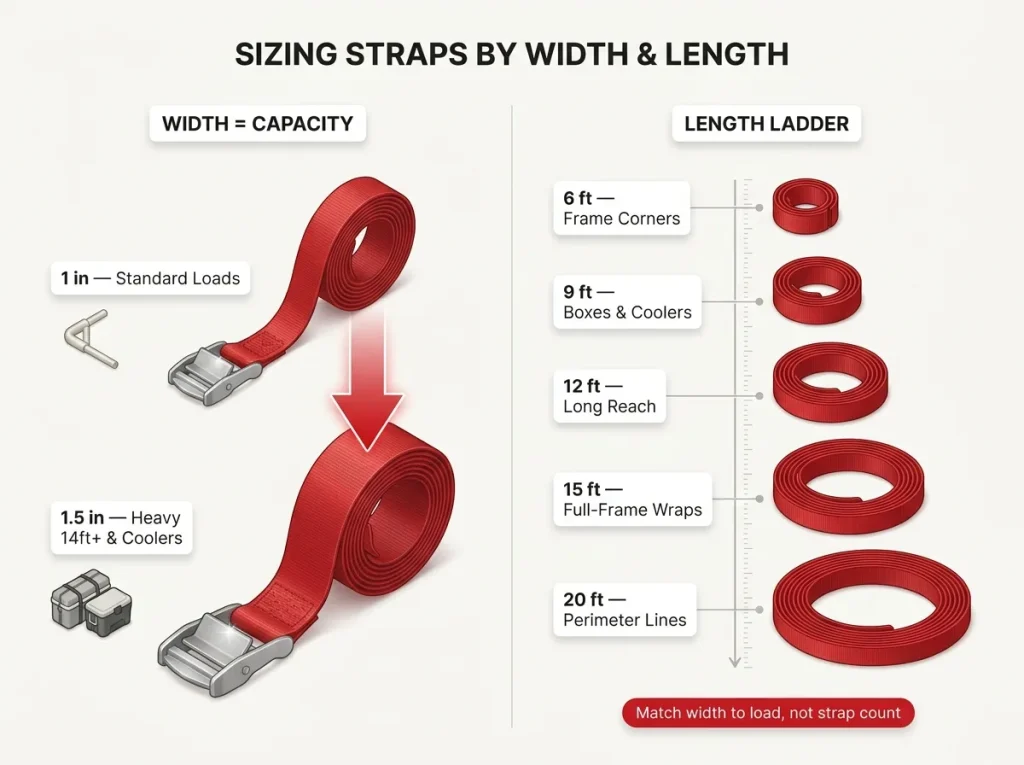
Two numbers on a strap actually matter: width and length. Nail those and you stop guessing at the shop or over-ordering “just in case” lengths you’ll never use.
1-Inch vs 1.5-Inch, and What Width Buys You
Width buys capacity. A 1-inch heavy-duty strap runs around 1,500 pounds MBS; step up to 1.5-inch and you’re looking at roughly 2,000 pounds. The move is to go wider for a loaded 14-foot-plus frame or a heavy cooler instead of stacking on more 1-inch straps and adding rigging points you then have to manage. Width is the cleaner lever than sheer strap count.
The Length Ladder
Straps come in a ladder of lengths, commonly 6, 9, 12, 15, and 20 feet, and each rung has a job. Short straps handle frame corners, mid lengths cover boxes and coolers, and long straps are for perimeter line duty and full-frame wraps. Buying one length for everything is why people end up fighting their rig, with a 20-footer’s worth of loose tail flapping off a corner that needed a 6-footer.
For the long jobs, a NRS 1″ HD 12-foot pair reaches across a wide load or wraps a full frame without leaving you knotting two shorter straps together. Keep one or two long straps in the kit specifically for perimeter lines and full-frame wraps, and you stop improvising with the wrong length.
The recurring mistake on the boater forums is running a single 1-inch strap on a heavily loaded frame corner that was calling for 1.5-inch. Match the width to the load, not to whatever’s in the bag.
Matching the Strap to the Job
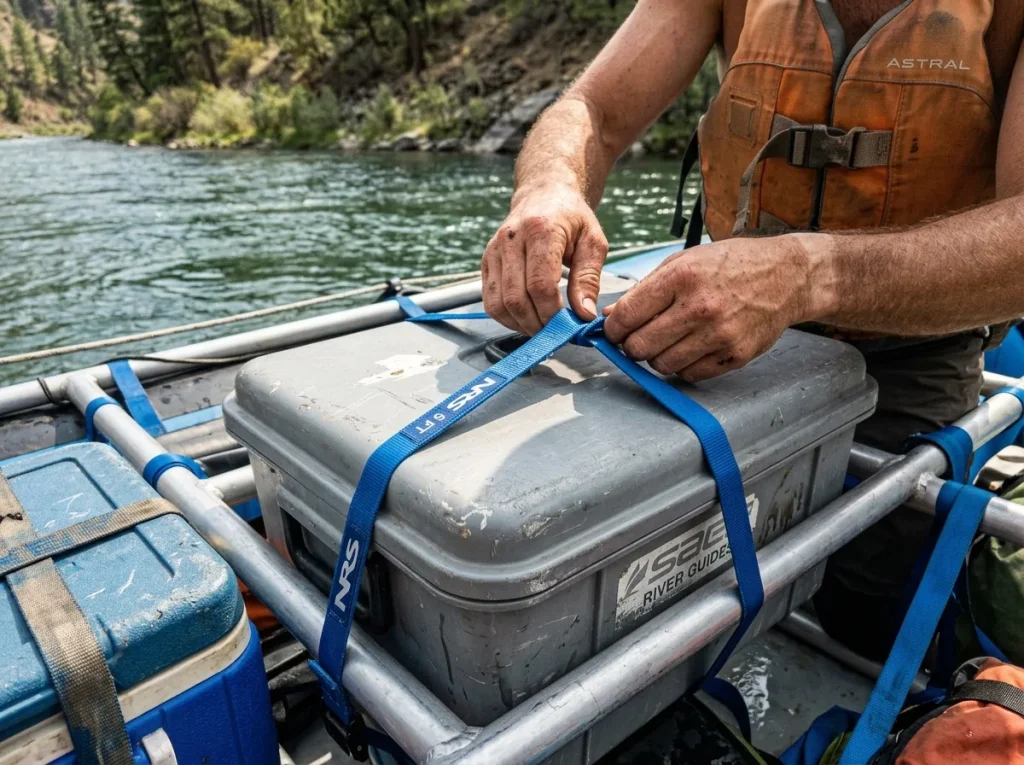
Not every strap on your boat should be the same strap. The dry box lid you open ten times a day has a different job than the frame corner you set once and forget, and matching the style to the task is where a rig stops being a wrestling match.
The standard cam strap is your workhorse, right for frame corners and general cinch-down where you set it and leave it. A loop-end strap solves a different problem entirely. Its sewn loop lets you cinch a dry box or cooler lid down and then reopen it mid-trip without unthreading the whole strap through the buckle, which matters every time you want a cold drink or the lunch bag at a beach stop. The NRS 1″ Loop Strap in the 9-foot length is the pick here, and it slots right into a full dry-box rig that survives a flip.
Then there are dedicated straps for fixed jobs, like a D-ring setup for lashing down a spare oar where you want a permanent anchor rather than something you unbuckle constantly. That spare oar is worth strapping as carefully as anything else on the boat, since it’s the piece you only reach for when a trip has already gone sideways. The rule of thumb: pick the strap for how often you’ll unbuckle it, not just for its length.
The Cam Straps Worth Buying, Budget to Heavy-Duty
This is the part where most guides just say “buy NRS” and move on. Here’s the straight version, including the budget option nobody mentions and the case for spending up on width.
The Standard Frame Strap Most Boaters Land On
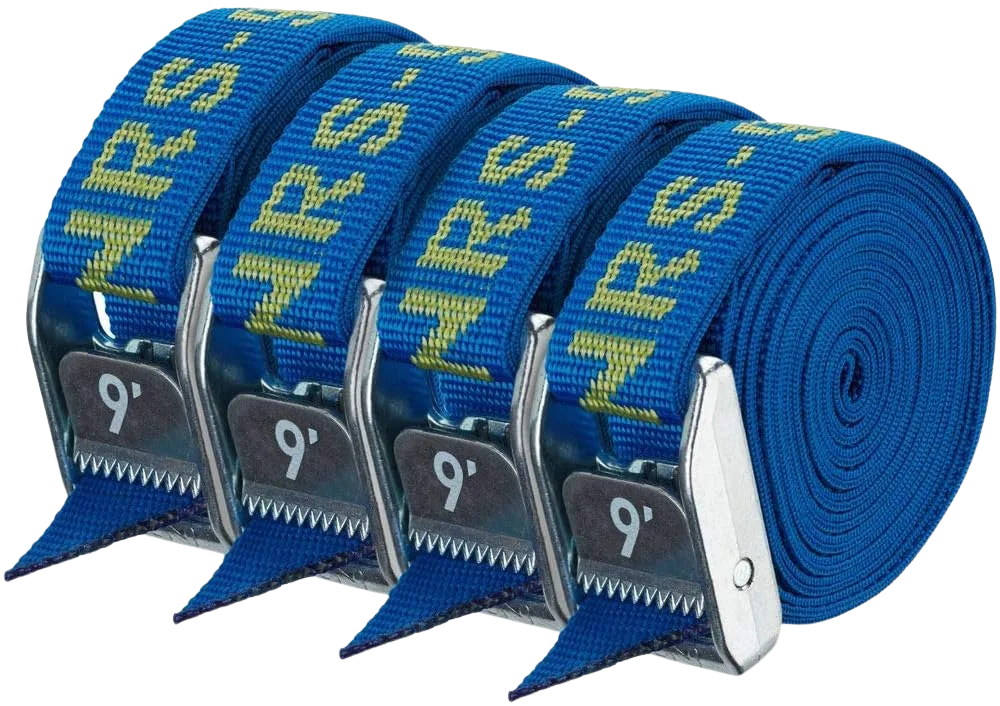
There’s a reason the NRS 1″ HD Tie-Down Strap is the category default. The polypropylene webbing resists wet stretch, the UV coating holds up through seasons in the sun, and the stainless buckle doesn’t corrode or seize after a summer of grit. It’s a mid-range buy that does the core job of holding your frame down without drama, which is all you want from the straps carrying your rig.
The Honest Budget Pick
You don’t have to buy the gold-standard brand to rig safely, and pretending otherwise is exactly the kind of gear-shop pressure worth ignoring. The JCHL Heavy-Duty 1″ Cam Strap, rated around 1,000 pounds, is a legitimate budget-friendly option that still clears a workable working load limit for standard frame and cooler duty. It’s the strap to hand a friend outfitting their first raft on a tight budget, or to buy in bulk for the spare pile. It won’t carry the premium reputation, but it holds a load, and for most private boaters that’s the honest bar.
When to Step Up to 1.5-Inch

The NRS 1.5″ HD Tie-Down Strap is the premium, spend-up move for exactly one reason: when the load is heavy, you pay up for width, not brand loyalty. Two of these across a loaded frame or a packed cooler do the work that three or four 1-inch straps would, with fewer buckles to check and fewer tails to tuck. Keep a couple in the kit for the heavy jobs and run 1-inch everywhere else.
How to Rig Cam Straps Without a Danger Rope
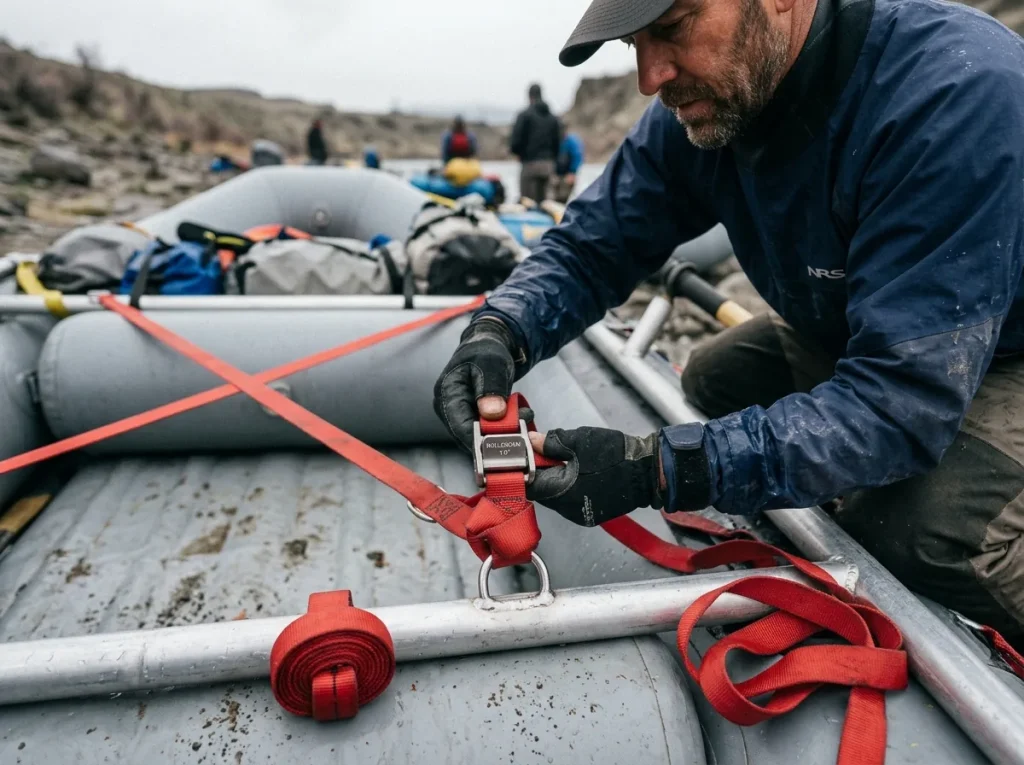
A strap rated for 1,500 pounds still fails you if it’s rigged straight down or left with a loose loop flapping in the current. Rating is only half of it. The other half is technique, and this is where a rig either holds through a rapid or comes apart at the worst moment.
Girth-Hitch the Strap First
Before you cinch anything, anchor the strap so it can’t wander. The girth hitch does this: pass a bight of the buckle end through the D-ring, then feed the whole buckle and strap through that bight and snug it. Now the strap is fixed to the ring and won’t slide or fall free once you unbuckle it mid-trip. This is the girth-hitch method river guides use to anchor a cam strap for good, and it takes about three seconds once it’s muscle memory.
X-Pattern Counter-Tension
Straight-down straps hold a frame vertically and let it rack side to side. The fix is counter-tension: pull your straps in opposing diagonal pairs so the frame locks fore-aft and side-to-side at once. This X-pattern is why a properly rigged frame stays put in a rapid instead of shifting, and it’s the same principle behind building a frame that won’t rack under load.
Tuck the Danger Rope
Once every strap is cinched, you’re not done. A loose strap tail long enough to form a loop is a danger rope, an entrapment hazard that can catch a swimmer’s arm or leg. Roll and tuck every tail, or daisy chain the excess back on itself so nothing flaps.
Then walk the whole rig and check, because the loop you can’t see is the one that grabs someone. Every strap on the boat should pass the same test the rig to flip mindset demands: it holds even when the boat goes fully upside down.
Do your final tail-check walk right before you launch, not right after you rig. Straps settle and loosen while you shuttle gear and shove off, so the tail that was tucked at the truck can work loose by the water. One last lap around the boat catches it.
When a Strap Has Failed and How to Spot It First
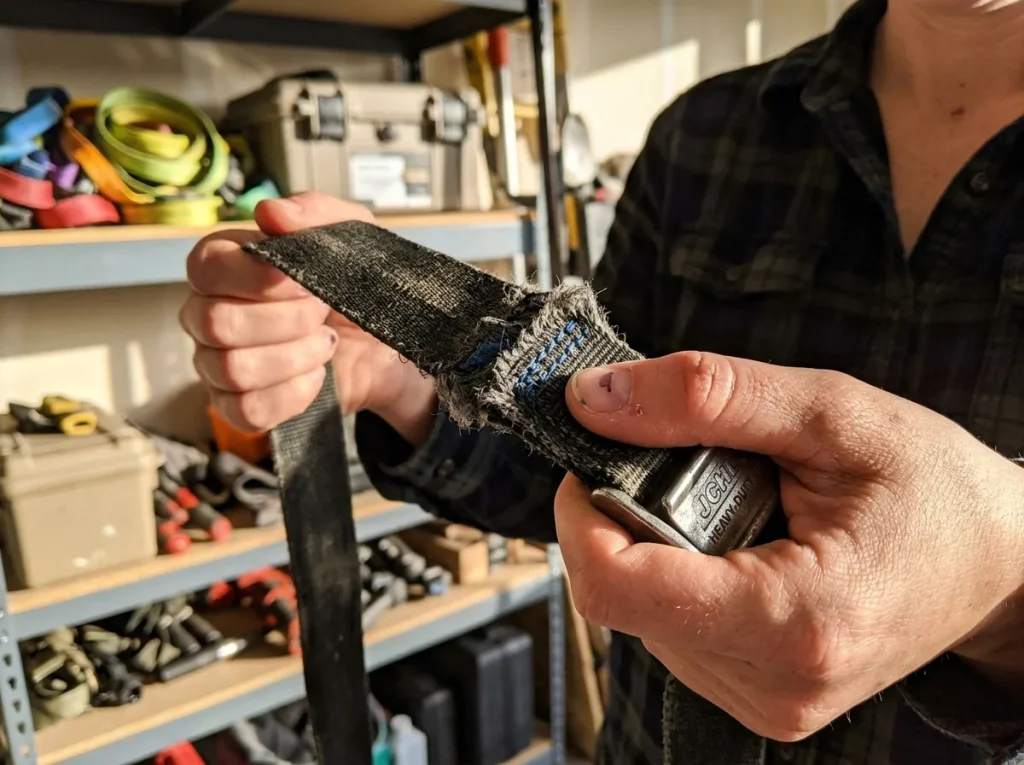
A strap doesn’t warn you before it lets go in a rapid, and the stakes aren’t a highway inconvenience like they are for a trucker. On the river, a failed strap is a frame shifting under you mid-rapid or a dry box gone in a flip. So the check happens before the trip, not during it.
Pull a strap from service the moment it shows any of these: a knot tied in it, a cut, burn, or hole past a shallow surface mark, or broken and pulled stitching, especially near the buckle. This mirrors the federal cargo securement standard that defines working load limit and strap retirement criteria, and the logic carries straight over to river gear. A knot alone means the strap is already compromised, because a knot creates a permanent weak point right where the webbing bends.
The mistake here is treating a strap with a knot, a deep nick, or fraying stitches as still good enough. It isn’t. Webbing ages from UV and grit even sitting in storage, so a strap that looked fine last season can be done this one.
Run the check each spring and again before any big trip, and retire the questionable ones instead of gambling on them. Those are the straps holding down the dry boxes worth actually buying, and a box in the current is a bad way to learn the lesson.
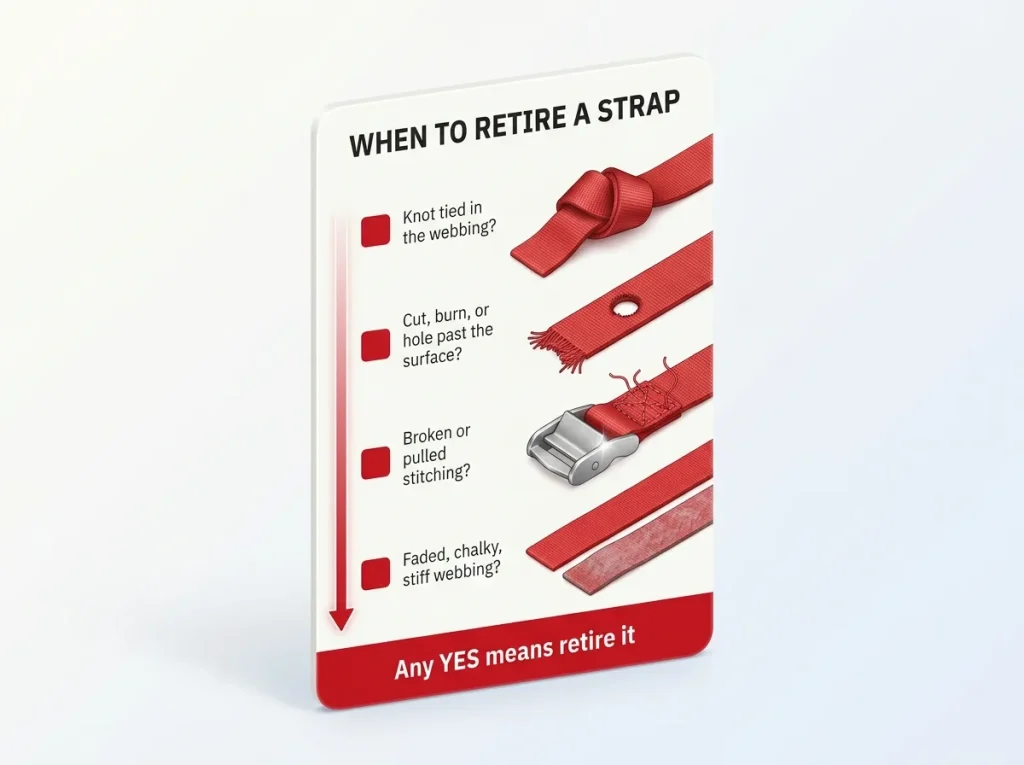
Retire a strap without throwing it away. A dinged frame strap still works fine for lashing gear in the truck, tying down the boat in the driveway, or a hundred garage jobs. Mark the buckle with tape so it never migrates back onto the boat, then demote it.
Caring for and Storing Your Straps So They Last
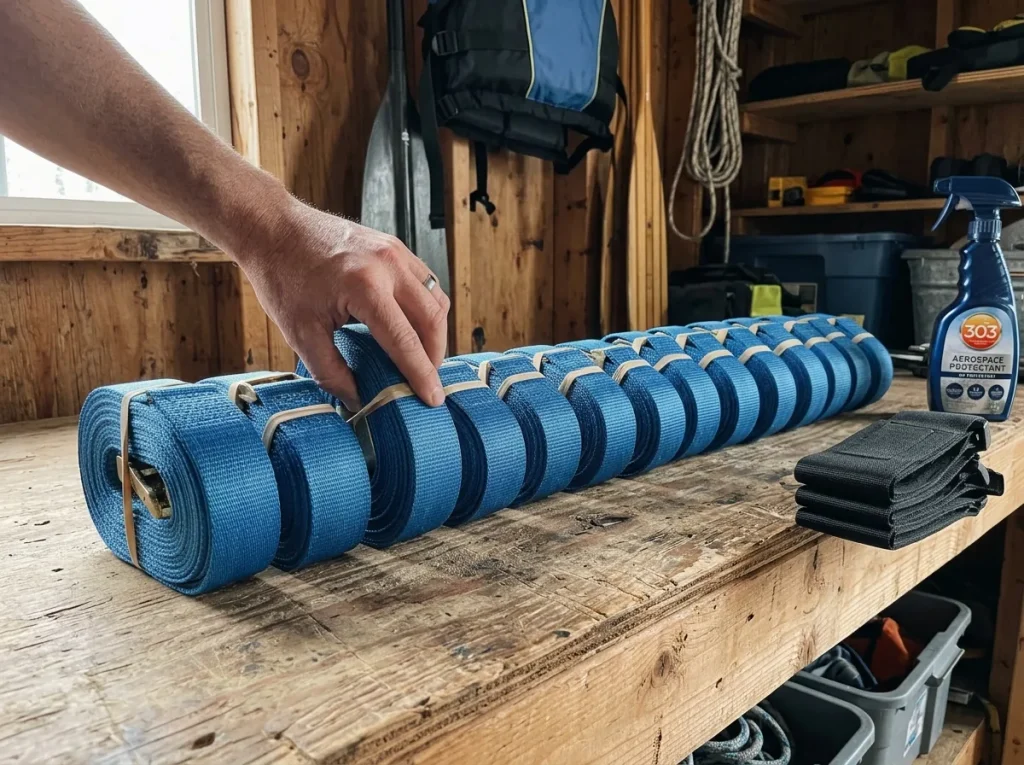
Straps are cheap, but the ones that fail early almost always die in the garage between trips, not on the water. A little off-season care buys you seasons out of a set.
Dry them fully before they go into storage. Damp webbing rolled up tight breeds mildew and weakens the fibers over a winter, so let a wet set air out before you coil it. Keep straps out of direct sun and away from solvents and fuel while they’re stored, since UV degradation and chemical exposure do their damage quietly, out of season, when you’re not looking.
Roll your straps for storage instead of knotting them, because a knot left tied for months becomes a permanent weak point, the same flaw that pulls a strap from service in the first place. The same UV that fades your boat is aging your straps on the shelf, so the habits that protect one protect the other, and the off-season care that keeps a whitewater raft alive covers the rest of the routine. Off-season storage is where strap lifespan is quietly won or lost.
Conclusion
Count before you buy. A real rig runs 10 to 12 straps or more, not the four your frame kit shipped with, and showing up short is a put-in problem you solve at home. Buy river-grade webbing, meaning polyester or polypropylene with a UV coating, and match the width and style to the job instead of buying the priciest brand out of habit. Then rig with counter-tension and tuck every tail, because a strap rated for half a ton still fails if it’s rigged straight down or left flapping as a loose loop.
Before your next trip, lay the whole rig out in the driveway and count straps against your actual load. The driveway is a much cheaper place to come up short than the put-in.
Frequently Asked Questions
01What is the working load limit of a cam strap?
Working load limit is the strap’s breaking strength divided by a 3-to-1 safety factor. For a 1-inch strap rated around 1,500 lb MBS, that is roughly 500 lb WLL. Plan your rig around the WLL number, never the larger breaking-strength figure printed on the strap.
02Do cam straps stretch when they get wet?
Nylon webbing can stretch 10 to 15 percent when wet, which is why a nylon rig cinched tight at the put-in can go slack by the first rapid. Rafting-grade straps use polyester or polypropylene webbing specifically to resist that wet stretch.
03How tight should a cam strap be on a raft tube?
Hand-tight and snug, not cranked. A cam strap is designed to cap out at hand strength so it will not over-stress an inflatable tube. If you are reaching for a ratchet to crank a strap into the tube, you are rigging it wrong.
04Can I use ratchet straps instead of cam straps on my raft?
For strapping the whole boat to a trailer or roof rack, ratchets are fine. For the frame and gear on the raft itself, cam straps win. A ratchet’s geared force can over-stress or deform an air-filled tube, and cam straps release faster when wet and gritty.
05How often should I replace my raft cam straps?
There is no fixed calendar. Retire a strap the moment it has a knot tied in it, a cut, burn, or hole past the surface, or broken and pulled stitching. Check the whole set each season and again before a big trip, since UV and grit age webbing even in storage.