
In this article
The raft drops sideways off a wave, you slide off the tube, and the spring-runoff river closes over you. Before you decide anything, your chest heaves on its own and you gasp. The air hit 80°F on the drive up, but the water came off a snowfield two days ago and it does not care what the forecast said. The first thing any guide talks about at a cold-water put-in is not your paddle stroke, it is what you are wearing, and knowing how to layer for cold water rafting is what buys you those first ugly minutes in the current. Some of the best moves here cost nothing. Here is what goes on, in order, and why each piece is doing a job.
What Cold Water Actually Does to You
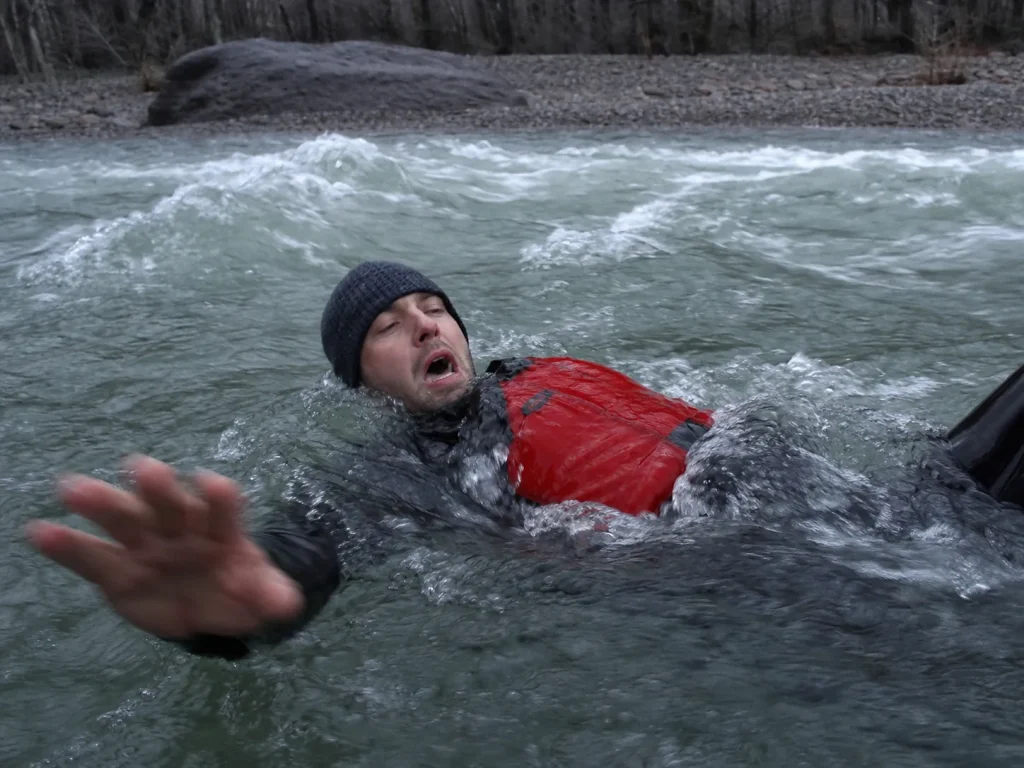
The part that hurts people is not the part that looks scary. That gasp when you go under is not fear, it is a reflex, and understanding it changes how you dress.
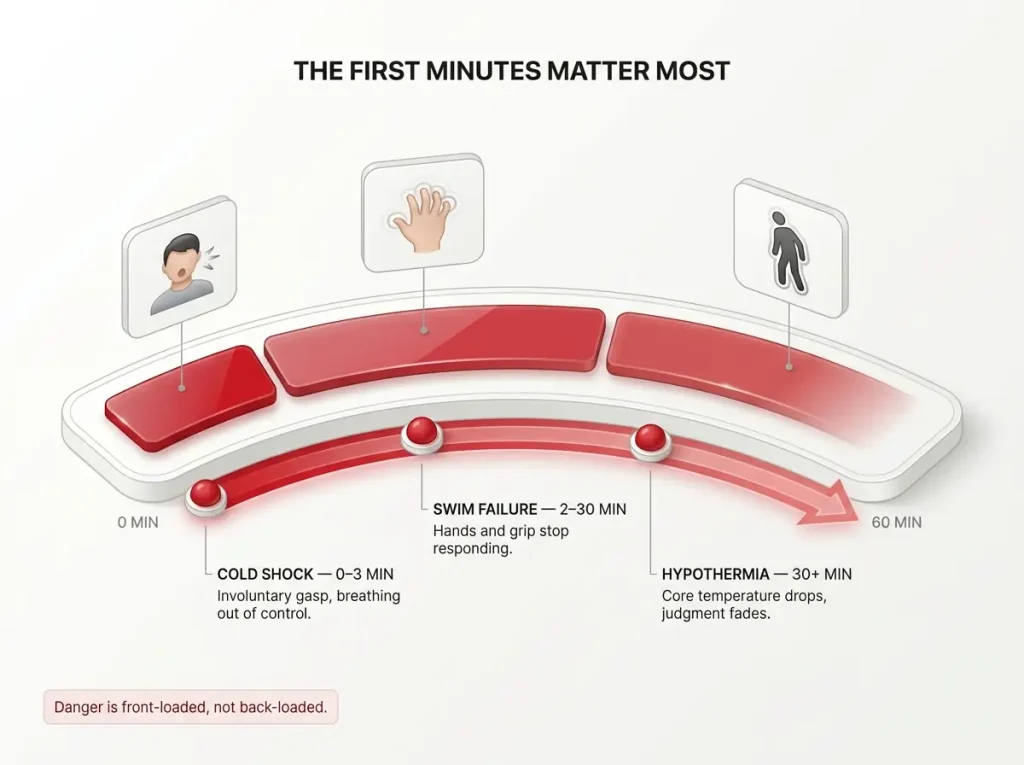
Cold water immersion runs on three separate clocks, and each one is a different emergency. The first is cold shock, and it hits in the first zero to three minutes. Your system forces an involuntary gasp, the cold-shock gasp reflex, and you briefly lose control of your breathing. If your face is underwater when that gasp comes, you inhale water almost instantly, which is why the opening minute is about getting your breathing under control, not swimming. This is the same reflex covered in our breakdown of controlling your breathing in whitewater, and it is worth knowing before you need it.
The second clock is swim failure, sometimes called cold incapacitation, and it sets in anywhere from two to thirty minutes. Your grip strength, manual dexterity, and movement speed can drop 60 to 80 percent. You will not run out of energy so much as your hands simply stop obeying you, well before you feel tired, which is exactly why self-rescue has to happen early instead of when you feel wiped out. The full picture of how cold water immersion actually unfolds on the river is worth a read on its own.
The third clock is hypothermia, at thirty minutes and beyond. It gets all the attention, but statistically the first two minutes claim more people than the first hour ever does. There is a popular memory aid, the 1-10-1 rule: one minute to control your breathing, ten minutes of meaningful movement, one hour before you lose consciousness. Treat it as a rough guide, not a promise. In water near freezing, the swim-failure window can shrink to about two minutes, a caveat spelled out plainly in the real cold-shock and swim-failure timeline the National Center for Cold Water Safety lays out. The 60 to 80 percent dexterity drop is documented in the four documented stages of cold water immersion too. The first time you drop into spring runoff, the gasp happens before any conscious decision to react. That is the whole point, and it is why what you wear has to carry you through those first minutes.
Check the Water Temperature, Not the Air
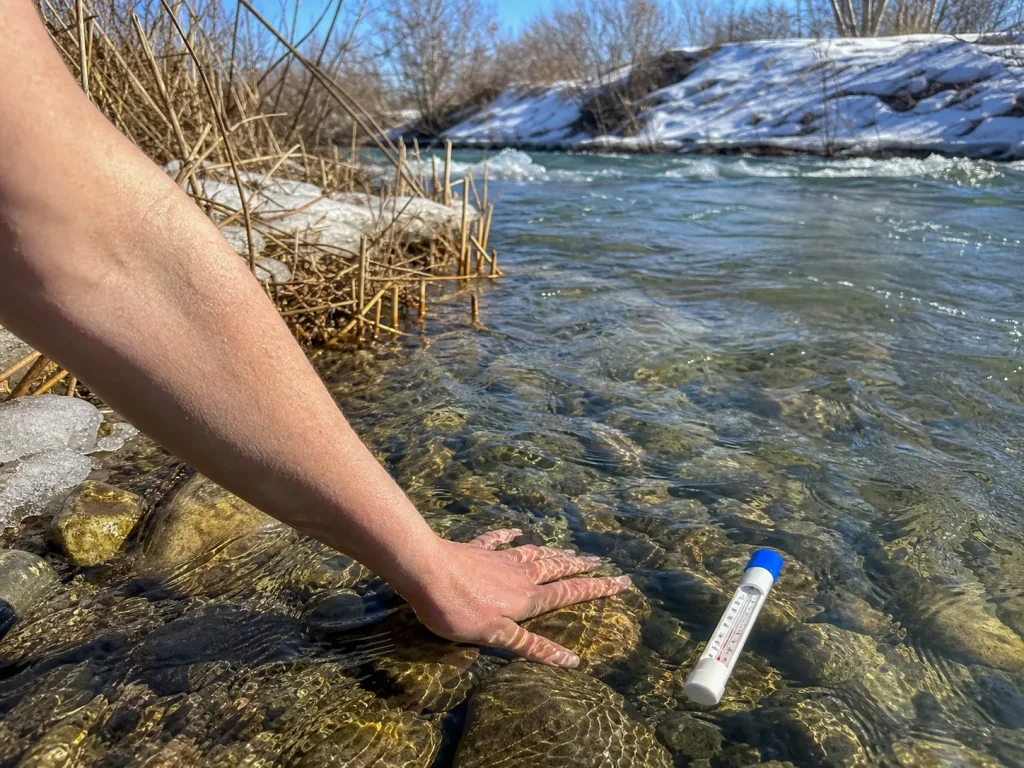
Here is the mistake that sends more first-timers home shivering than any other: they show up in board shorts on a sunny 80°F day because the forecast looked warm, and the snowmelt river is still sitting at 45°F. The air lies. The water does not.
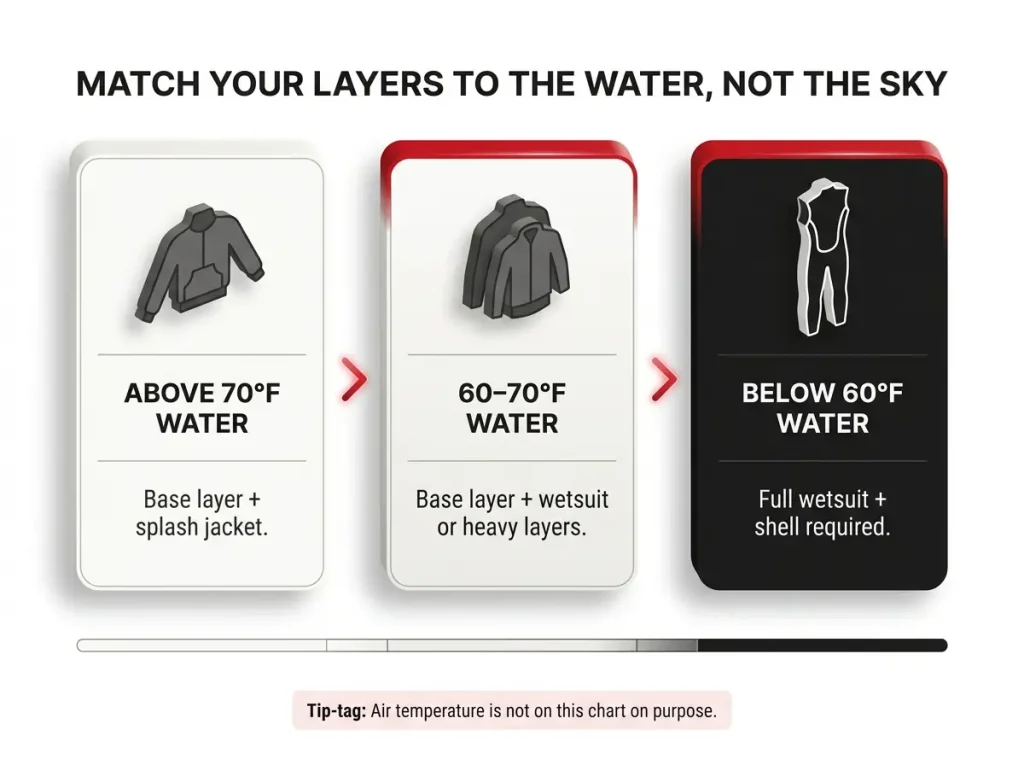
The number that drives every choice below is water temperature, not air temperature, so check the river gauge before you pack. Around 70°F water is the broadly cited line where you start planning for real insulation instead of just a rain jacket. 60°F water is the harder threshold, the point where thermal protection becomes essential. Sixty degrees does not feel alarming to a hand dipped at the put-in, which is exactly the trap, because it can still trigger cold shock the moment you go in and your breathing catches up to it. That water-first habit is the same one the water-temperature-first rule cold-water safety researchers recommend is built around.
Season and flow tell you more than the shore thermometer. Shoulder season is when this bites hardest: a spring river runs coldest during peak runoff no matter how hot the afternoon gets, and the CFS reading is a better tell than the sky. This is the deep-dive under our broader guide to what to wear rafting when the water’s colder than the air, so start there for the water-first rule and come back here for the layers.
Do not judge the water by dipping a hand off the bank. Your hand adjusts in seconds and lies to you. Trust the gauge reading and the season, and dress for the coldest water you might swim in, not the warmest air you might stand in.
Layer 1: The Base Layer Against Your Skin
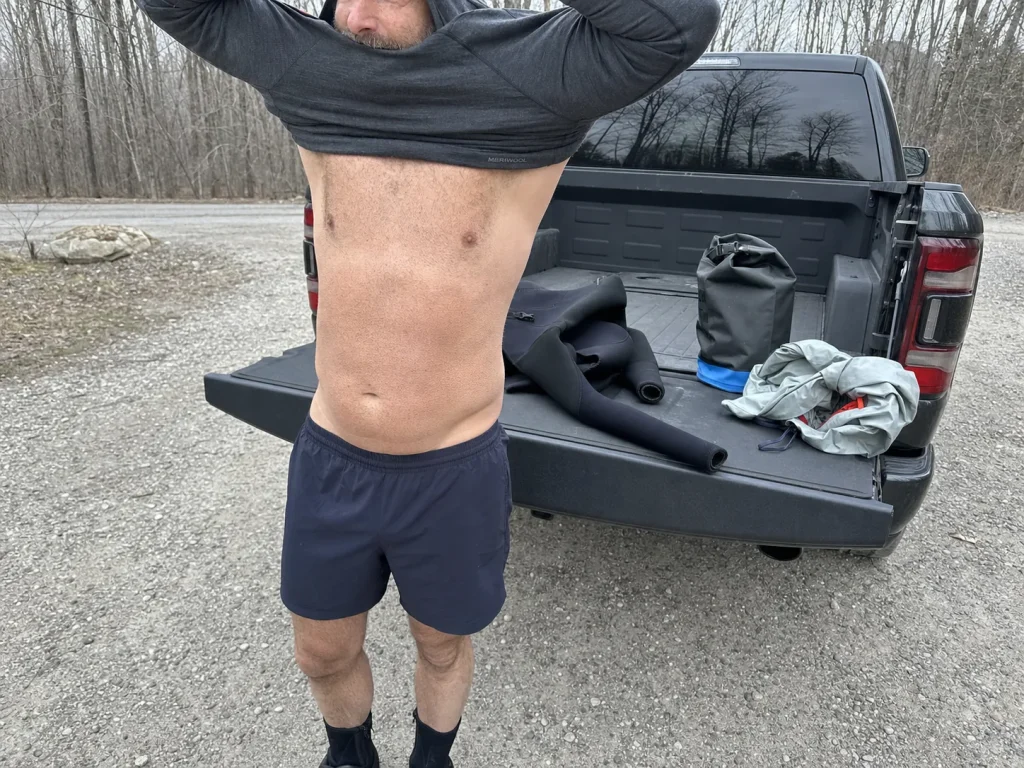
The base layer’s only job is moisture management. It moves sweat and river water off your skin so the layers over it can still do their work. Get the material right here and everything above it performs better.
The one hard rule guides repeat at every put-in is no cotton, at any layer, including your underwear. Cotton soaks up water, quits insulating the second it is wet, and speeds up how fast you lose heat, so a single cotton layer sabotages every layer wrapped around it. That is the whole reason it gets banned outright. Your two good options are synthetic (polyester, polypropylene, Capilene) or merino wool. Both wick moisture and stay warm when wet, and merino has the edge on odor over a multi-day trip.
If you want a merino top built for this, the MERIWOOL Base Layer Midweight (men’s · women’s) hits the mark without much fuss. That said, the honest budget move is to skip the purchase entirely: any synthetic long-sleeve you already own works fine as a base layer, so there is no need to buy merino just to get on the water.
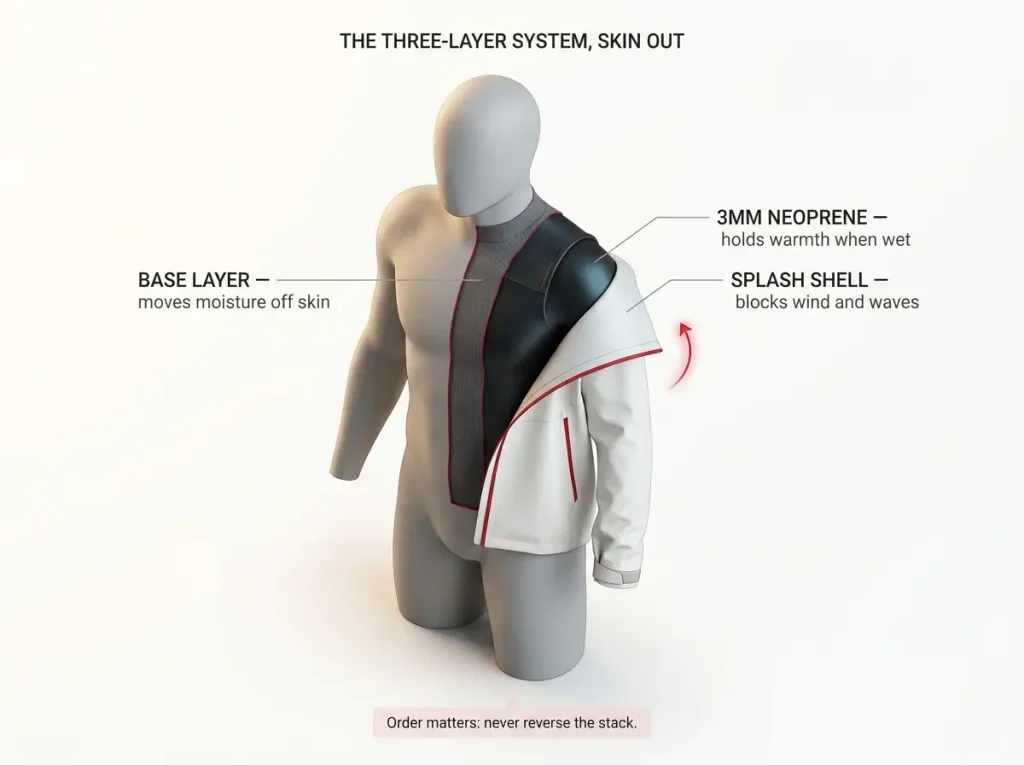
Long underwear goes under the wetsuit, never over it. Layering order matters as much as layer choice, and boaters get this backwards all the time. Skin, then base layer, then neoprene, then shell. Keep that sequence and each piece can actually do its job.
Layer 2: Insulation and the Wetsuit Call
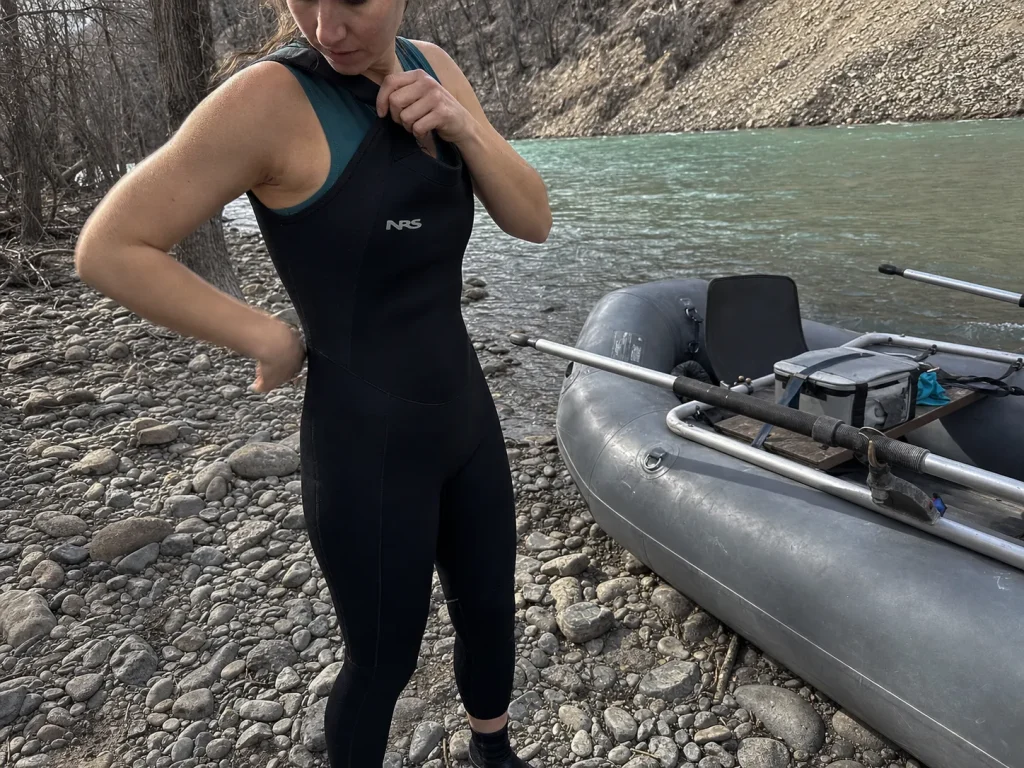
This insulating layer, the mid layer in the classic three-layer system, is doing the real work when the water is cold, and it is where most of the money and most of the confusion live. Below roughly 70°F water, insulation stops being optional and a wetsuit or heavy long underwear comes into play.
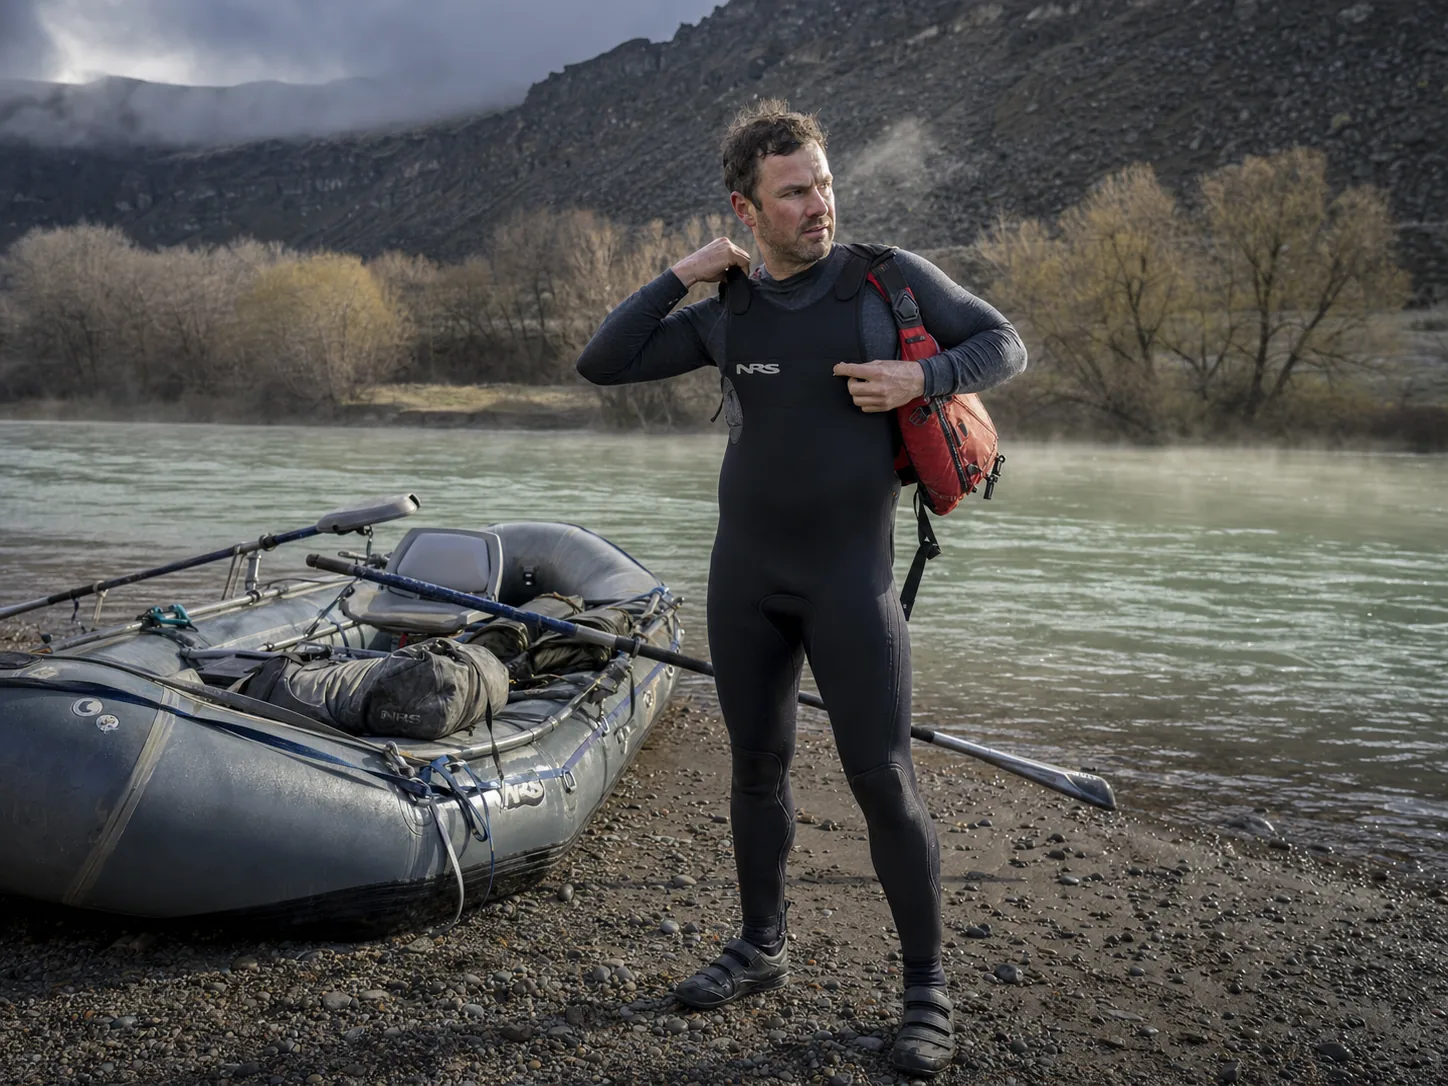
Paddling wetsuits are built in 3 to 4mm neoprene, thinner than a surf wetsuit, and that is on purpose. A thick surf suit keeps you warmer standing still but fights your shoulders and arms on every stroke, so a rafting wetsuit trades a little warmth for the range of motion you actually need on an oar or paddle. The standard cut is the Farmer John/Jane style, sleeveless with full legs, which leaves your arms free to paddle while covering your core and legs. The NRS Farmer John / Farmer Jane 3.0 Wetsuit (men’s · women’s) is the usual beginner pick in 3mm. Before you buy, though, remember you can rent or borrow one from an outfitter for your first trip or two and decide later.
Wetsuit versus drysuit comes down to one line: a wetsuit handles most cold-water day trips, while a drysuit earns its cost in the coldest water and the longest exposure. That decision deserves its own space, and we lay it out in the full wetsuit vs drysuit breakdown for rafting. Whichever you land on, neoprene wears out over a few seasons of hard use, so a beginner-tier suit is rarely a wasted purchase even when you upgrade later.
Layer 3: The Waterproof Shell
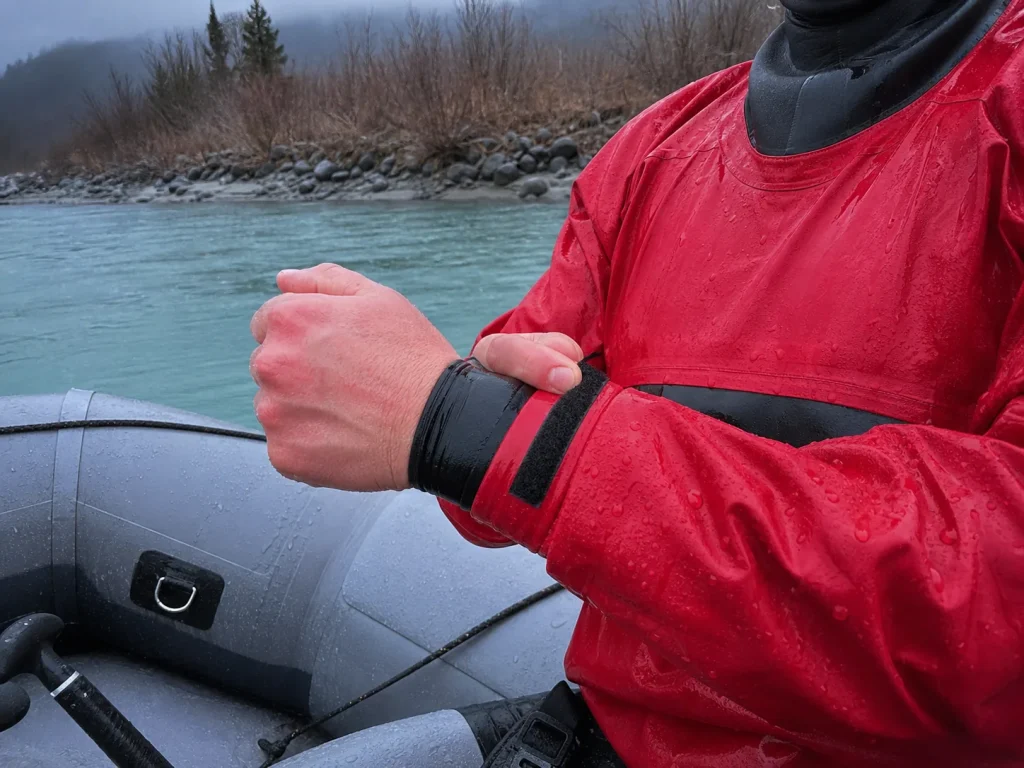
The shell is not your warmth. It protects your warmth. Skip straight to “just wear a raincoat” and you have missed the two layers underneath actually doing the heating.
Your outer shell blocks water and wind, so it needs to be waterproof-breathable, not just water-resistant, with snug closures at the wrists and neck so a wave cannot flush cold water up your sleeves. The rafting-specific version is a splash or paddle jacket, cut for paddling movement with sealing closures. The NRS Endurance Paddling Jacket (men’s · women’s) checks those boxes, though any waterproof-breathable rain shell with snug cuffs you already own will do the job. On a cool-but-not-cold day the shell over a base layer may be all you need; below the wetsuit threshold it goes over the neoprene.
A loose-cuffed rain jacket flushes cold water up your arms on the first big wave, so the seal is the point, not the label on the chest. It is also worth remembering that your PFD adds a real amount of core warmth on top of the shell, one more reason your PFD, or life jacket, adds a surprising amount of core warmth matters more than people expect.
Feet and Socks for a Full Day Wet
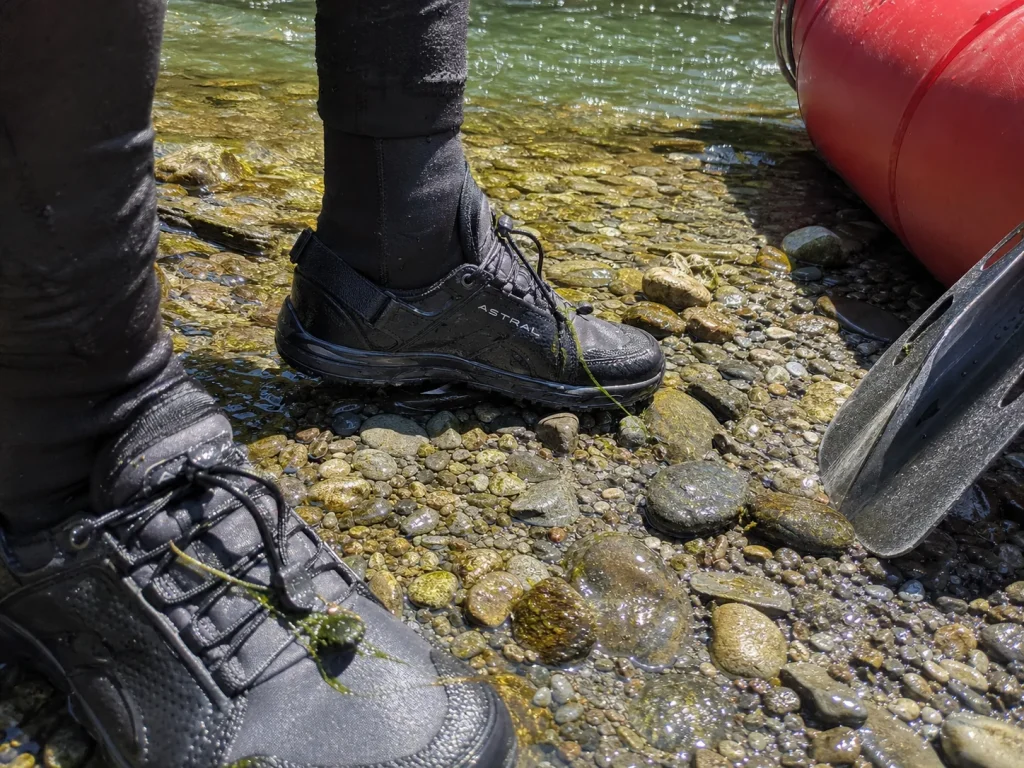
Give up on keeping your feet dry right now. They are going to be wet the entire trip no matter what you do, so the real choice is which material stays warm while wet, and which shoes will not wash off in current.
For insulation, you have two options that hold heat when soaked: neoprene socks or wool socks. Never cotton here either. The NRS HydroSkin 0.5 Wetsocks run thin at 0.5mm and stay warm down to roughly 40°F, and if you would rather not buy anything, wool hiking socks you already own are the free alternative. Over the sock, you need secured, closed-toe river shoes. Flip-flops, Crocs, and bare feet come off in current, and footwear that leaves your foot mid-swim is a hazard, not a comfort issue. The Astral Brewer 2.0 / Brewess 2.0 Water Shoes (men’s · women’s) are closed-toe and lock onto your foot, but any secured closed-toe shoe that will not pull off in moving water works.
Pick your footwear assuming you will swim, the same way you pick everything else. If you want to go deeper on the options, we compared the water shoes that actually stay on your feet for exactly this problem.
Hands, Head, and Neck
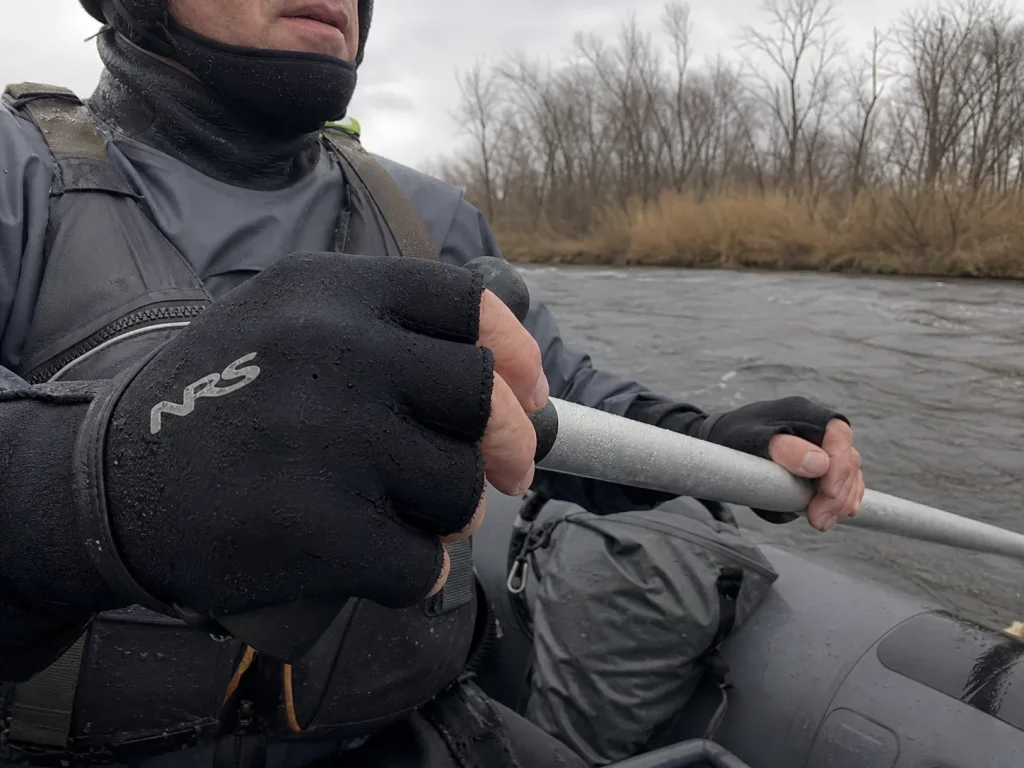
Your hands are the swim-failure canary. They are the first thing to stop working in cold water, and once your fingers quit, so does your grip on the oar. That makes the extremities worth a little planning even though none of it is heavy.
Neoprene gloves keep your grip on cold days when bare hands would go numb and clumsy. A beanie or warm hat under your helmet cuts real heat loss from your head, and a neck gaiter or neck gasket seals the gap your shell leaves open at the collar. The NRS Boater’s Gloves (men’s · women’s) are a neoprene, dexterity-cut option, but be honest with yourself: above the wetsuit threshold, bare hands are fine, and gloves are a cold-day add rather than a must. If you want to weigh warmth against dexterity, we put rafting gloves compared for grip and warmth side by side.
Cold hands, not a cold core, are usually what ends a spring paddle early. Test your beanie with the helmet on before the trip, since a thin one that fits under the shell beats a thick one that will not, and a hat that will not go under the helmet does you no good on the water.
When Your Layers Get Soaked Mid-Run
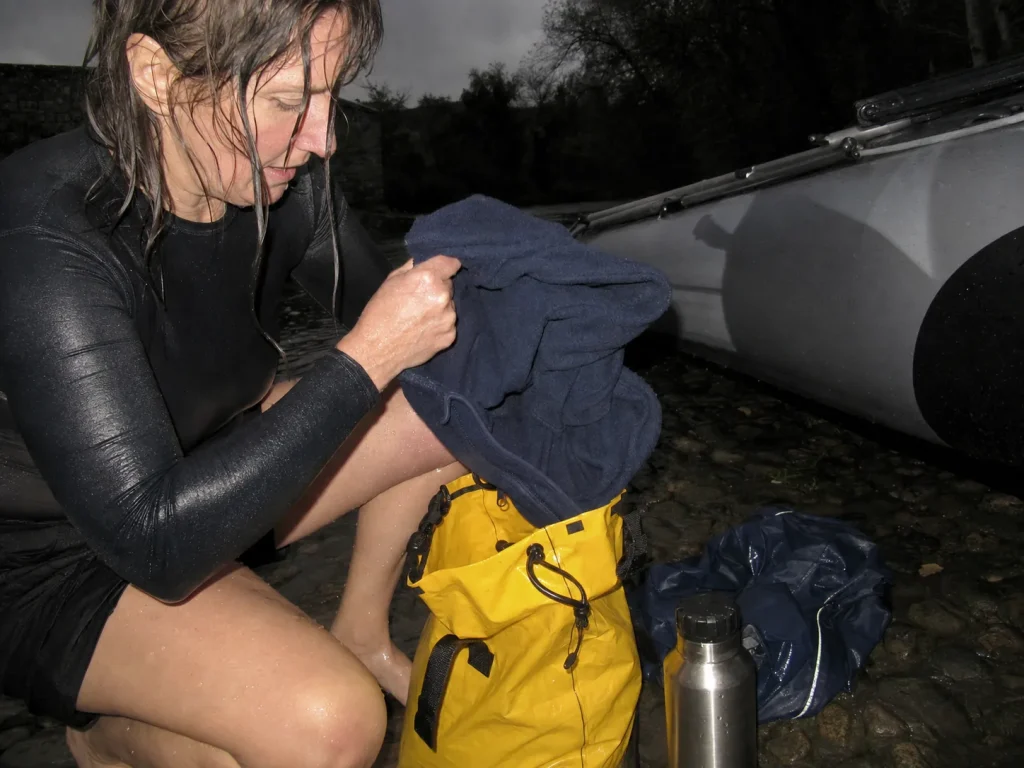
Everyone swims eventually. The question is not whether your layers get soaked, it is what you put on at the lunch stop once they are. This is the piece almost nobody covers, and it matters most on the exact kind of trip this article is about.
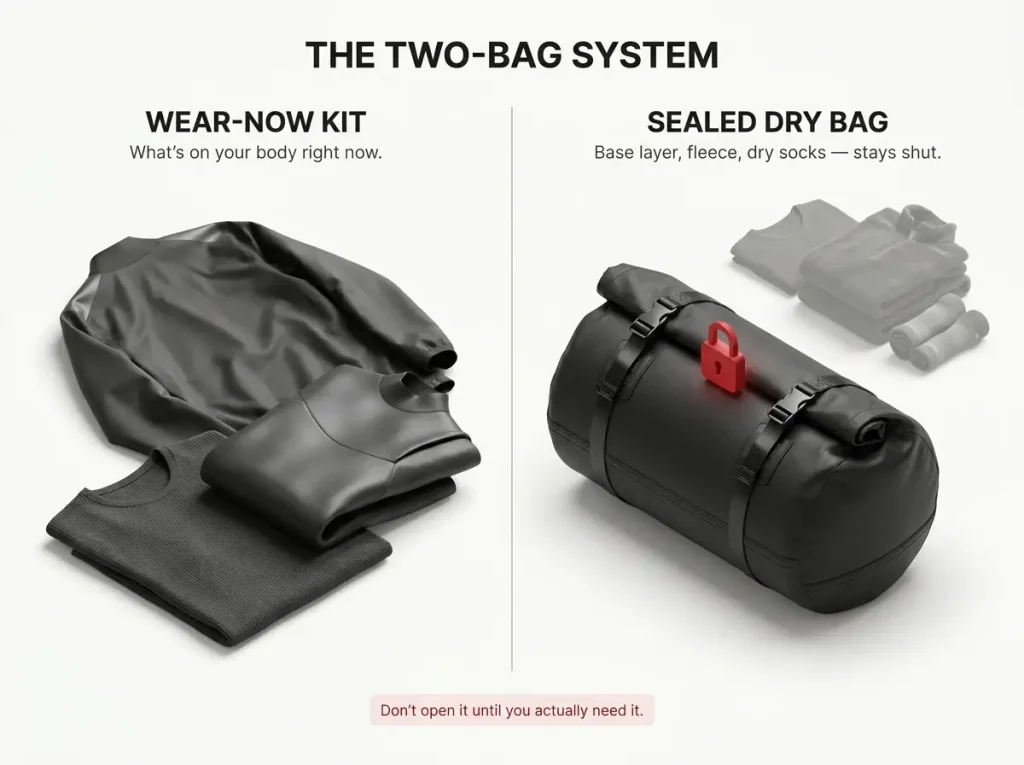
A soaked layering system still insulates as long as it is wool, neoprene, or synthetic, which is the no-cotton rule finally paying off. Your highest-value single item for a cold day is a fleece, and guides use it two ways: worn under the wetsuit on the water, or packed dry and pulled on at the lunch stop after a soaking. Pair that with a habit worth building early: pack a dedicated dry bag holding a full warm change, a base layer, a fleece, and dry socks, and do not open it until you actually need it. Keep it separate from your wear-now kit so it is guaranteed dry when you are cold. A bag rated to survive a flip is the point, which is why we recommend a dry bag that survives a flip for this job.
Re-warming on the boat comes down to getting moving, blocking the wind with your shell, and putting food in to pull your core temperature back up. If someone is past shivering and getting sloppy, that is a different situation, and knowing warming a cold paddler back up with the gear you have is the next skill to have ready. The mistake that undoes people is skipping the backup layer entirely, then having nothing warm and dry after the first-rapid swim.
Building Your First Cold-Water Kit Without Overspending
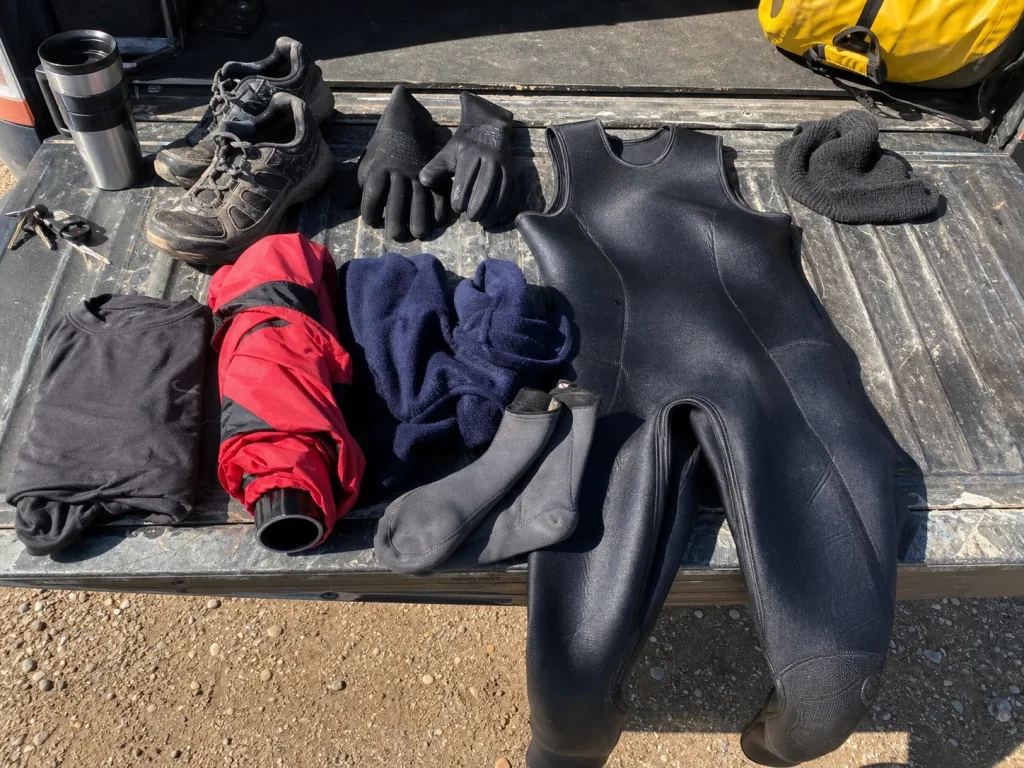
Here is the honest part nobody selling gear wants to lead with: you do not need to buy everything new, and on a guided trip you may not need to buy much at all.
Guided trips usually include the wetsuit and splash gear in the package, so check the outfitter’s gear list before you buy a single thing. First-timers routinely over-shop for gear the trip already hands them. If you want to know what a first trip actually covers, we walk through what a first guided rafting trip actually includes start to finish.
For private boaters, the math is simple. Renting is fine for your first trip or two, and owning starts paying off once you are on the water more than once or twice a season. Neoprene wears out over a few seasons anyway, so a beginner-tier wetsuit is not wasted money even when you upgrade later. The genuinely cheap first kit looks like this: a synthetic long-sleeve you already own as the base layer, a borrowed or rented wetsuit, and a rain shell from your closet as the outer layer. Buy the cheap, yours-only pieces first, the secured shoes and warm socks, and rent the big-ticket wetsuit until you are sure you are staying in the sport. Most boaters go through a first season buying piecemeal, the wrong socks, a cotton hoodie under a shell, no backup layer, and end up with a stripped-down kit two seasons later that works better than the pile they started with. That slow slide is a rite of passage covered in the private boater’s slow slide into owning all the gear.
The Bottom Line on Cold-Water Layering
Get these three things right and the rest falls into place:
- Read the water temperature, not the forecast. That single number sets everything else.
- Layer skin-out with anything but cotton, base, insulation, then shell, and pack a sealed dry change you never touch until take-out.
- Dress for the swim, because you will take one eventually. The right layers buy you the first minutes that matter.
Before your next cold-water trip, look up the put-in’s water temp, pack the layers to match, and go run it warm.
Frequently Asked Questions
01What do you wear for cold water rafting?
Layer skin-out with a synthetic or merino base layer, insulation like a 3mm wetsuit when the water is below 70°F, and a waterproof splash jacket over it, plus neoprene or wool socks in secured closed-toe shoes. The rule guides repeat is dress for the water temperature, not the air.
02What should I wear under a wetsuit for rafting?
A thin synthetic or merino base layer. Long underwear goes under the wetsuit, never over it, and on the coldest days a thin fleece under the neoprene adds warmth without sacrificing paddling mobility. Skip cotton entirely, since it stops insulating once it is wet.
03What water temperature do you need a wetsuit for rafting?
Most guides put the line around 70°F water. Below that, plan for real insulation rather than just a rain jacket. At 60°F and colder, thermal protection becomes essential, even though 60°F water does not feel alarming to a hand dipped at the put-in.
04Can you wear jeans or sweatpants rafting?
No. Both are cotton, which soaks up water, stops insulating, and pulls heat out of you fast. That is exactly the no-cotton rule guides drill at the put-in. Wear synthetic or wool layers instead, even for the parts nobody sees.
05Is a wetsuit or drysuit better for cold water rafting?
For most cold-water day trips a 3mm wetsuit is enough and far cheaper. A drysuit wins for the coldest water and longest exposure, where staying fully dry matters more than saving money. See our full wetsuit vs drysuit breakdown to match it to your water.