
In this article
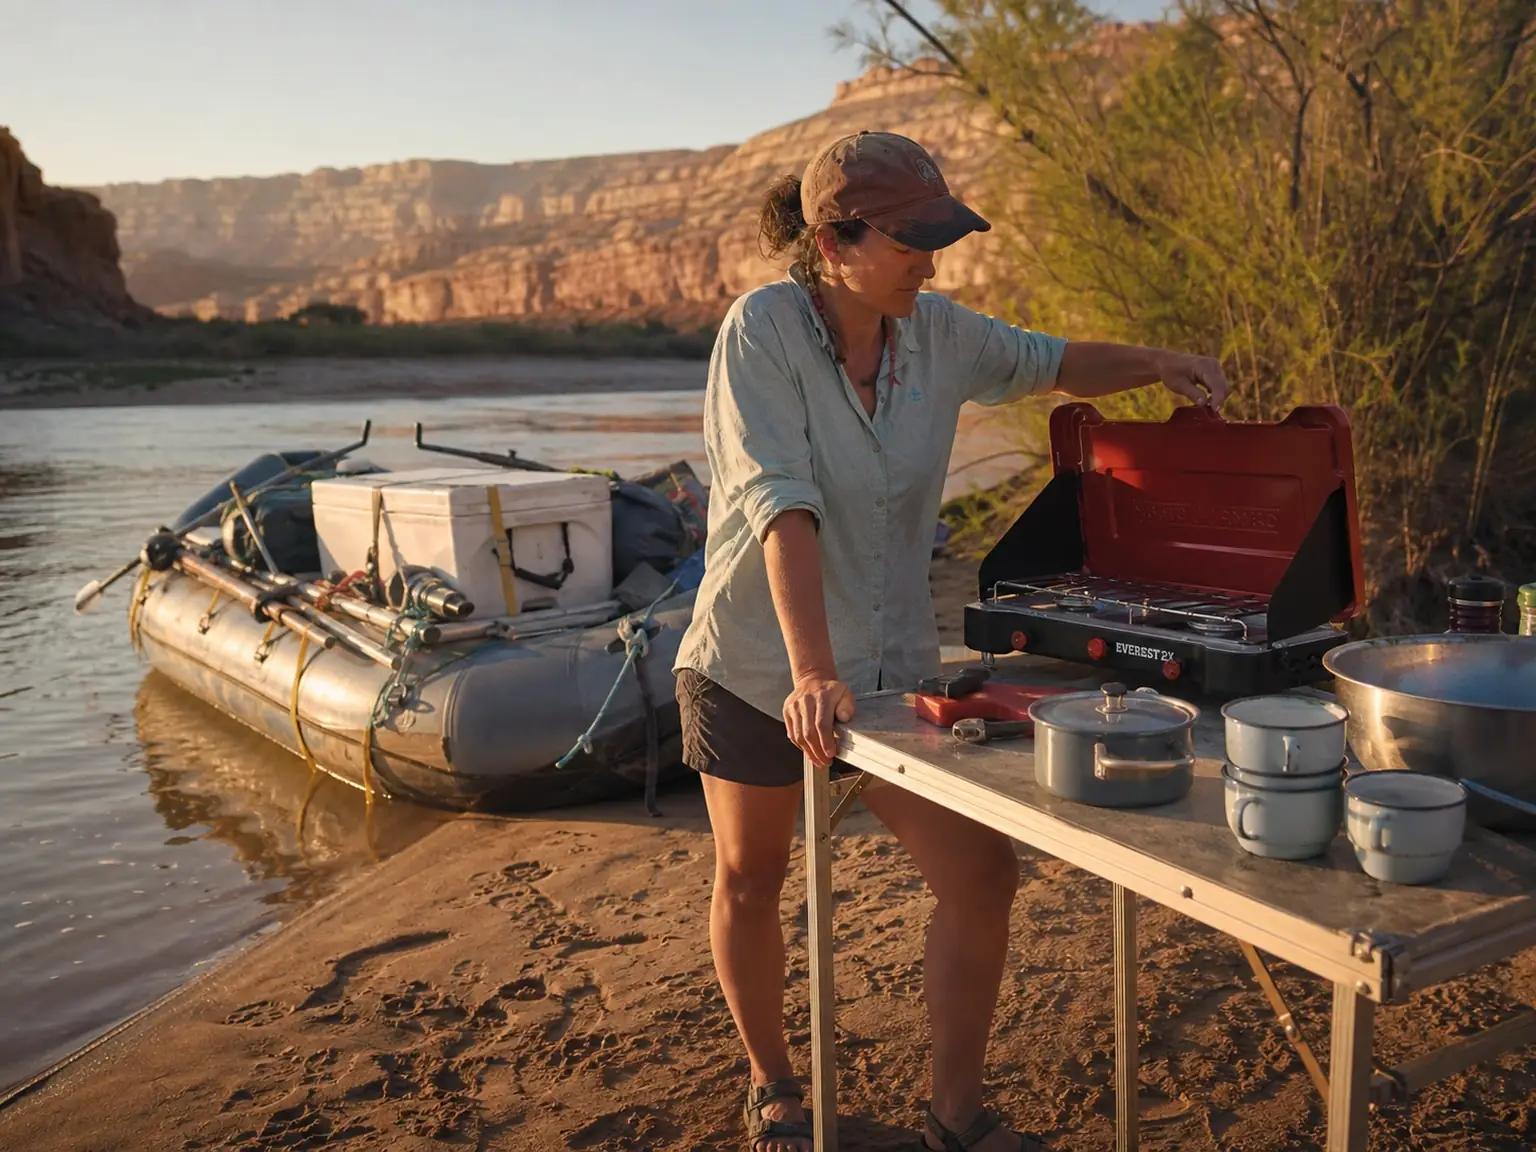
Your raft ties up to a sandbar and camp looks like a pile of dry boxes, coolers, and strapped-down bags. Twenty minutes later there’s a stove lit, a prep table standing level in the sand, a dish line strung between two tamarisk, and water going for coffee. That twenty-minute transformation is the entire job of a river kitchen, and it’s the reason gear that works fine in a campground falls apart on the water. Ask anyone who has run a permitted river: a chunk of your camp kitchen isn’t a preference at all, it’s a requirement checked before you launch. Here’s what the permit demands, what the raft demands, and what a week of heat demands from your food.
Why River Camp Gear Isn’t Car Camping Gear
Nearly every gear list written for this topic is a car-camping list that somebody carried to a riverbank. That’s the gap. A raft is a different vehicle with a different set of rules, and those rules quietly decide which cooler, which box, and which table are even candidates.
Three constraints govern everything that follows. Your frame has fixed bays with fixed dimensions, so a container either seats properly between the cross-members or it rides badly all week. Your load has to balance across the boat, which means the heaviest kitchen items get placed on purpose rather than wherever there’s room. And the whole load gets rigged on the assumption that the raft could go over.
The Three Constraints a Raft Puts on Your Kitchen
That last one has a name on the river. Rig to flip means you set up every strap, every latch, and every loose item as though the boat is going upside down at some point today, because occasionally it does. Kitchen gear is where crews get sloppy about this, since a folding table and a coffee pot don’t feel like safety items. They become one the moment they’re loose in the current. The full method behind rigging everything to flip applies to your kitchen exactly the way it applies to your drybags.
Hard-Sided vs. Soft-Sided for Kitchen Gear
Dry bags are fine for clothing and sleeping gear. They’re a poor answer for a cook kit. A crushed pot nests wrong for the rest of the trip, a punctured stove ends hot meals entirely, and a bag full of loose utensils becomes an archaeology dig every evening. Hard-sided containers take the compression, take the weight of somebody sitting on them, and open flat so you can actually see what you own.
Why Everything Gets Strapped
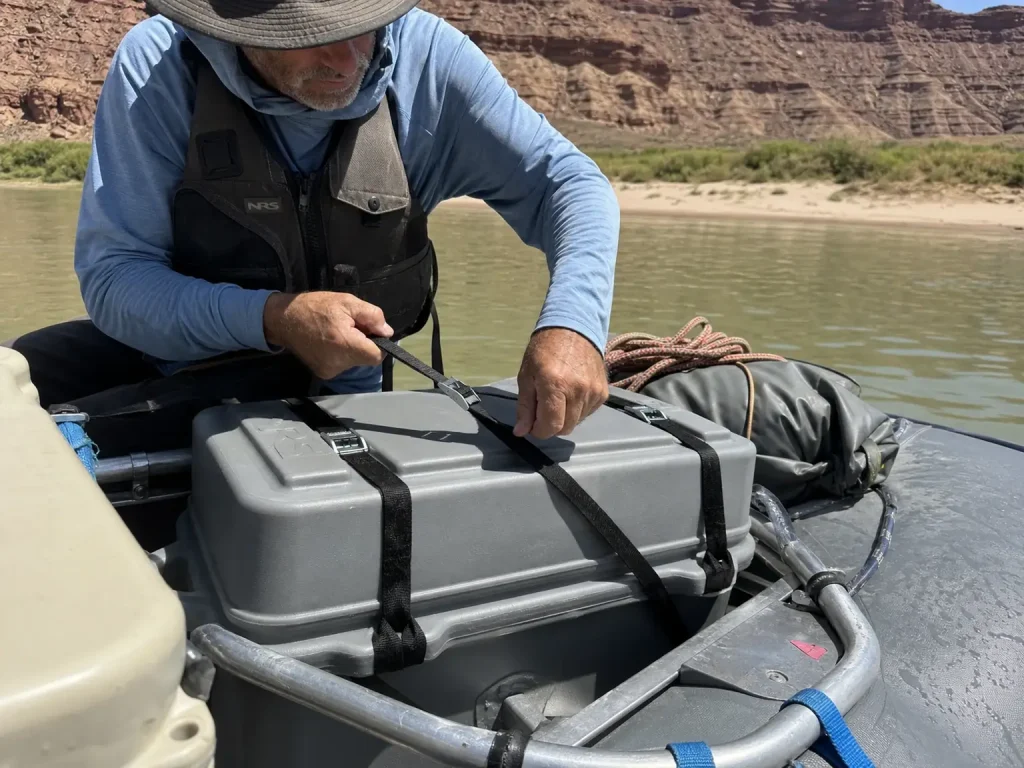
Nothing stacks on a raft. Everything cams down. That includes the camp table, the buckets, and the ash container, all of which are light, flat, and buoyant, which is another way of saying they float off first.
Dry box lashing is its own small skill, and it matters most in the splash zone, the stretch of frame that takes water on every wave train. Anything in that zone gets treated as though it will be submerged, because at higher CFS it periodically is. Before you buy anything in this article, it’s worth knowing how your frame’s bay layout is arranged, because bay dimensions decide what physically fits.
The Gear Your River Permit Actually Requires
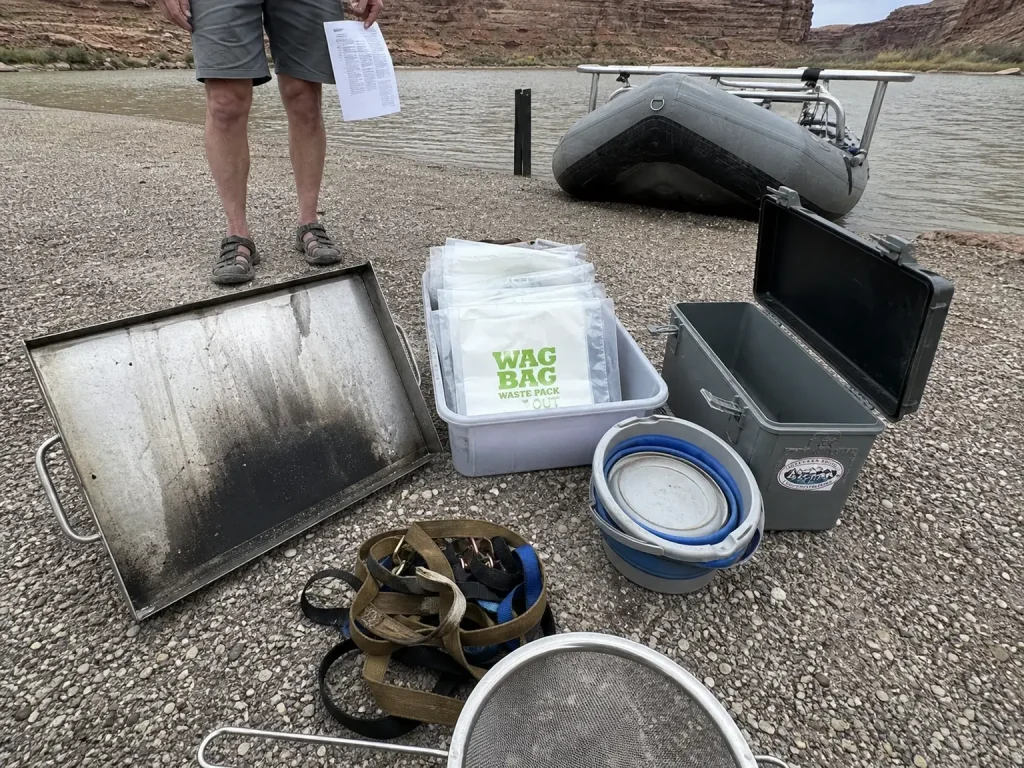
Here’s the part most gear lists skip entirely. On nearly every permitted multi-day river in the United States, two pieces of camp kitchen equipment are mandatory: a metal fire pan and a system for packing out solid human waste. Not encouraged. Not best practice. Required, and verified before you’re allowed on the water.
This applies to private boater trips specifically. On a guided trip the outfitter carries and certifies all of it, which is why so much of the advice floating around online quietly assumes somebody else is handling compliance. The requirements come from whichever agency manages that stretch of river, which is why the permit system that sets these rules in the first place matters more than any gear review. Two rivers a hundred miles apart can have different minimum pan dimensions and different waste-capacity expectations.
Required, Not Recommended
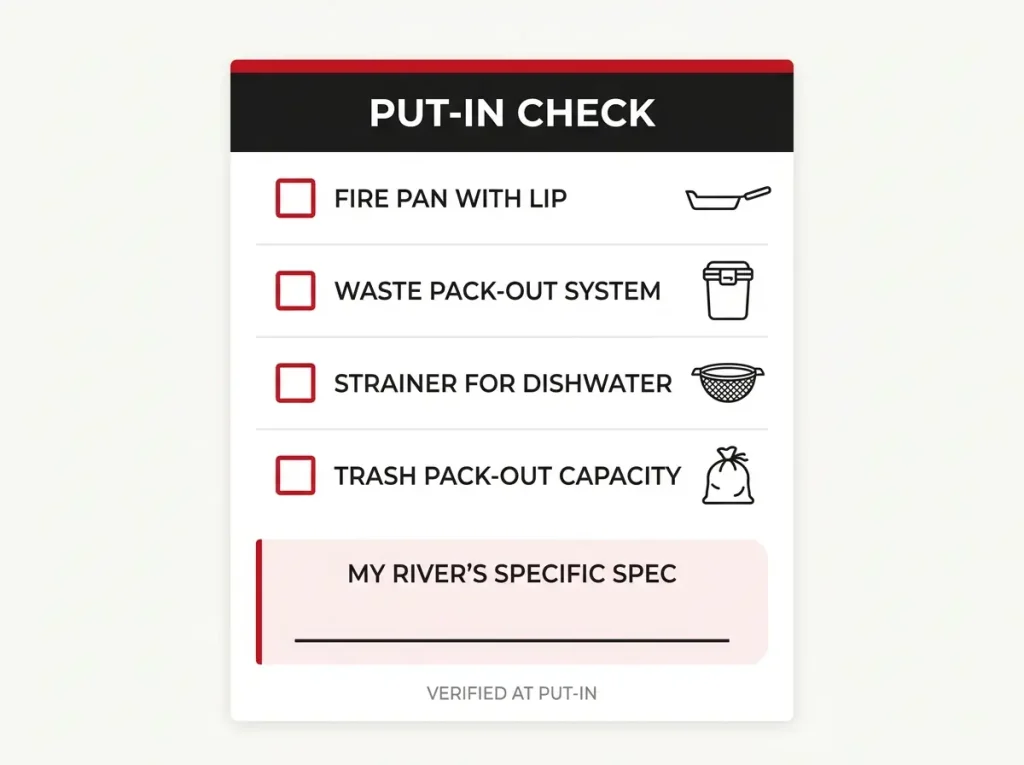
The practical consequence is that generic advice fails you at the exact moment it counts. “Bring a fire pan” is not the same instruction as bringing a pan that meets a published minimum. Desolation and Gray Canyon, for example, calls for a metal fire pan at least 12 inches wide with a lip of at least 1.5 inches. Buy to a number, not to a category, and check your specific river’s fire pan and groover size requirements before you launch.
Why the Spec Changes From River to River
Different managing agencies, different sediment loads, different visitor volumes. A high-traffic desert corridor with limited beaches enforces harder than a lightly used stretch of forest river, and the gear spec reflects that. The mistake that ends trips before they start is assuming last year’s river and this year’s river want the same things.
Fire Bans Don’t Cancel Fire Pans
This one surprises people every season. An active fire ban prohibits ground fires, not contained ones, and the pan requirement usually stands regardless. Leaving the pan at home because you read about a ban is a fast way to fail a put-in check, and it’s worth folding into your broader multi-day trip planning rather than sorting out the morning of.
Print your river’s specific gear requirements and put the page in the kitchen box, not in your phone. Cell service dies at the put-in, and the ranger asking questions is standing next to your boat, not next to your wifi.
Fire Pans and Why a Rock Ring Won’t Pass
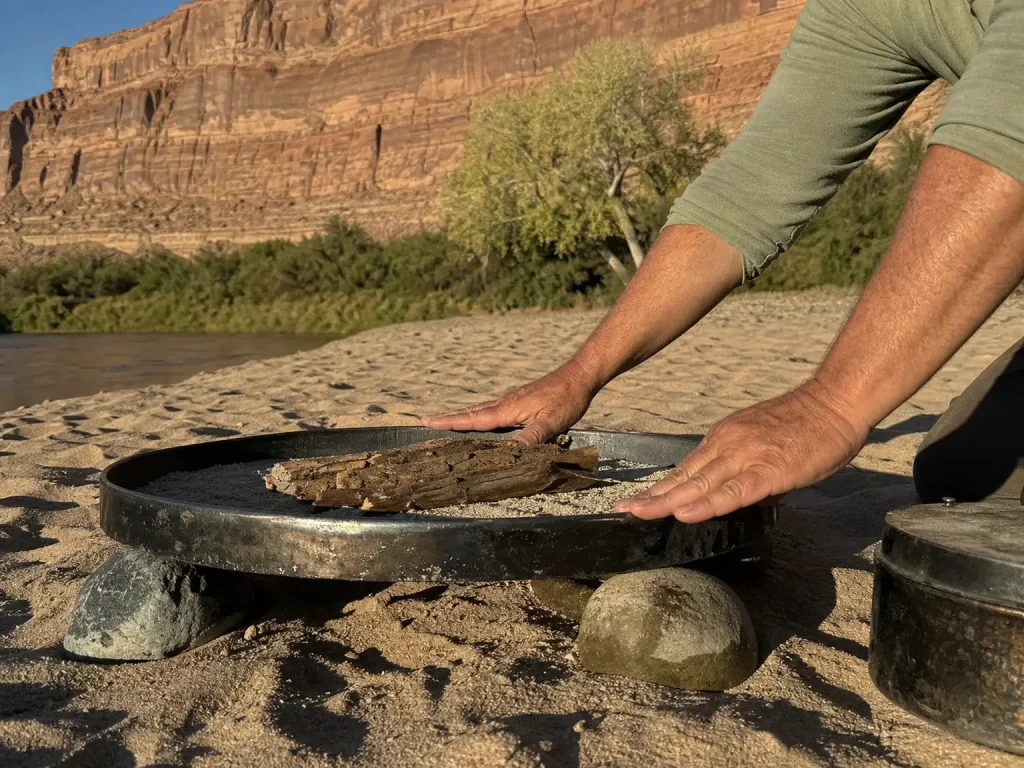
The instinct on an empty sandbar is to build a rock ring. On a permitted river that instinct is the fastest route to a citation, and the fix is a flat metal pan you buy once and use for a decade.
Ground fire rings are prohibited on nearly all permitted rivers. The fire has to be contained above the sand so the beach isn’t scarred, and so the next crew doesn’t inherit a ring of blackened rocks. That’s the whole logic, and once you’ve seen a heavily used beach with six abandoned rings on it, the rule stops feeling bureaucratic.
Sizing a Pan to Your River’s Spec
Check the width and lip minimum before you buy, because a pan that satisfies one river fails another. Sourcing is its own small hurdle. River-spec fire pans are a specialty item, and general online retail mostly returns indoor fireplace ash trays and raised wood-burning stoves, which are not the same thing and won’t meet a lip requirement. Shop the river outfitters directly. NRS, Down River Equipment, and Tye Works all carry pans built to river standards.
Lining and Raising the Pan
The pan by itself isn’t compliance. Line it with a few inches of inorganic soil and prop it on flat river stones so the sand underneath stays cool and unscorched. It takes two minutes and it’s the difference between a legal fire and a scarred beach. This is straight out of Leave No Trace’s own fire-pan technique, from lining it with soil to packing out every ounce of ash.
Packing Out Ash
Every ounce of ash leaves with you. It does not get scattered on the beach, buried in the sand, or dumped in the current. Plan ash containment into the fire system from the start, meaning a sealed metal can that lives with the pan rather than an afterthought you improvise on day three. The same reasoning drives the full Leave No Trace framework for whitewater trips, where the fire pan is one application among several.
Groovers, WAG Bags, and Packing Out What You’d Rather Not
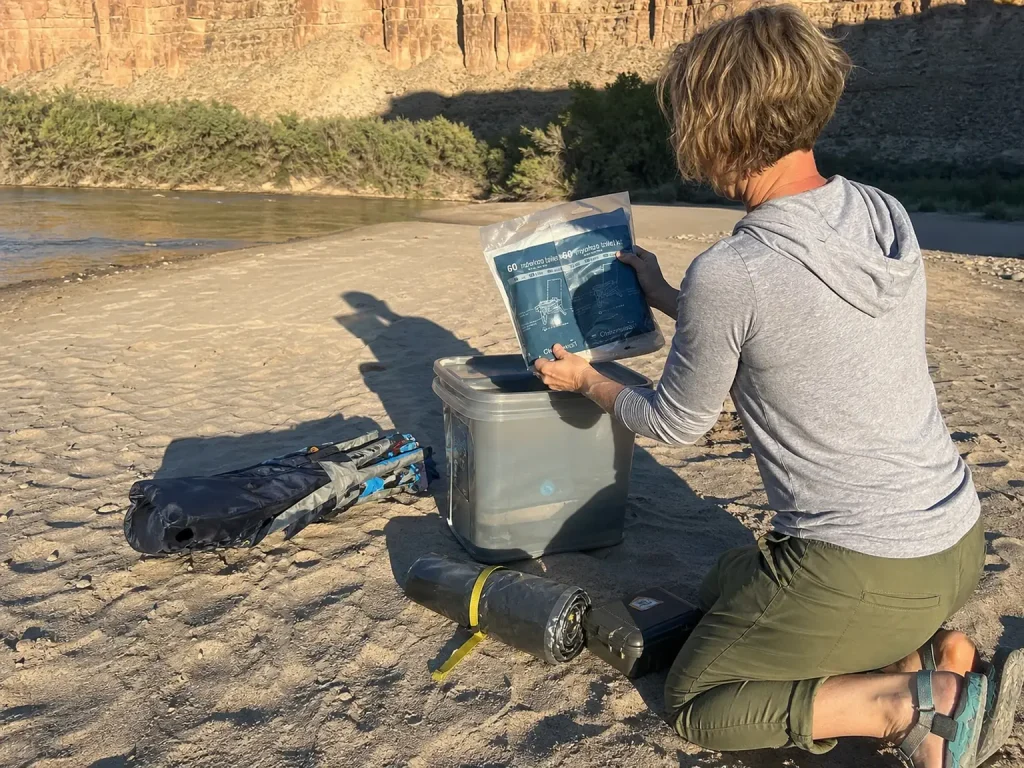
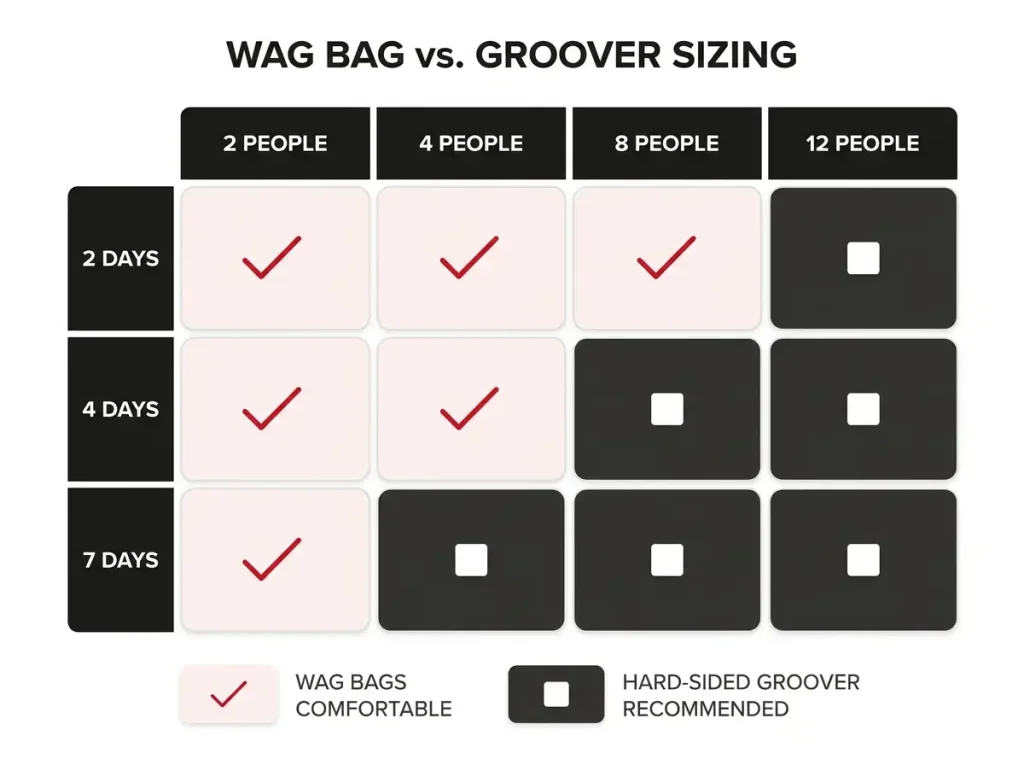
This is the section first-timers skim nervously, so let’s handle it plainly. A washable, leak-proof, reusable toilet system, called a groover on the river, is required on nearly every multi-day permit river, sized to your group and your trip length.
The name comes from the era when the system was an ammo can with no seat, which left grooves on whoever used it. Modern versions are considerably more civilized. What hasn’t changed is the requirement: solid human waste comes out with you, which is Leave No Trace’s waste-disposal principle, which every permitted river enforces.
What a Groover Actually Is
It’s a sealed, washable container with a seat, carried in a dedicated spot on the raft and emptied at an approved dump station after take-out. Setting it up somewhere with a view is a genuine river tradition, and first-timers consistently report the awkwardness resolving inside a single day. By camp two it’s usually a running joke about the best bathroom view in the canyon. The complete groover and WAG bag walkthrough covers setup, privacy, and cleaning in detail.
When WAG Bags Are Enough
Here’s the honest recommendation nobody selling gear wants to make: for a first or short trip, WAG bags are accepted on many permits and they cost a fraction of a full hard-sided groover system. The Cleanwaste WAG Bags Toilet Kit uses a gelling agent to solidify waste for pack-out and meets the requirement on a lot of rivers. The RESTOP 2 Wilderness Kit works on the same principle if you find it easier to source.
Buy the hard-sided box once you’re running trips regularly and the math starts favoring reusable. Not on trip one.
Sizing to Group and Trip Length
Capacity is where people get caught out. Two people on a weekend and eight people on a seven-day run are not the same problem, and a system that felt generous on a short trip fills up faster than anyone expects. Count people, count days, then add margin.
Coolers That Hold Ice for a Full Week
A cooler on a raft holds two jobs at once. It keeps food cold, and it’s structural, because it’s strapped into a frame bay and people sit on it, stand on it, and lash gear over it. General-purpose coolers do the first job only.
Rotomolded construction is the baseline for multi-day trips. The one-piece walls and thick insulation are the difference between a cooler that holds ice for a week and one that’s swimming by Tuesday. Anything less is a two-day cooler with a good marketing budget.
What Rotomolded Actually Buys You
Thicker insulation, a freezer-grade gasket, and latches that survive being cranked down under a cam strap all trip. It also buys abuse tolerance, which matters more than the spec sheet suggests when the cooler is doubling as camp seating.
Fitting the Cooler to Your Frame Bay
This is the raft-specific detail general reviews never mention: the lid lip has to clear your frame’s cross-members, or the cooler sits proud in the bay and never seats properly. That’s the whole reason a river-specific cooler beats a generic one at the same price.
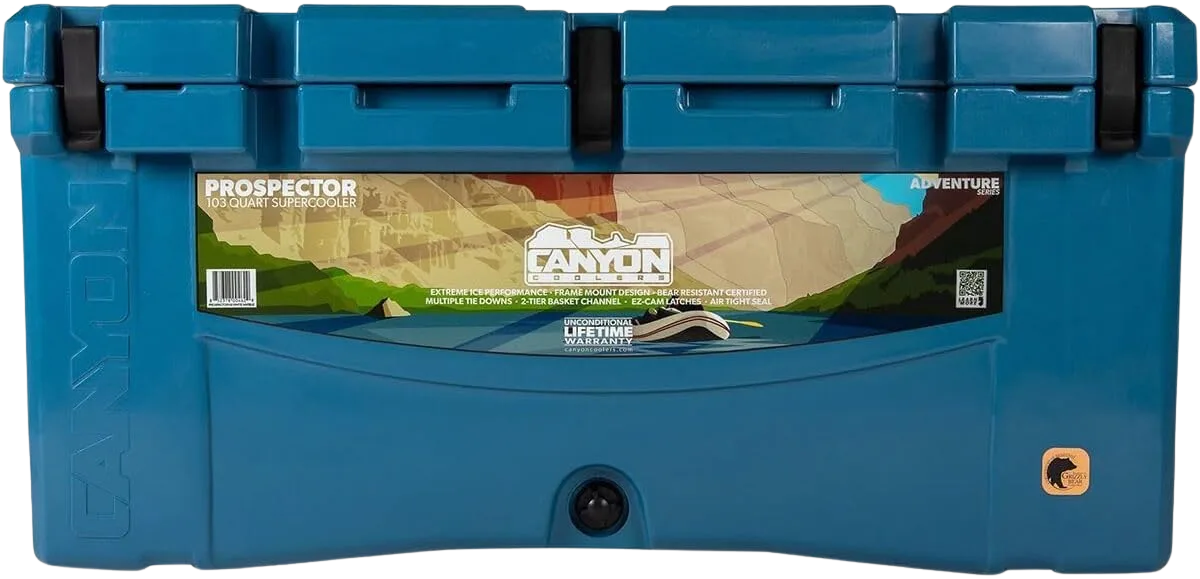
The Canyon Coolers Prospector 103 earns its place here on geometry as much as insulation. Plenty of rotomolded coolers hold ice well. Fewer of them drop cleanly into a raft frame and stay put under a strap without rocking on a cross-member every time somebody shifts weight. If you’re outfitting from scratch and want a second opinion in the same construction class, the Grizzly 100 Cooler is a reasonable alternative, though you’ll want to measure your bay before committing.
The honest trade-off is weight and price. A rotomolded cooler this size is heavy empty and premium in cost, and on a two-night trip that’s overkill. It pays for itself somewhere around day four, when everyone else’s ice is water.
Sizing by Trip Length
Match the cooler to the trip, not to the aisle. A long weekend for four does not need 100 quarts. A week for a full group does, and trying to shave capacity there is how you end up rationing ice on day five. Our full cooler buying guide for rafting breaks down the size classes in more detail.
The Two-Cooler Split and the 2-to-1 Ice Rule
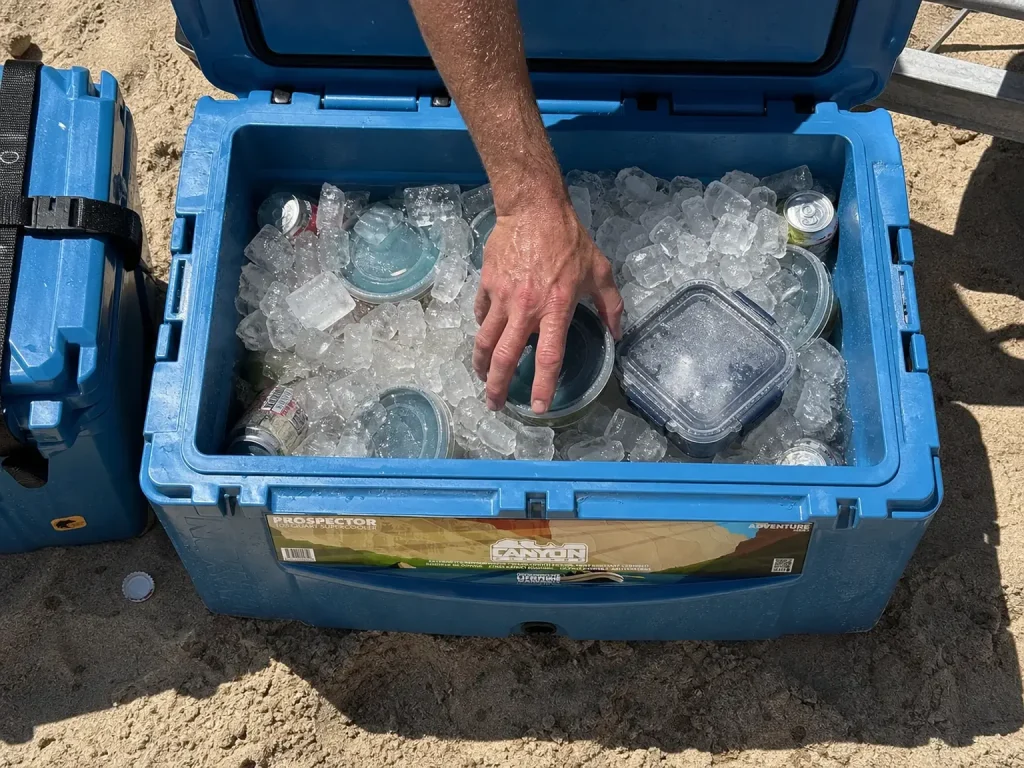
Most groups run one big cooler, open it twenty times a day, and act surprised when it’s slush by Thursday. The fix costs nothing except planning.
Start with the ratio. Pack roughly two parts ice to one part food by weight. Under-icing is the single most common packing error on multi-day trips, and it’s the one that compounds, because a cooler that starts short never catches up.
The 2-to-1 Ice Ratio
The numbers behind this are worth knowing precisely. A pre-chilled 65-quart rotomolded cooler loaded at 2:1, opened four times a day, sitting in 85°F shade, holds ice for roughly 6.2 days. That’s the manufacturer’s own ice-retention testing behind the 2:1 ratio, and the conditions in that sentence are doing real work. Change the shade, change the opening frequency, and the number moves fast.
Day Cooler and Reserve Cooler
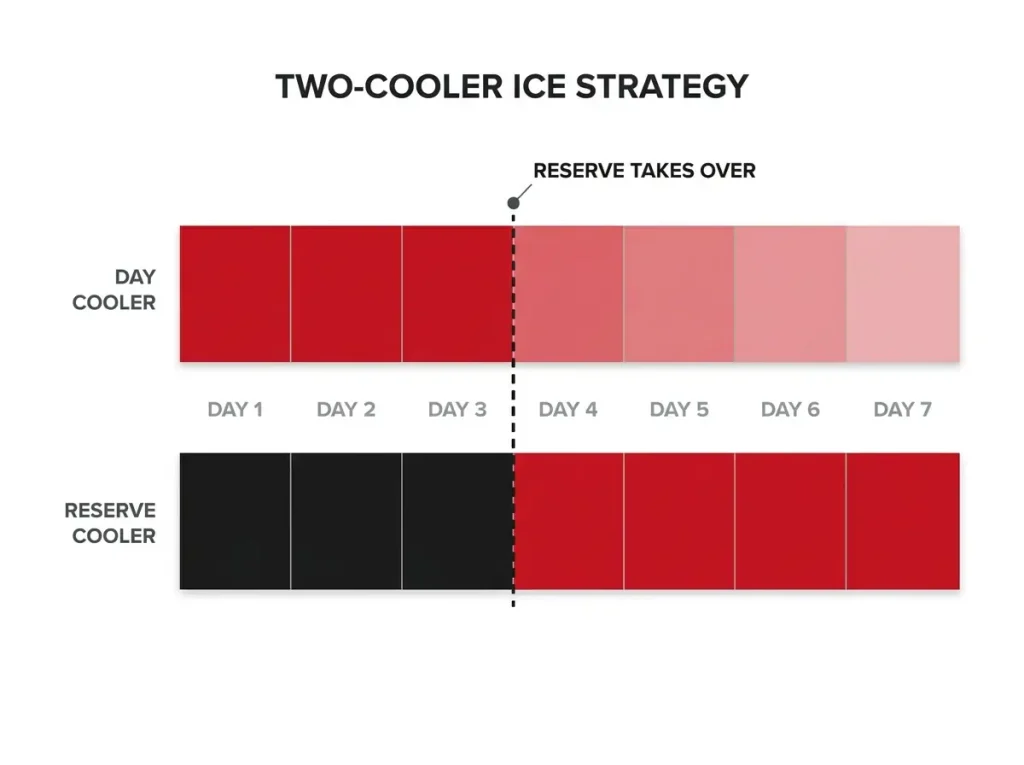
Here’s the strategy experienced crews run instead of one giant box. Split the food across a day cooler that gets opened daily for days one through three, and a reserve cooler that stays sealed and strapped until day four. The sealed one arrives at take-out still holding ice, because nobody breathed on it for 72 hours.
It works because ice loss is driven far more by warm air exchange than by ambient temperature. Every rummage costs you. Sequencing meals so you know what’s in which box, which is where planning meals around cooler temperatures becomes a cold-storage decision rather than a menu one, cuts the digging down to almost nothing.
Pre-chill the empty cooler overnight with a sacrificial bag of ice before you load it. A warm rotomolded cooler spends its first day cooling its own walls instead of your food, and you never get that day back.
Pre-Chilling and Opening Discipline
Pre-chilling and opening discipline are the two levers you control for free. Everything else is construction and weather.
The rest of ice management is packing method. Vacuum-sealed portions take less space than the packaging they came in, they don’t leak into the meltwater, and they thaw slower than loose containers. Frozen solid on day one, they double as ice for the first two days of food storage and become dinner on day three. And weather is worth planning around honestly, because the season and water levels you’re running change every number in this section. A cooler plan built for a 75°F spring canyon behaves very differently in August at 100°F.
The Kitchen Box That Holds Your Whole Cook System
The single change that most improves how camp feels has nothing to do with buying better cookware. It’s consolidating the cook gear into one box, so the crew stops excavating three rafts at dinnertime.
One dedicated kitchen box holds the core system: stove, pot set, utensils, cutting board, coffee gear. Nothing else goes in it. Personal items, repair kits, and food all live elsewhere, and the discipline of keeping it that way is what makes the box worth having.
70 Liters vs. 150 Liters
Sizing is simpler than the catalog suggests. A 70-liter dry box covers most rafters’ kitchen loads on multi-day trips. The 150-liter size is for expedition-length runs or hauling full group gear, and buying it “just in case” costs you frame space you’d rather have for a cooler.
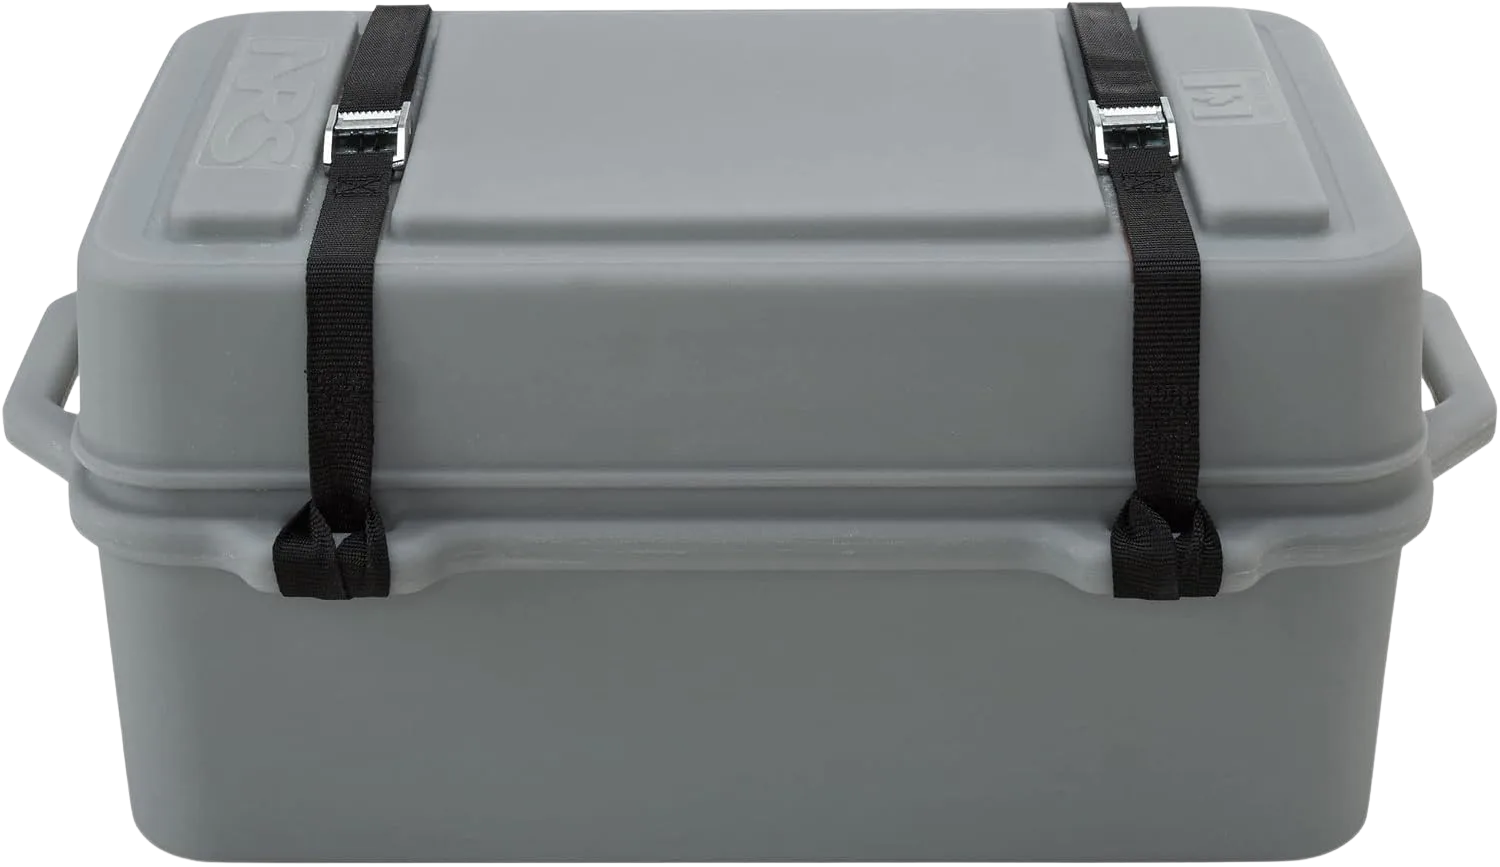
The NRS Boulder Camping Dry Box sits in the sweet spot for a kitchen load: big enough for the whole cook system, small enough that it doesn’t eat the bay your cooler needs. It’s also built to be strapped and stood on, which a household storage bin very much is not.
The honest caveat is that a hard-sided box is a real investment and it’s heavy. If you’re one trip into this and borrowing a boat, a well-packed tote inside a dry bag will get you down the river. You’ll just spend more evenings digging. Once you’ve bought one, how to rig that box so it stays put is the next thing worth learning, and our full comparison of rafting dry boxes covers the size classes.
What Belongs in the Kitchen Box
Stove, propane, pot set, skillet, utensil roll, cutting board, tongs, spatula, can opener, coffee gear, and the stove repair kit. That’s the list. Anything that isn’t used to cook a meal belongs somewhere else.
A dutch oven is the one optional addition worth the weight, since it turns a fire pan into an actual oven for bread and cobbler. A griddle or a flat camp grill plate does the same job for group breakfasts. Both are heavy, so decide before you leave rather than at the ramp.
Put the cook gear in one box and the dishwashing gear on a different raft entirely. Cleanup and cooking overlap at exactly the wrong moment, and two crews reaching into the same box is how spatulas end up in the river.
Keeping Wash Gear Separate
Buckets, soap, bleach, strainer, and towels ride separately from the cook kit. It’s a packing decision rather than a purchase, and it’s the one veterans mention first when asked what they’d change about their first trip.
Stoves That Can Actually Feed the Group
Wind is the variable nobody plans for. A canyon at dinnertime moves air steadily, and a camp stove that boils a pot in six minutes in your backyard takes twenty on an exposed sandbar.
Two burners is the practical floor for group cooking. One handles the main dish, the other handles water for coffee, dishes, or the next course. With a single burner, everything happens in sequence and dinner arrives in shifts, which is hard on whatever cook crew drew the evening.
Two Burners and Why One Isn’t Enough
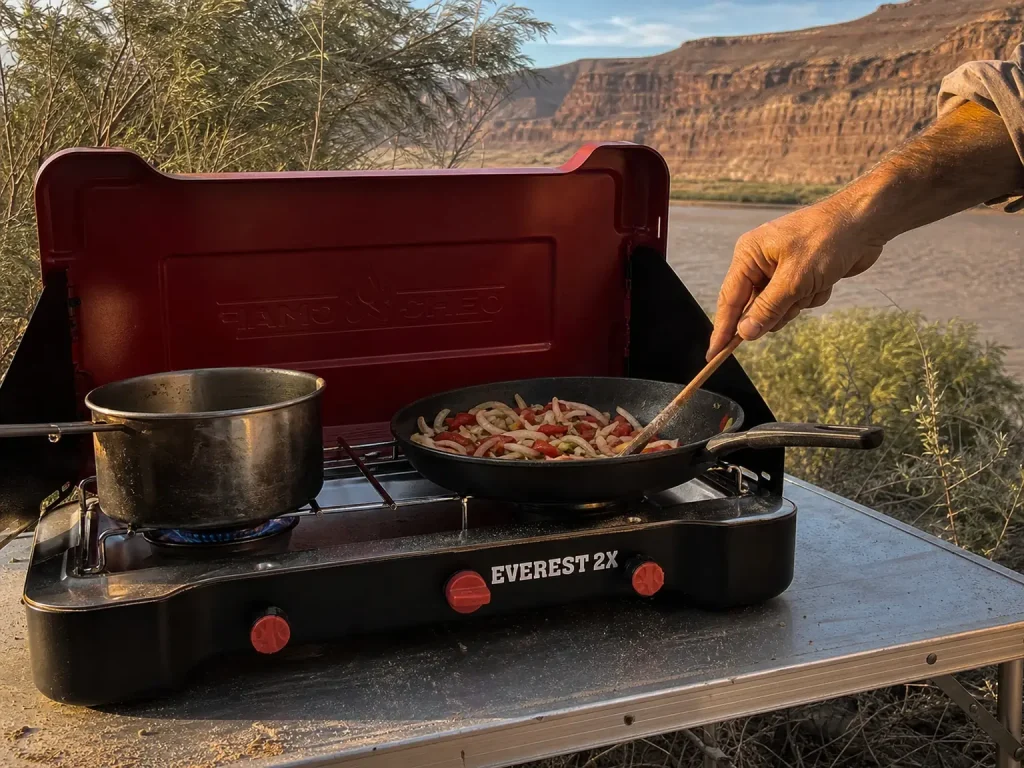
Output matters once you’re cooking for more than two people. Roughly 40,000 BTU across two burners keeps a group meal moving instead of watching a pot refuse to boil. The Camp Chef Everest 2X 2-Burner Camping Stove hits that output with a three-sided windscreen built in, which is the part that matters on an open river camp rather than in a campground with a picnic shelter. Run it off refillable propane bottles rather than the green one-pound canisters and you cut both cost and the pile of empties you’re packing out.
For a solo run or a pair on a short trip, a single-burner backpacking stove is genuinely the correct call rather than a compromise. Buy the two-burner when you’re feeding a crew.
Wind Is the Real Enemy
A windscreen isn’t a bonus feature out here. It’s the difference between a simmer and a wait, and it also stops your fuel from disappearing twice as fast as planned. If your stove doesn’t have one integrated, build a break out of dry boxes and the cooler before you light it.
Never Light It on Sand
The stove goes on the table or another stable platform, never directly on the beach. Sand blows into jets and burners and clogs them, and a sand-fouled stove on day two turns into the trip’s defining problem. This one habit prevents most stove failures on the river. If you’re still assembling the whole load, the full rafting gear checklist by river class covers what rides alongside the kitchen.
A Prep Table Beats Cooking on Sand
Every sandbar camp starts the same way, with somebody chopping onions on a dry box lid at ankle height while sand blows across the cutting board. A table is the least exciting purchase in this article and the one people thank themselves for on night two.
The table becomes the kitchen’s center. It’s prep surface, stove platform, serving line, and the thing that keeps grit out of dinner. Everything else arranges itself around it.
Height Adjustment on Uneven Ground
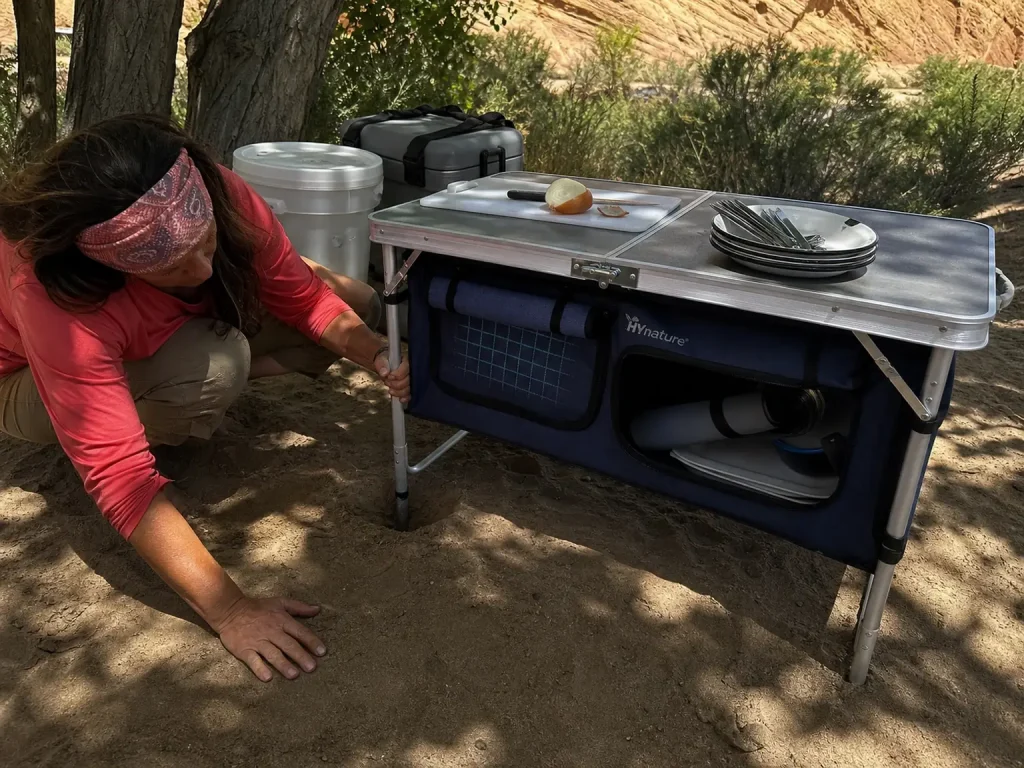
This is a river-specific requirement rather than a nice extra. Sandbars are not flat, and table legs sink at different rates in soft sand, so a fixed-height table ends up tilting toward the water with your cutting board sliding off it. The HYMnature Folding Camping Table adjusts leg height individually and folds flat for the frame, with built-in storage compartments that give utensils a home other than the bottom of a box.
Doubling as a Stove Platform
An aluminum top takes stove heat without complaint, which is exactly why it earns its space twice. Set the stove at one end and keep the prep area at the other, and the whole kitchen works from a single surface.
Strapping It Down
A folding table is flat, light, and buoyant, which describes almost perfectly the kind of object that floats away. It gets cammed to the frame like everything else, and cam straps that hold a flat load down are worth having in surplus for exactly this.
Camp Coffee for a Crew
Morning coffee is the one meal the entire group waits on simultaneously. A system that produces two cups at a time is a system that produces irritable people.
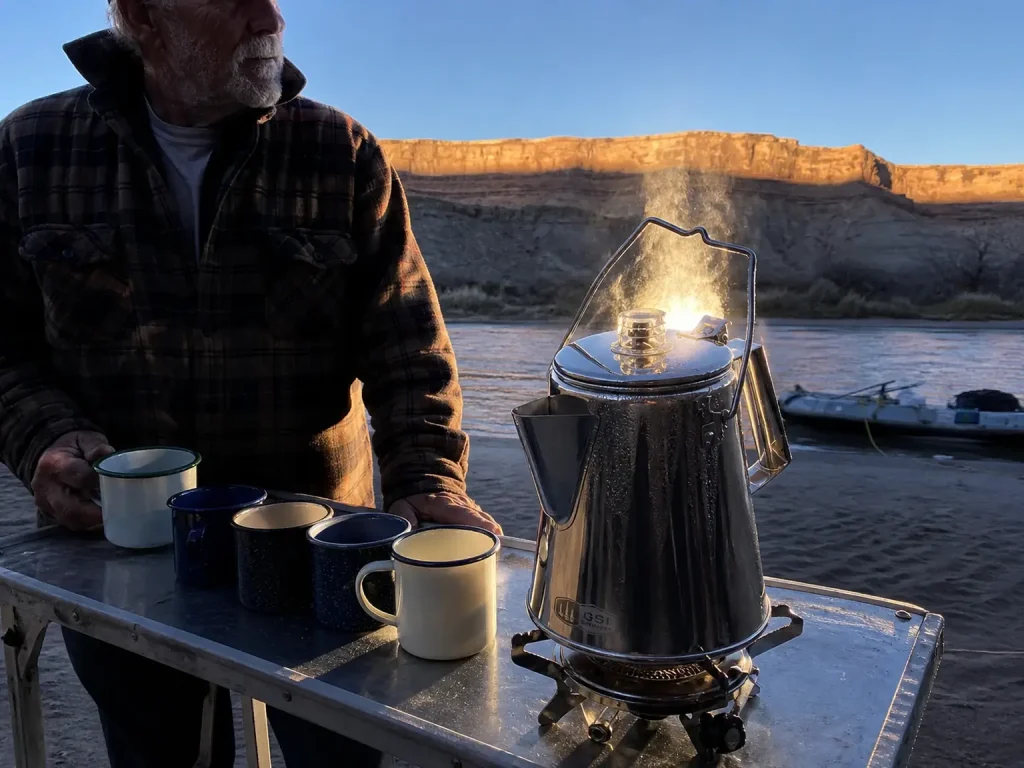
Group-sized is the whole requirement. A coffee percolator in the 36-cup range serves a full crew in one go, and stainless construction survives being packed in a hard box for a decade. The GSI Outdoors 36-Cup Percolator is named by both of the genuinely river-focused sources covering this topic, which is roughly as close to consensus as camp coffee gets.
Sizing the Pot to the Crew
Match the pot to the boat count. Eight people want one pot going, not three presses passing back and forth. For a smaller crew, an insulated coffee press like the BruTrek BaseCamp Coffee Press makes more sense than a percolator built for a dozen, and the french press style brew is what most people prefer anyway when the group is small enough to make it practical.
No Filters to Pack Out
A percolator needs no paper filters, which means one fewer consumable to pack in and one fewer wet thing to pack out. The grounds themselves are trash and go out with everything else, never into the current and never buried on the beach.
The Three-Bucket Dishwashing System
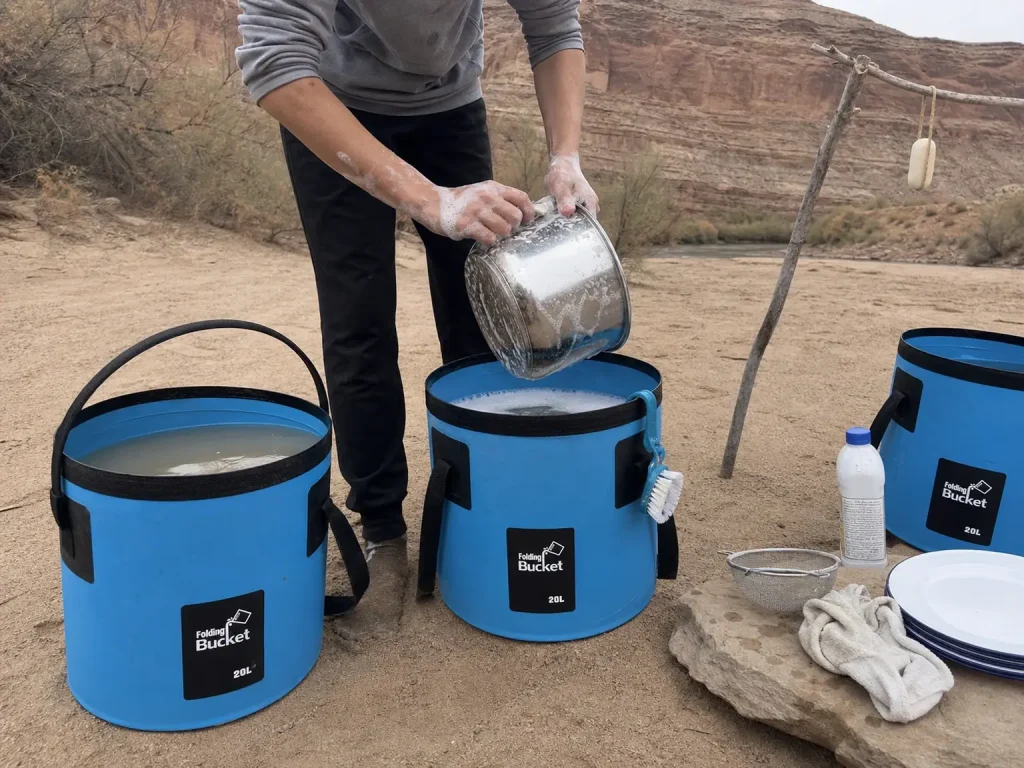
This is the system that quietly decides whether day three is a good day. It’s also the one crews cut corners on, because three buckets feel like two more than necessary.
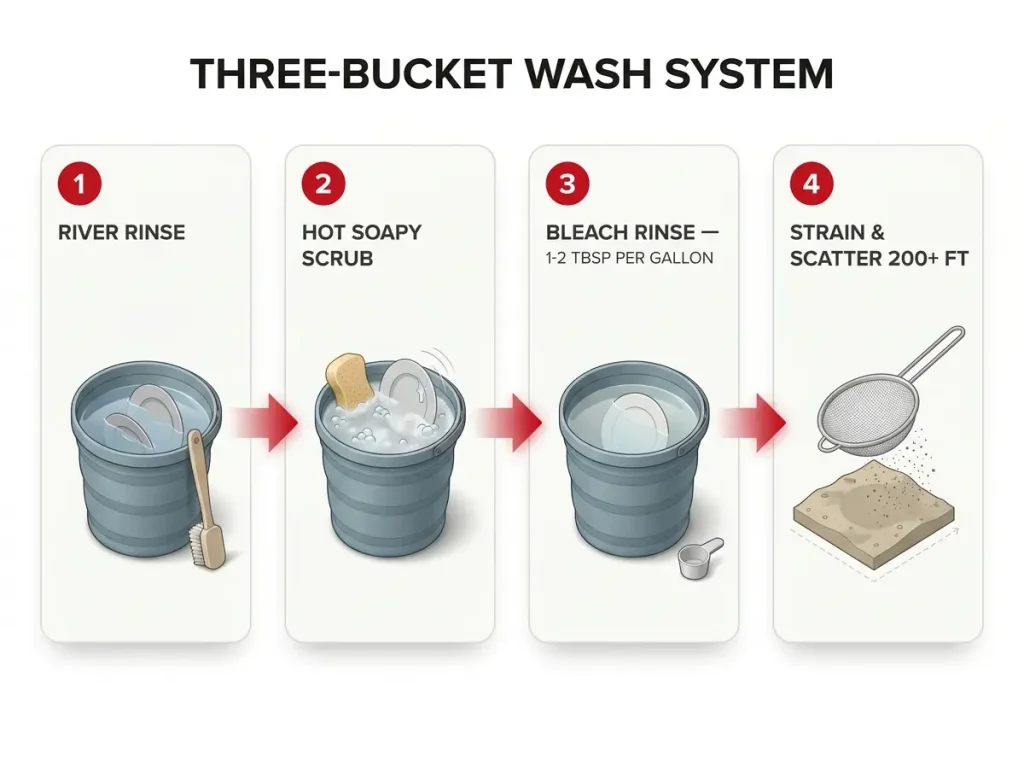
They aren’t. The standard field method turns three buckets into a dishwashing station that runs in a fixed sequence, and each wash bin does a job the others can’t.
The Three Buckets in Order
Bucket one is a cold water rinse straight from the river that knocks off the heavy food residue. Bucket two is hot water with biodegradable soap, where the actual scrubbing happens. Bucket three is a bleach rinse at 1 to 2 tablespoons of bleach per gallon, and that’s the sanitizing step.
Collapsible buckets are the river-specific answer here, since they pack flat and a rigid galvanized tub does not. A 5 Gallon Collapsible Bucket folds down to almost nothing in the box and sets up as one leg of the wash line in seconds. Carrying three of them costs less frame space than one rigid bucket.
Why the Bleach Bucket Is Not Optional
Skipping the third bucket is how a stomach bug moves through a group and takes out half the crew by day three. It’s one extra bucket and two tablespoons of bleach. On a river trip, where everyone eats from the same pot and shares the same wash line, a single missed sanitizing step spreads to the whole group rather than one person.
Hang a hand-wash station near the kitchen as part of the same system. It runs off the same supply, so how you’re treating and storing water on the trip feeds directly into whether your wash line actually works.
Most river crews handle water treatment with a gravity filter hung from a tripod or a branch, because gravity-fed filtration produces volume while everybody does something else. A pump-style water filter works for two people and becomes a chore at eight. Whatever you run, keep filtered drinking supply in a dedicated water container that never touches the wash line, and if the group wants a rinse at the end of the day, a solar camp shower bag heats on the frame all afternoon for free.
Set the wash line up before dinner, not after. Nobody wants to haul and heat water at 9pm in the dark, and that’s precisely when the bleach bucket quietly stops happening.
Straining and Scattering 200 Feet Out
Dishwater gets strained through fine mesh and scattered at least 200 feet from the water. Food scraps never go in the current, and the strainer catch goes in the trash. This is stricter than the backcountry gray-water rule most people learned hiking, and on a permitted river it’s enforced.
Camp Lighting So Nobody Cooks by Headlamp
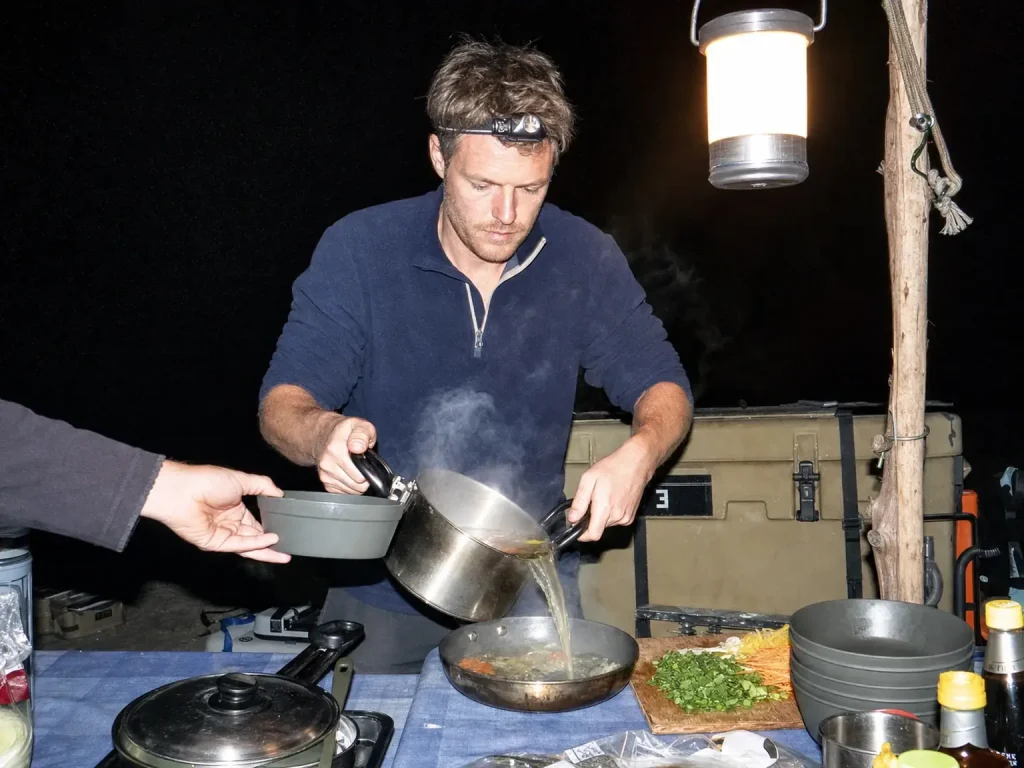
Picture handling a lit stove and a pot of boiling water while the only light in camp is strapped to your forehead and aimed wherever you happen to be looking. Experienced river cooks name this as a genuine hazard, not a minor annoyance, and it’s absent from every gear list written on this topic.
Why Headlamps Fail at the Stove
A headlamp lights where you look, not where your hands are. Look down at the pot and you blind the person across from you. Look at them and your hands go dark. During the dinner rush, with three people working one table, that’s a system built to spill boiling water.
One Hanging Light Changes the Kitchen
A single kitchen lantern hung above the table frees every set of hands in camp at once. It doesn’t need to be expensive. A basic solar lantern strung from a driftwood pole or a tamarisk branch clears the bar completely, and it speeds up cleanup, which is the part of the evening everyone wants shortened.
Charge it on the frame during the day alongside a solar power bank, and the same panel keeps headlamps and a satellite messenger topped off for the week. Keep the headlamp on your head anyway. It’s the walk-to-the-groover light, not the cooking light.
The Camp Gear That Rides Alongside the Kitchen
The kitchen is the part of camp that has requirements attached to it. The rest of the load is comfort, and comfort on a sandbar comes down to shade, a dry bed, and somewhere to sit that isn’t a cooler lid.
Sleeping System for a Sandbar
Sand is a forgiving surface, which changes the math from backpacking. A thicker sleeping pad is worth the bulk here because weight barely matters on a raft, and a sleeping bag rated warmer than the forecast covers the desert-canyon swing between a scorching afternoon and a genuinely cold pre-dawn. Many crews skip the tent entirely in summer and sleep on a ground mat under the stars, carrying the tent and its footprint only as rain insurance.
A tarp earns its space twice. It’s shade over the kitchen at midday, when a sandbar with no trees turns brutal, and it’s a roof if weather moves in during dinner. Rig it before you need it.
Seating, Shade, and Camp Comfort
One folding camp chair per person is the item nobody regrets. Standing around a sandbar for four hours after dinner gets old, and the chairs strap flat against the frame. Pack quick-dry clothing rather than cotton, since you’re wet most of the day and layering handles the temperature swing better than one heavy piece. Real rain gear stays accessible on the boat, not buried under the kitchen box.
Two small items punch above their weight: a multi-tool in the kitchen box for the repairs nobody planned, and a folding saw for driftwood if fires are permitted. Bug repellent matters more than people expect on slow-water stretches, and a bug tent over the kitchen table saves the evening in mosquito season.
Organization That Survives Seven Days
Loose gear is the thing that turns a good camp into a slow one. A barrel organizer or a set of labeled dry storage bags keeps the non-kitchen load sorted, so nobody unpacks four containers looking for sunscreen. Dedicated trash bag capacity gets planned the same way, since everything you brought in leaves with you and a week of packaging takes real volume. A sand-free mat at the kitchen entrance is a small luxury that keeps grit out of the cook zone.
Backups and Spares That Save Dinner
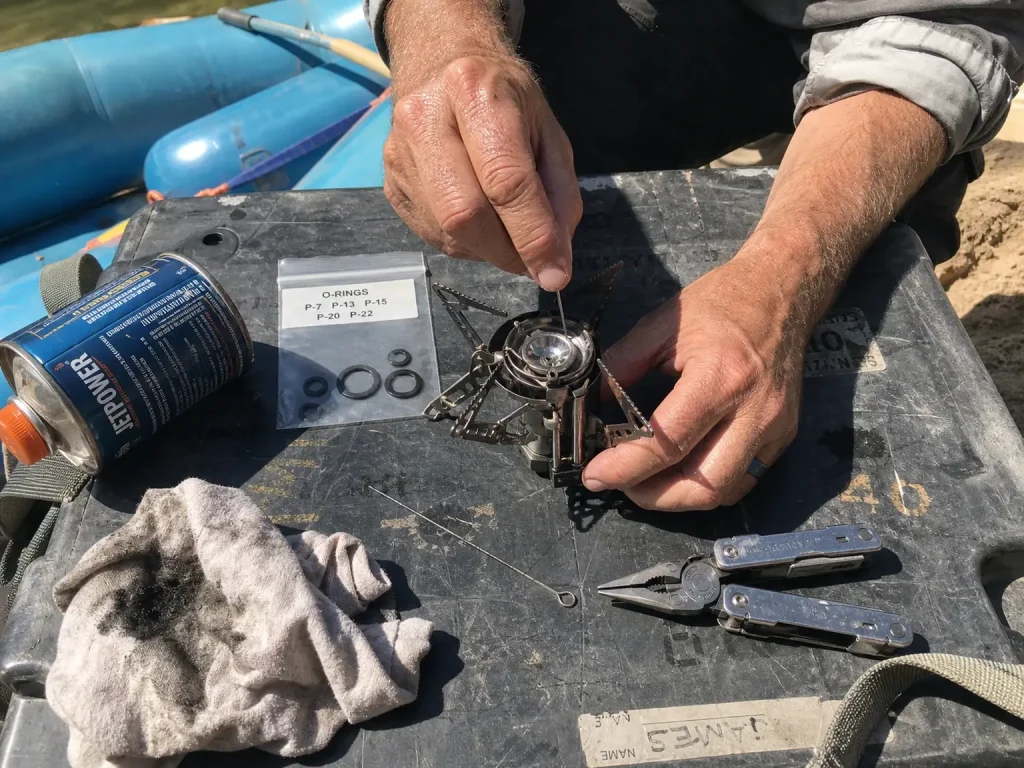
One stove is a single point of failure for every hot meal remaining on your trip. That framing sounds dramatic until you’ve watched a jet clog on day two of seven.
Redundancy is the same reasoning you’d apply to first aid, where nobody argues about carrying a second option, and it’s worth thinking through with the same planning logic you’d apply to first aid rather than treating it as gear paranoia.
The Backup Stove Argument
Crews commonly pack a full second stove, usually a small single-burner, purely as insurance. It’s cheap, it’s light, and it turns a trip-ruining failure into a story about the night dinner was late. The failure modes are predictable: clogged jets from blown sand, dead o-rings, and fuel someone was sure they’d packed.
Spare O-Rings and a Jet Tool
A strip of spare o-rings and a wire jet-cleaning tool weigh nothing and live permanently in the kitchen box, not in the general repair kit on somebody else’s boat. When a stove sputters at 7pm, you want the fix in the same container as the problem.
Buy Used Cookware on Purpose
Sturdy thrift-store pots and pans outlast specialty camp cookware on the river, and they cost a fraction. Skip anything with removable handles or clever folding mechanisms. Fewer moving parts, fewer failures, and no grief when a pot comes back dented. The river first aid kit checklist covers the other container that rides alongside the kitchen box and gets opened just as rarely, right up until it matters.
Putting It Together
Three things to carry away from all of this. The river decides part of your kitchen list before you have any say in it, so the fire pan and the waste system get confirmed against your specific permit first, not last. Cold storage is where planning beats spending, since the 2:1 ratio and a sealed reserve cooler outperform an expensive box opened twenty times a day. And consolidation beats accumulation, because one well-packed kitchen box gets camp fed faster than three half-sorted ones.
If you’re outfitting for a first multi-day trip, the honest budget path is a basic fire pan plus WAG bags for permit compliance, one good cooler, a two-burner stove, and a table. That covers you. Save the hard-sided groover box for once you’re running rivers often enough to justify it.
Get it right and you earn back the best twenty minutes of the day: rafts tied off, boxes open, stove lit, and a working kitchen standing on a sandbar that was empty when you arrived.
Frequently Asked Questions
01Do I need a fire pan if I am not planning to have a campfire?
Yes, if your permit lists one. The requirement is about capability and compliance at the put-in, not about your plans. Rangers check whether the pan is on the boat and whether it meets the published size and lip spec, not whether you intend to light it.
02How much ice do I need for a six-day river trip?
Pack roughly two parts ice to one part food by weight. A pre-chilled 65-quart rotomolded cooler at that ratio, opened four times daily in 85°F shade, holds ice about 6.2 days. Splitting into a day cooler and a sealed reserve cooler stretches it further.
03Can I use WAG bags instead of a groover?
On many permits, yes, and it is the honest first-trip path. WAG bags satisfy the solid waste pack-out requirement at a fraction of a hard-sided groover system. Confirm with your specific river’s managing agency, since capacity expectations vary by run and group size.
04How big should my kitchen dry box be?
Seventy liters covers most rafters’ kitchen loads on weekend to week-long trips. Step up to 150 liters only for expedition-length runs or when the box carries full group gear. Oversizing costs frame space your cooler needs more.
05What is the cheapest setup that still meets permit requirements?
A basic fire pan plus WAG bags handles compliance on many rivers. Add one cooler, a two-burner stove, a folding table, and three collapsible buckets and you have a working camp. Defer the hard-sided groover box until you are running trips regularly.